
A university contacted me earlier this week to see if we had anything their faculty might be able to play with in terms of portfolio solutions. Tim Owens created the amazing State University as a demo site for anyone interested experiencing what a Domain of One’s Own package would be like. I took the opportunity to create a couple of quick tutorials and borrowed a couple more to showcase how one might imagine web hosting in terms of a portfolio—Documentation December in action! Below are the first wave of resources I created on the Reclaim Hosting site here. I plan on regularly updating this page with more focused resources given this quick guide is focused specifically on customizing WordPress after taking you through the minute and a half it requires to get an account and install WordPress. Damn we are good!
______________________
 Keep in mind that Reclaim Hosting is first and foremost a web hosting platform that allows students, staff, and faculty to build their digital presence online. In this regard it is by no means limited to portfolios, you can use it to create anything from course hubs to research sites to personal blogs and much more. At the same time, it provides several applications commonly used for portfolios in higher education, such as WordPress, Omeka, and Mahara to name just a few. What you get in a portfolio from Reclaim Hosting versus specific portfolio tools like Digication, Chalk & Wire, etc., is choice and possibility. You are not limited to a specific, proprietary system; you can customize your portfolio with thousands of freely available themes and plugins; and, finally, you have access to software that is popular, portable, and affordable.
In order to get a sense of how Reclaim Hosting could provide a portfolio solution for your university, we have created State University. StateU provides the opportunity to experience how getting access to a domain and web hosting would work at your school.
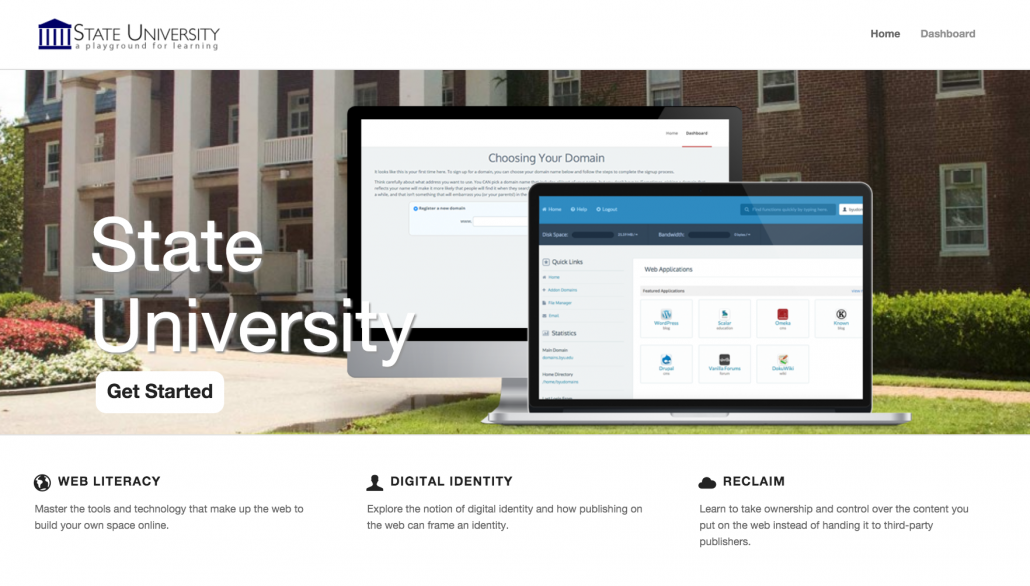
Signing-Up at StateU
The following video will demonstrate how easy it is to get up and running with a domain and web hosting on StateU.
Once you have an account on StateU, you’ll see your control panel dashboard, which will look like this:

There are several features in the control panel, and if you want to get a sense of how all of the different bits work you can see a comprehensive overview here.
Installing WordPress
For the purposes of this quick resource guide, we are going to highlight WordPress given it powers 25% of all sites on the web Let’s say that again, but this time with feeling, “25% OF ALL WEBSITES on the INTERNET!” The 50 second video below provides a quick walk-through of how to install WordPress, and there is also documentation for installing WordPress if the video is not cutting it.
Adding WordPress Themes
A benefit of installing and managing your own WordPress site as a portfolio is the freedom you have to install and customize any theme you’d like. And adding them couldn’t be easier. From your WordPress dashboard click Appearance > Themes to view the themes you currently have installed. You can have several different themes installed at the same time and switch between them. Clicking Add New will allow you to search and browse the thousands of themes available in the WordPress directory. When you find one that you like go ahead and click Install to add it to your list. You can choose to activate that theme immediately, or you can go back and browse for more themes.
Perhaps you secured a theme from elsewhere on the web and you want to add it to your site. To upload a theme you’ll still click Add New but then you’ll click Upload Theme. Select the zip file containing the theme and it will begin uploading. Once it’s done you can activate the theme and get started customizing it.
Installing and Activating WordPress Plugins
When building your WordPress-based portfolio you’re not limited to the stock set of tools that come with the software, there’s an entire ecosystem of plugins for you to take advantage of. What are plugins? Plugins for WordPress allow you to add functionality to your site that doesn’t normally come in a standard install. Wanna have all the new posts get sent to Facebook or Twitter? There’s a plugin for that. Wanna build a contact form? Well, there’s a plugin for that.
Adding plugins is a snap. From your WordPress Dashboard go to the Plugins page where it lists all of the plugins you currently have installed as well as which ones are turned on. Clicking Add New will connect you with the WordPress Plugin Directory where you can search and browse from over 35,000 plugins to install and customize. Find the one you like and it’s as simple as clicking Install andActivate and you’re ready to start setting it up. Installing plugins from your computer is also easy, just go to Add New and click Upload Plugin to upload the plugin from your computer and install it.
Creating and Organizing Content
Posts vs. Pages
Out of the box, WordPress provides two primary content types for you two work with: Posts andPages. If you read blogs or have ever written for a blog before, the concept of a post is probably a bit familiar. Posts often are content that appear on your blog in some kind of scheduled way. They usually are presented on your site in reverse-chronological order. Posts might be what you use to share your regular thoughts, reflections, or ideas about a topic. Posts make up a kind of “river” of content that you’re producing as part of your work flow. For a portfolio posts may be work-in-progress, reflections, focused research, etc. And they can be categorized to represent various threads of your work.
Pages usually correspond to more traditional concept of what makes up a Web site. Pages are presented outside of the flow of content that are posts. They are more likely to stand alone and be organized according to a traditional hierarchy using the Custom Menus feature in WordPress. Pages might be content less frequently updated. So, for your portfolio that could be the About page or a resume page.
Categories and tags (which are used in WordPress to help you organize your content) are ONLY available on posts. Page organization is done through customizing your site menu.
WordPress also creates Category Pages and Tag Pages that display all the posts in a category or tag. You can use these to provide topic pages on your site that automatically filter your posts based on a category or tag.
Using Custom Menus
Out of the box, most WordPress themes will create default navigation for your site based upon the content you create. Posts, for example, will be available through some kind of blog presentation — displayed in reverse, chronological order. In addition, you may be able to add Widgets to your site’s sidebar that allow readers to navigate your posts based upon the category they were in or when they were published.
Pages, by default, are usually used to build a menu somewhere in your theme. Each top-level page becomes another item in that menu. When you create new pages, you can choose to “nest” them underneath other pages by choosing a page Parent. This can be cumbersome, however, and, eventually, you may wish to organize your site’s content by creating a Custom Menu.
In addition to allowing you to more flexibly organize the pages on your site, Custom Menus now allow you to add posts, categories/tags, and custom links to your menu. With this feature, you can really build an entirely customized navigation tool for your site, and you can be sure that all your content is organized and available to your readers exactly how you want.
There are two primary components to building a Custom Menu:
- You must designated and organize the links you want to be in your menu.
- You must “place” the menu somewhere in your theme. Most themes will have at least one Custom Menu built into their design. Some may have several areas designated for Custom Menus. Older themes may not use Custom Menus at all; for these you will have to rely on the default menus created by the them based on your site’s content.
Building Your Custom Menu
Start at your site’s Dashboard and choose Appearance > Menus.

In the Custom Menus interface that appears, type a name for your menu. This can be anything you want. It doesn’t get displayed anywhere; it’s used by WordPress to identify and place your menu. Once you’ve typed the name, click Create Menu.

You’ll now be presented with a screen that includes a section titled Menu Settings. This is where you’ll indicate where you want your menu to appear in your theme. The number of locations available depends entirely upon the theme you choose. In the example shown below, there are two areas available; we’ve chosen to place the menu in the Top primary menu area which we know corresponds to the header menu. You may need to experiment a bit in order to find out where your menu will appear in your theme. You can always change this location later by coming back here and clicking theManage Locations tab.

Now that you’ve set up your menu and assigned it to a location, you can begin to add links to it. On the left-hand side of the screen, you’ll see what content is available to add. On the right-hand side of the screen, in the Menu Structure area, you can arrange and organize your links.
By default, you may not see everything that is available to you to add to your menu. For example, posts can be added to menus, but they’re not usually displayed by default. To make more content available, click the Screen Options tab at the top of your WordPress screen, and then click off the check boxes that correspond to additional content.

To add content to your menu, simply check it off on the left, and click the Add to Menu button.

Your new content will appear on the right, and you can drag items in the order you want them to appear. Drag items to the right to indent them under other items. This will usually make them appear as drop-down items in your menu.

You can add custom links to your menu by clicking the Links section on the left. In the short form that appears, enter your link’s URL, and a text for the link. Click Add to Menu to move it to the left.

Note that you can change the link text of any item you add to your menu. This can be helpful if you have a page with a long title, and you’d like the link to not take up so much space. You can abbreviate the title in the Navigation Label section, and that shorter text will become the actual menu link.

When you are done, make sure you click Save Menu.
Other Notes about Menus
- When you add a Category or Tag to a menu, the link will take your readers to an archive of all the posts on your site that use that category or tag. This can be a very useful feature for organizing your content when you’re using posts to share your work.
- In addition to assigning Custom Menus to theme areas, there is a default Custom Menu widget that you can put in the sidebar of your site. This is useful for creating smaller, customized navigation for your site.
- If you forget to click Save Menu after making changes to your menu location or content, you will lose your work!
Uploading and Embedding Media in WordPress
Uploading
You can upload files into your site’s Media Gallery and then link to them in your posts/pages. This works very well for images, and when you take this approach for images you have the added benefit of being able to make use of WordPress’ built-in editing tools. Also, when you upload images to WordPress, it automatically creates different sizes that you can use, as needed. This approach works less well for video. In order to have your media files actually show up in a “player” (with controls for stopping, pausing, etc.) you’ll need to install a plugin. Otherwise, you’ll only be able to include links to the files. How people view them will depend a bit on the setup on their own computer and in their own browser. They may, for example, have to download the media file and then open it in another program on their computer.
Embedding
You can embed media from other sites easily in WordPress, the above images and videos are perfect examples of this. Embedding an image just means providing a URL to it’s location elsewhere on the Web. Instead of uploading it to the server, WordPress grabs that image from the external source and displays it on your post/page. However, with this approach you lose your editing capabilities as well as the resizing feature.
Embedding audio and video from external sources becomes easier with every version of WordPress it seems. These days, you can embed video and audio from many external services (YouTube, Vimeo, SoundCloud, complete list here) by simply placing the full URL of the audio/video location on it’s own line in your post/page. There is a complete list of supported external services, and you can learn more about embedding from external sources at the WordPress site.
The End is the Beginning
This brief resource guide is focused on just one of many applications you have access to at Reclaim Hosting—albeit by far the most popular. One of the things you will quickly realize about choosing na industry-standard web hosting solution for portfolios on your campus is that it is not a one-size-fits solution. Rather, it provides departments, faculty, and students alike a tool that they can customize to meet their particular needs. What’s more, it foregrounds the act of engaging and thinking critically about how we architect and build spaces for and on the web. In that regard, it is very much a platform for both engagement and reflection that is student-centered and integrated more generally with the process of creating and reflecting that should be at the heart of an education-based portfolio.

NICE. I’ll have to point people to here, when they ask about WordPress ePortfolio stuff. Say, for instance, on a campus ePortfolio platform running on top of WordPress…
It’s beautiful when you don;’t even have to say the Word….Press 🙂
And here! Eportfolios@Macaulay.
The really great thing here is that for campuses where there isn’t a cooperative or capable IT department, Reclaim can make things not just possible, but secure and successful!
Joe,
You are exactly right, and we have found university IT departments to often be far more receptive to working with us. They are understaffed like the rest of higher ed support, and they are just as excited to get out from supporting stuff like this as faculty and student are to finally have the option. Part of this has to do that commodity hosting and many of these apps are not nearly as threatening as they seemed just 5 or 6 years ago, I need this stuff is kinda standard now, and I think everyone is beginning to expect it.