
After some frustration with the motion detection bit of the Creepshow diorama, I took solace in getting a $10 Zero Pi W (version 1.1) up and running with Raspberry Pi Video Looper. Essentially this project turns the Pi into a machine that loops images or video—playing a single file (or a playlist) over and over gain. This can be useful for digital signage, art projects, trade shows, etc. We’ve used it previously at OER19 to show off our art and videos, as well as Domains19 to get Ryan Seslow’s art streaming on a tower of CRT televisions.*
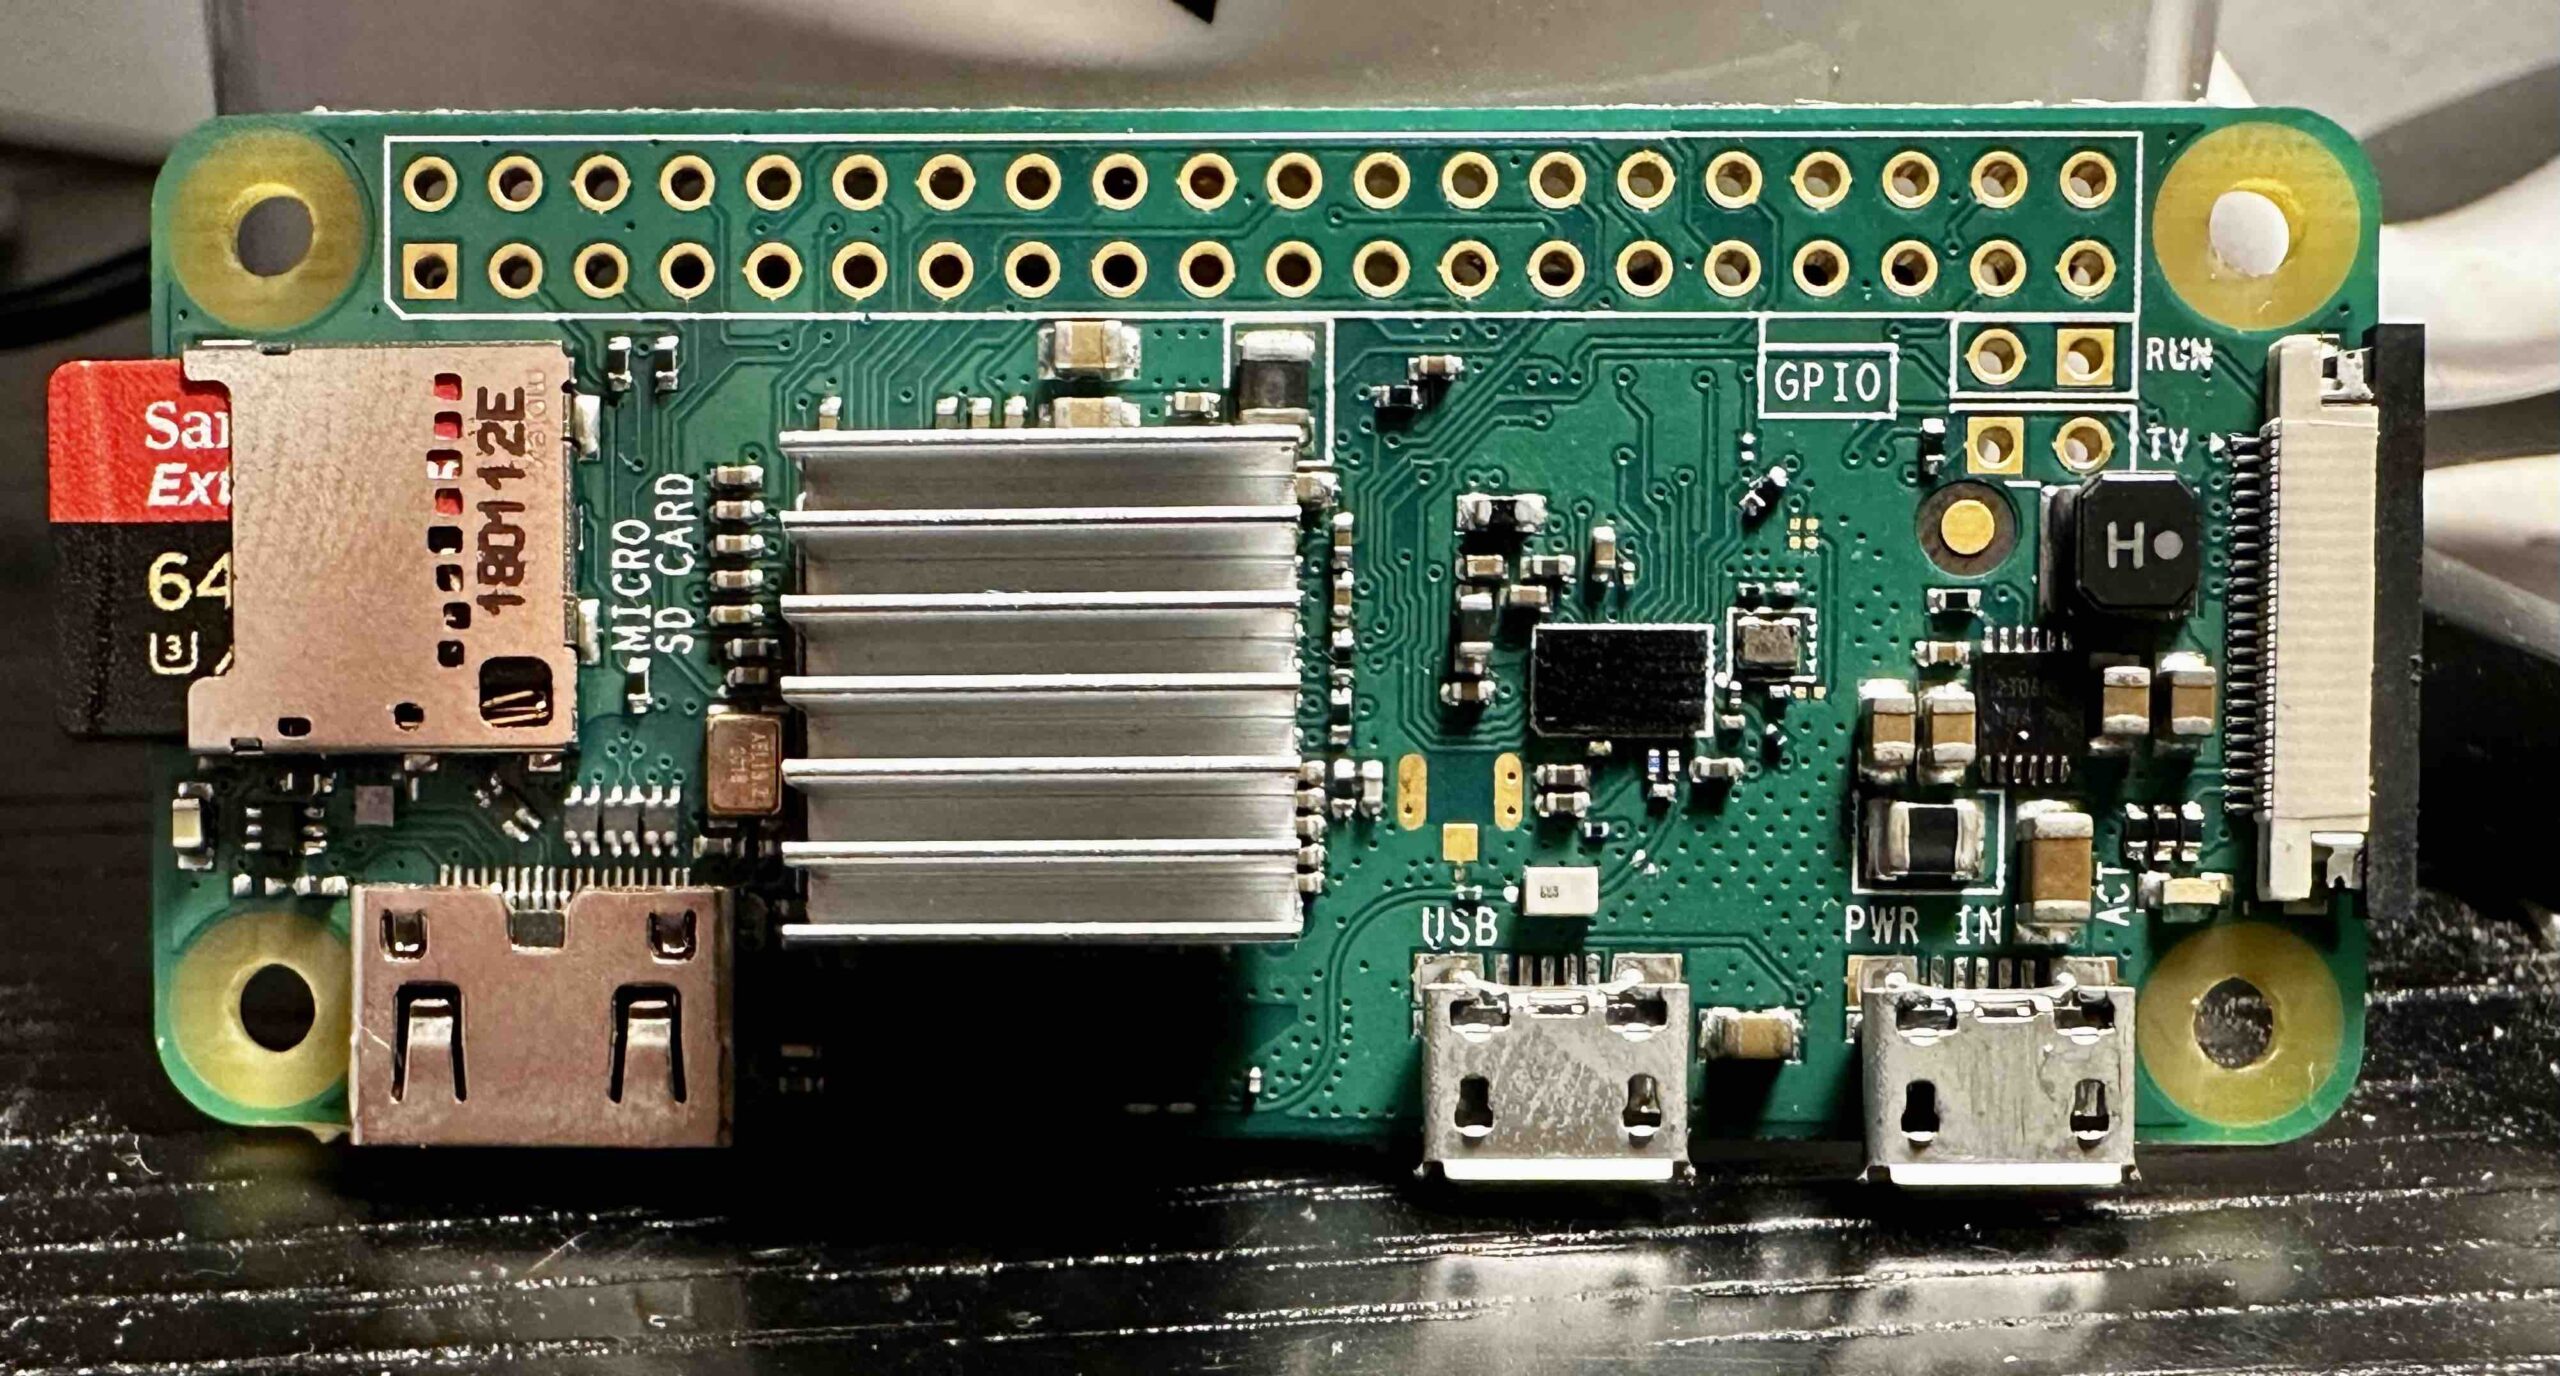
A look at the $10 Zero Pi W model, with two micro USB ports and a HDMI mini port
This time around the project is being used to loop a video of edited clips of Becky Vickers drowning from the “Something to Tide You Over” episode of Creepshow. The Zero Pi will be feeding this video into a 50 year old black and white TV (with some cable/signal conversion magic). I like the Zero Pi for this because it’s cheap, non-intrusive, and more energy efficient than a laptop—which is important given it will be running almost non-stop. †

Underside of the Zero Pi W model, this is a 2016 version 1.1
In terms of getting this setup, this guide from Suzanne Borders reinforced that the Video Looper can be run on a Zero Pi. And to be honest, her post might be all you need to get things up and running—so check it out. She keeps things simple, and I believe the guide is geared towards folks getting the Raspberry Pi OS setup using Windows. Given I’m using a Mac I changed the OS customization so that I could easily access the Zero Pi via ssh. So, let’s get going, and I will quote the first four steps of Suzanne Borders post below—no reason to re-invent the wheel:
Preparing the SD Card
- Download and install the Raspberry Pi Imager
- Download the pre-built custom video looper OS image from videolooper.de which is still being actively maintained
- Run the Raspberry Pi Imager, click “Choose OS”, select “Use custom”, and pick the video_looper_v2.8.zip or whatever version you downloaded. You do not need to unzip this file.
- Click “Choose Storage” and select the MicroSD card you are going to use
At the point where you finish selecting all the options in the Raspberry Pi Imager it should looks like this (though your Raspberry Pi Device may be different), but the custom OS should be VIDEO_LOOPER_2.8.ZIP (latest version as of the writing of this) and the storage will be whatever Micro SD card is being used:
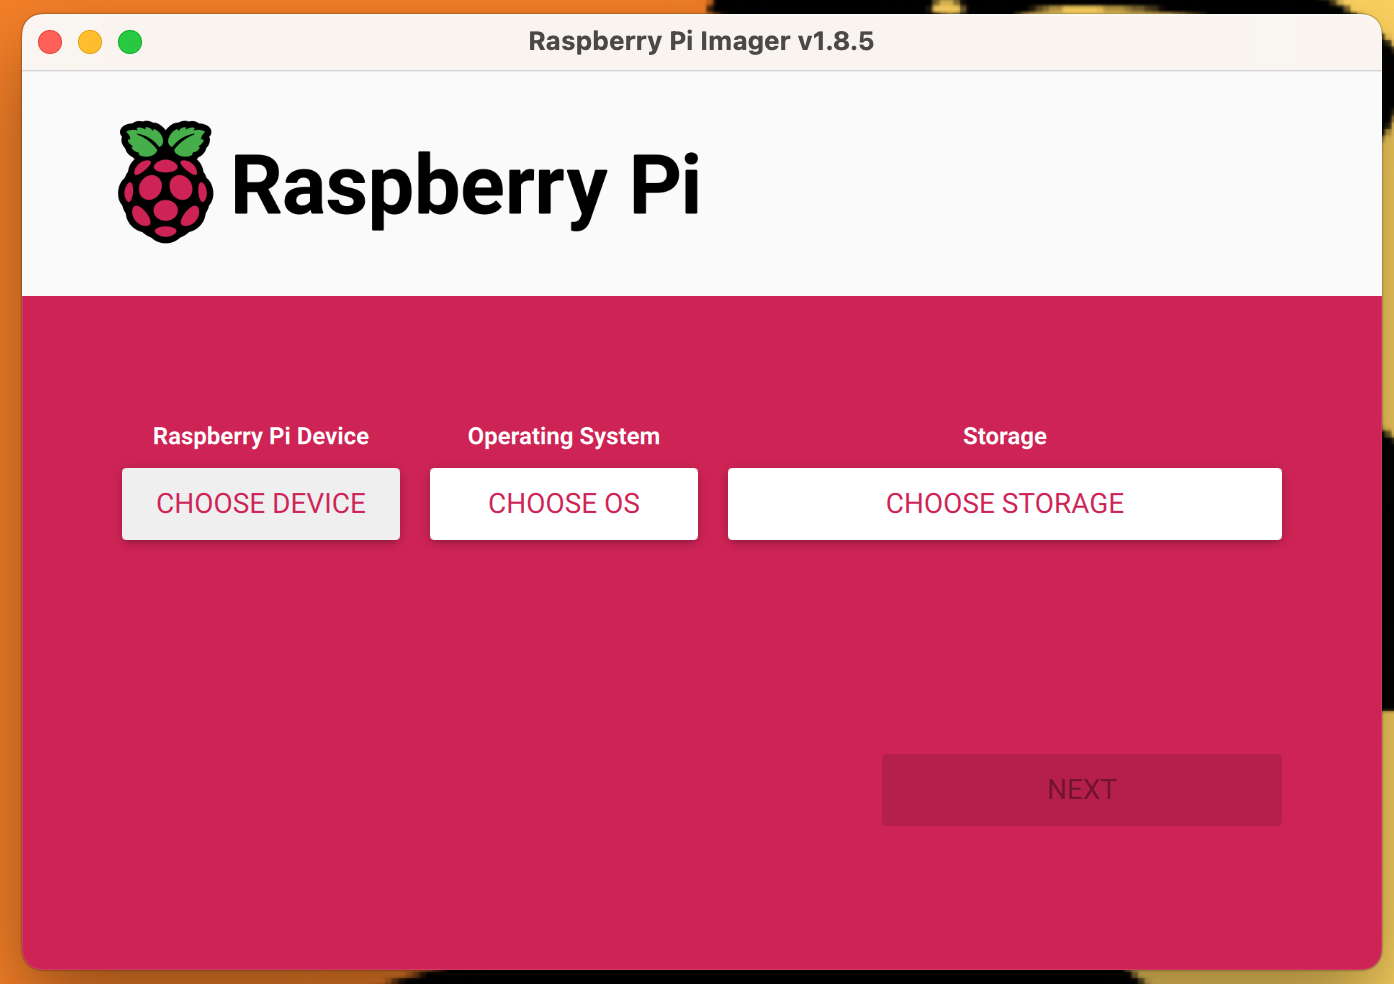
Clean Raspberry Pi OS Imager
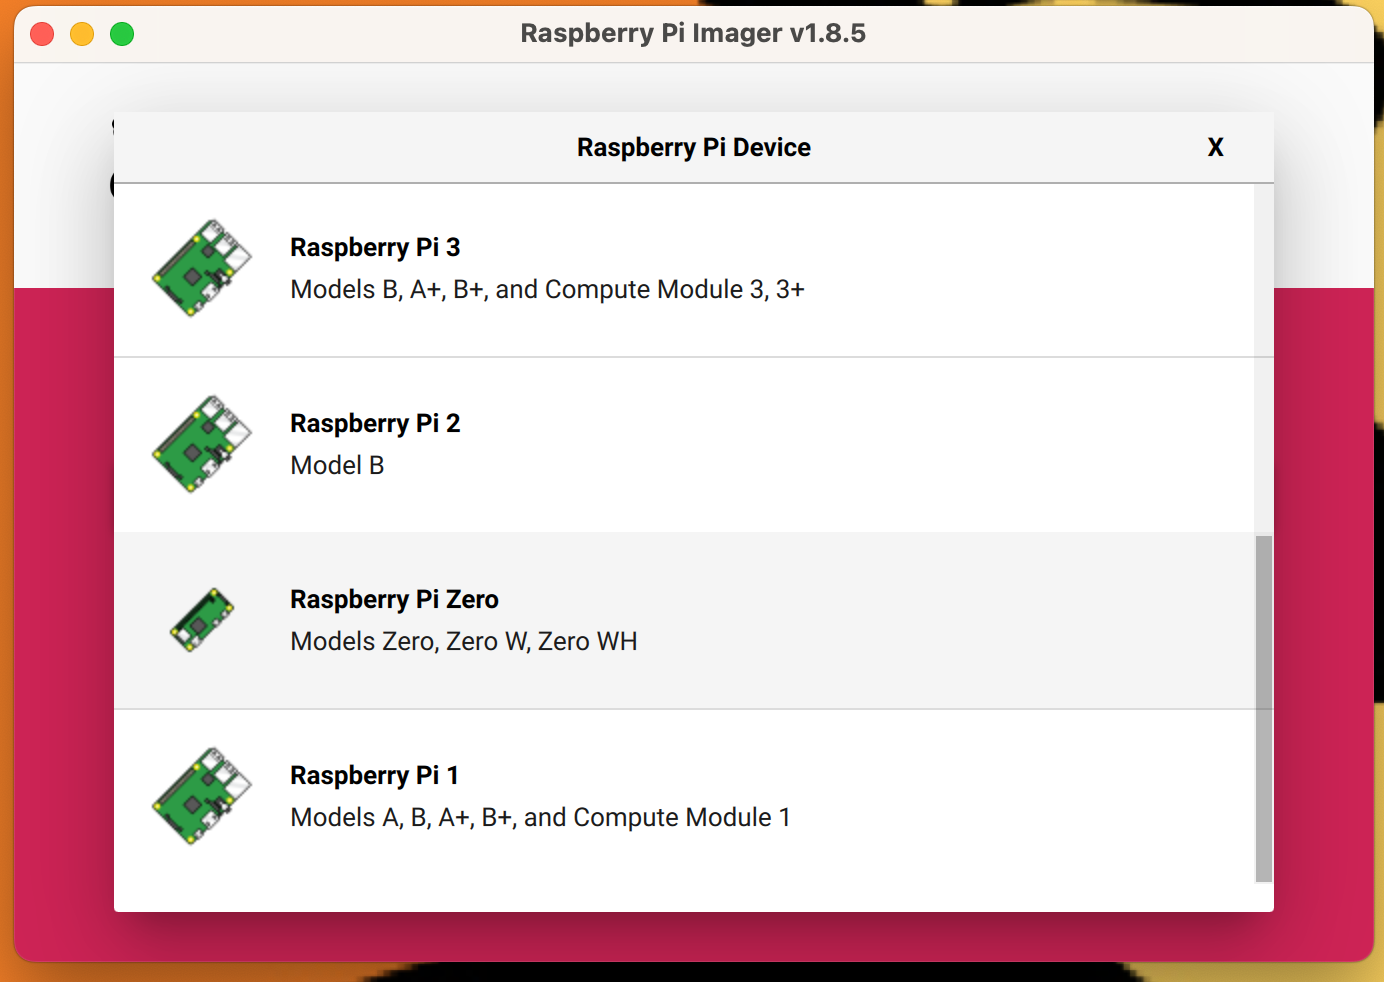
Click on the Raspberry Pi Device being used, mine was the Pi Zero
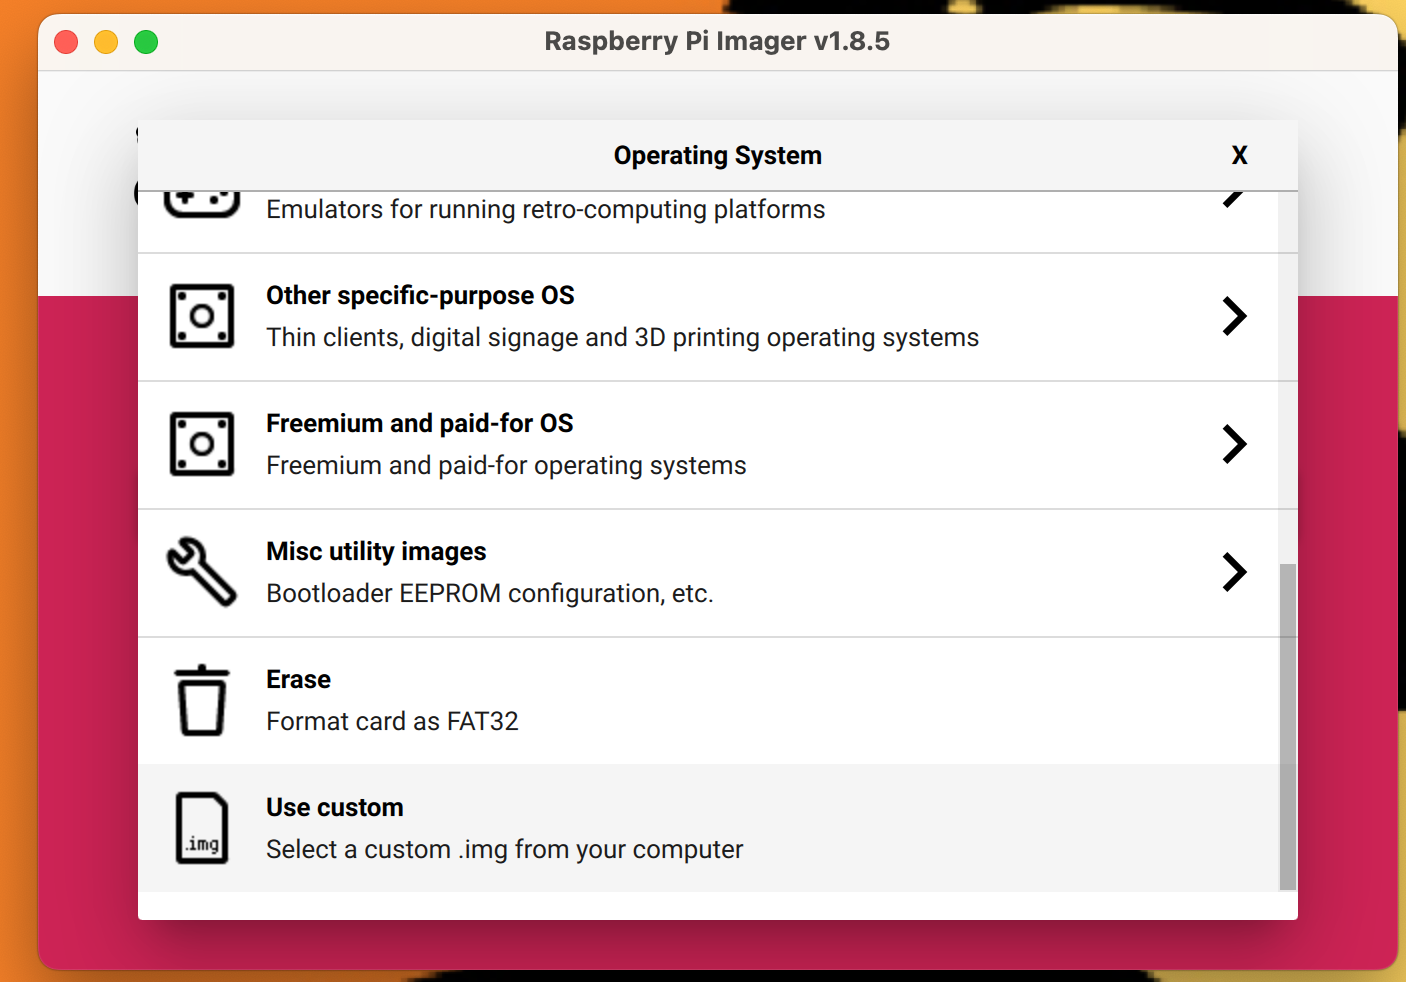
For operating system click on “Use Custom” and select the VIDEO_LOOPER_2.X.ZIP download
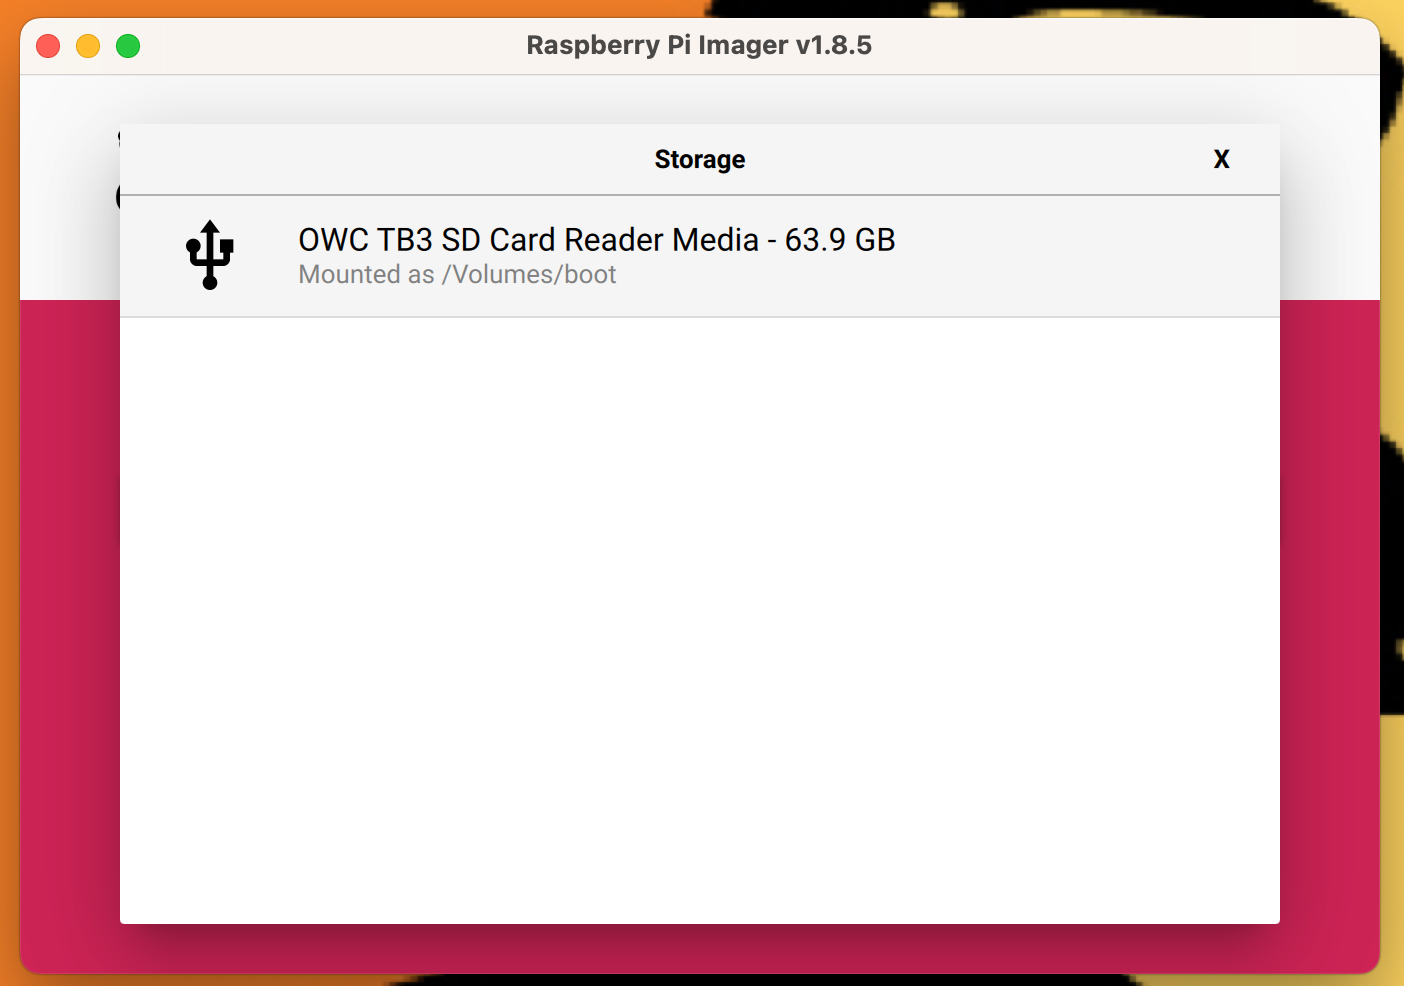
The micro SD storage device should be listed here
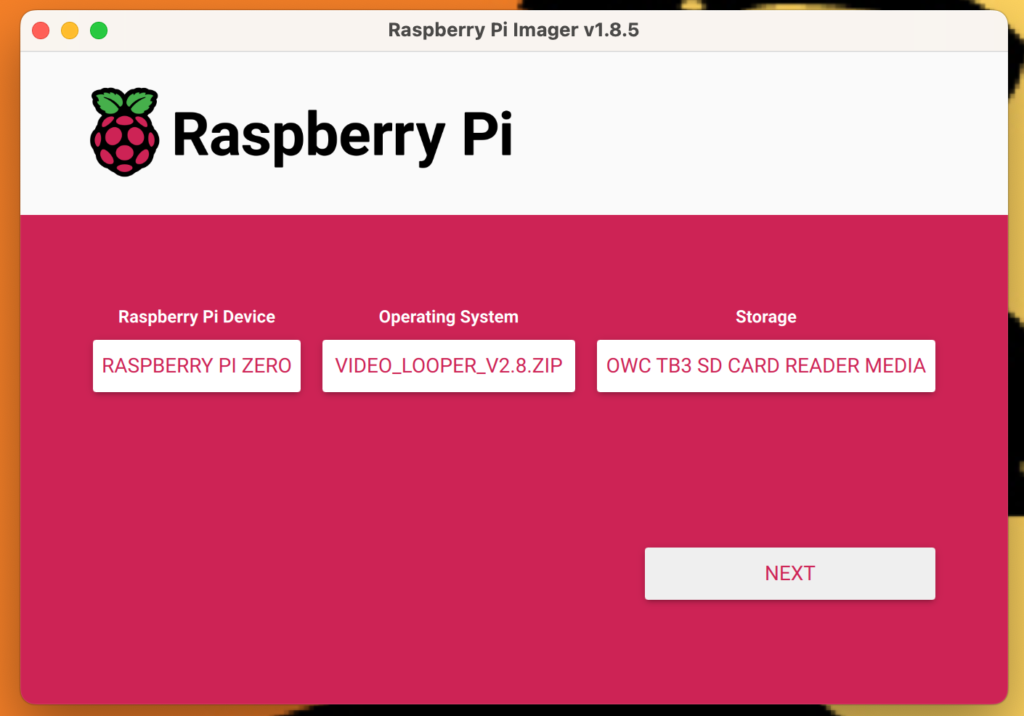
A screenshot of my selections before clicking “Next”
Once you click “Next” you will be given the option to customize the OS, click “Yes”:

Click “Yes” to customize your OS configuration
This will give you the options to set your Raspberry Pi’s local hostname, which will make it easier to SFTP or SSH in if you don’t know the IP address. That said, at boot up my Zero Pi does give me the local IP address. You can also change the default OS username (pi) and password (raspberry) to something you can remember and is a bit safer. You also have the option to have the wireless connect to the network automatically at boot up.
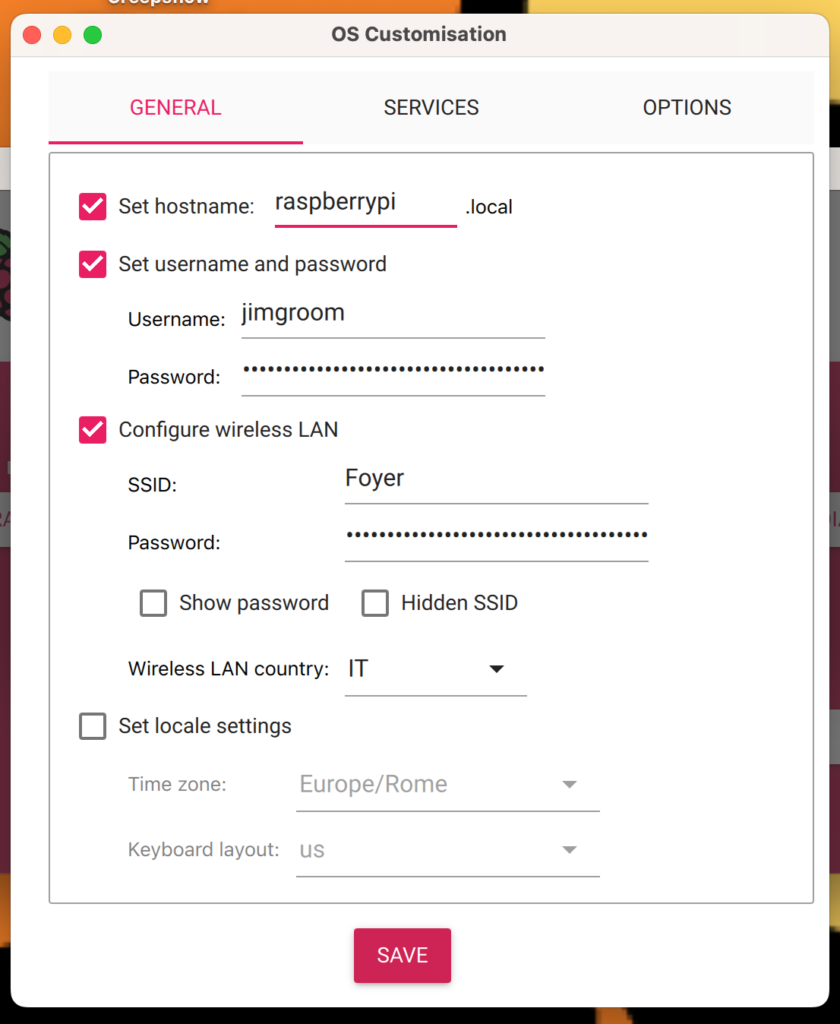
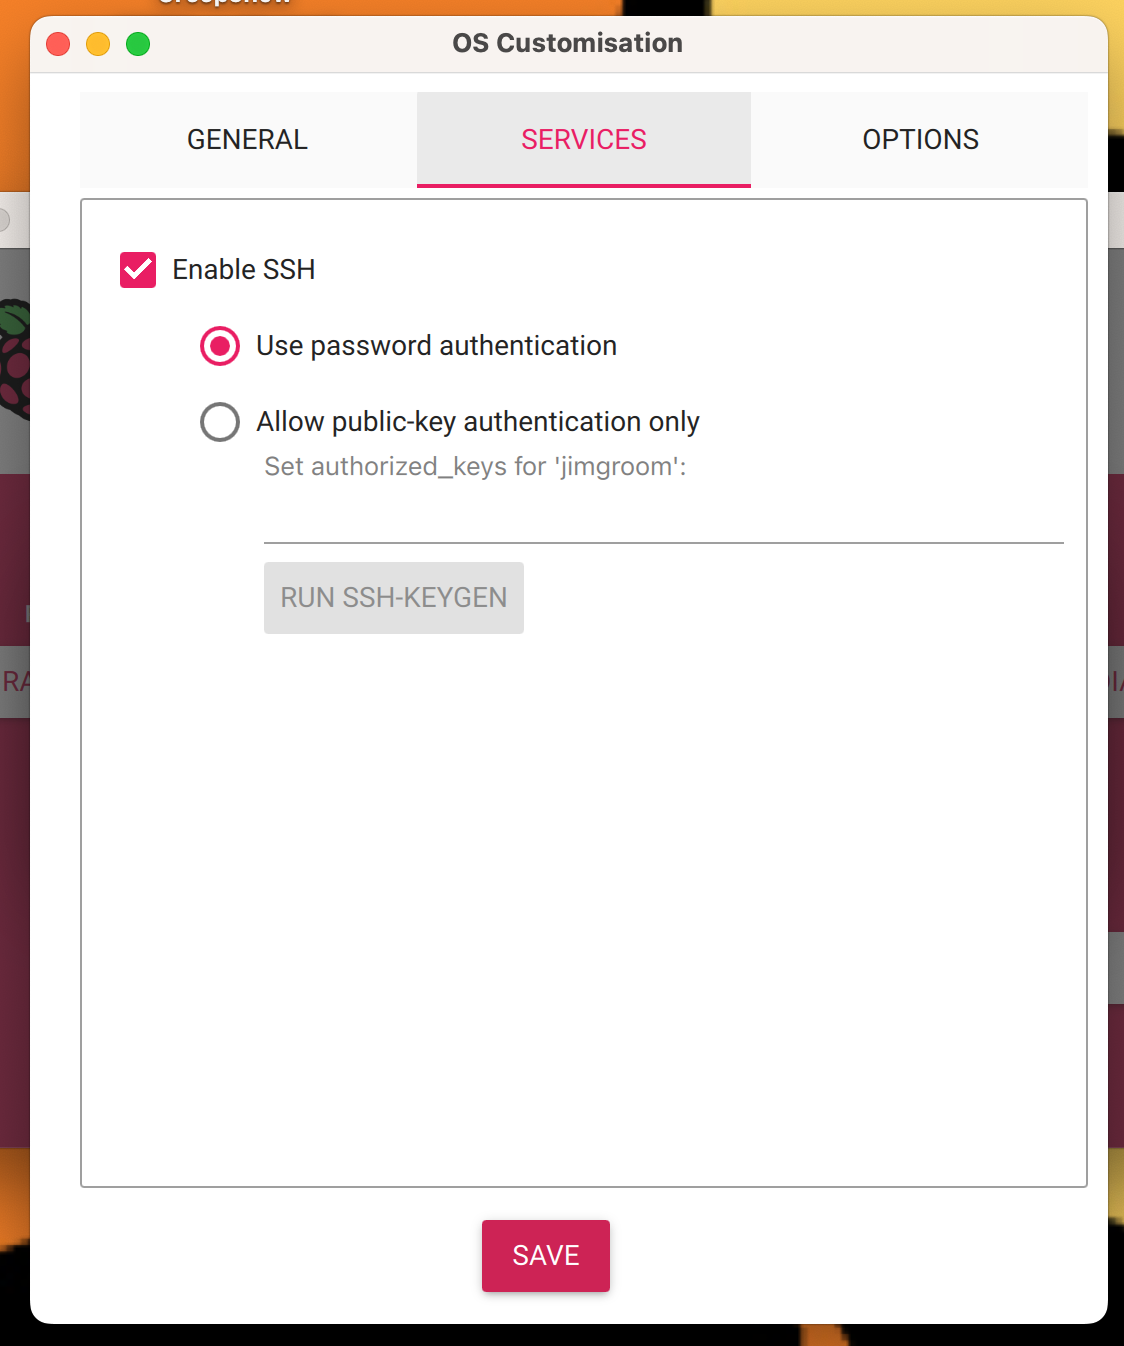
The other piece, and arguably most important, is making sure that you have SSH enabled under the Services tab of OS Customisation. This will allow you to remote into the Pi using terminal (or your SSH/SFTP app of choice). I opted for password authentication because password keys still trip me up:
After that I apply the customizations by answering “Yes”:
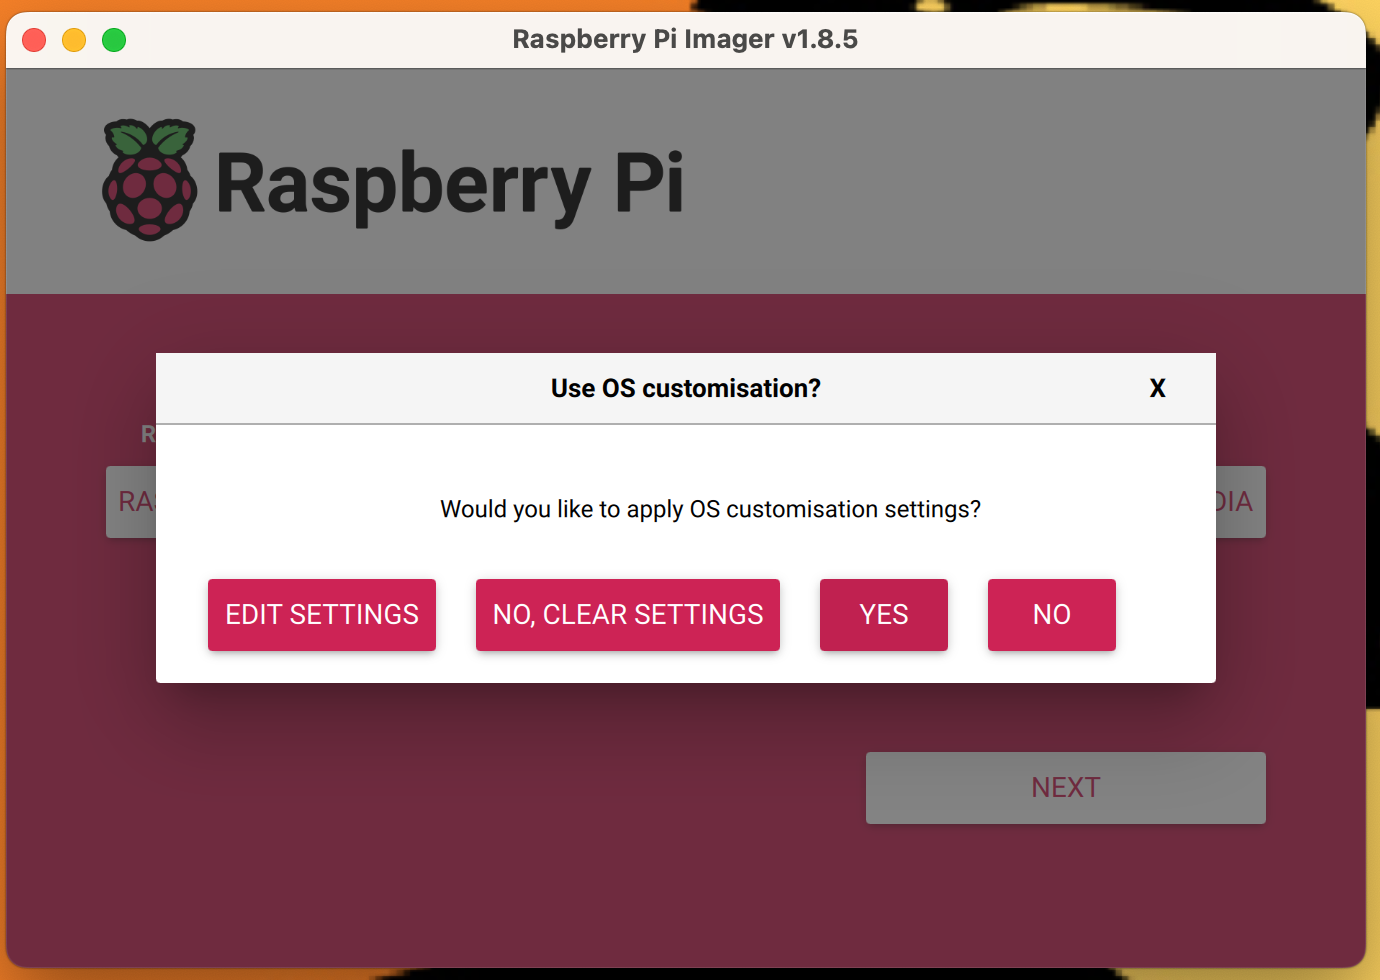
Click “Yes” to apply customizations
The next dialogue box will warn you about losing all existing data on Micro SD disk,‡ which you can answer yes given it’s assumed the disk is empty. If you have data on the disk you will need to back it up because everything will be erased when the OS is installed.
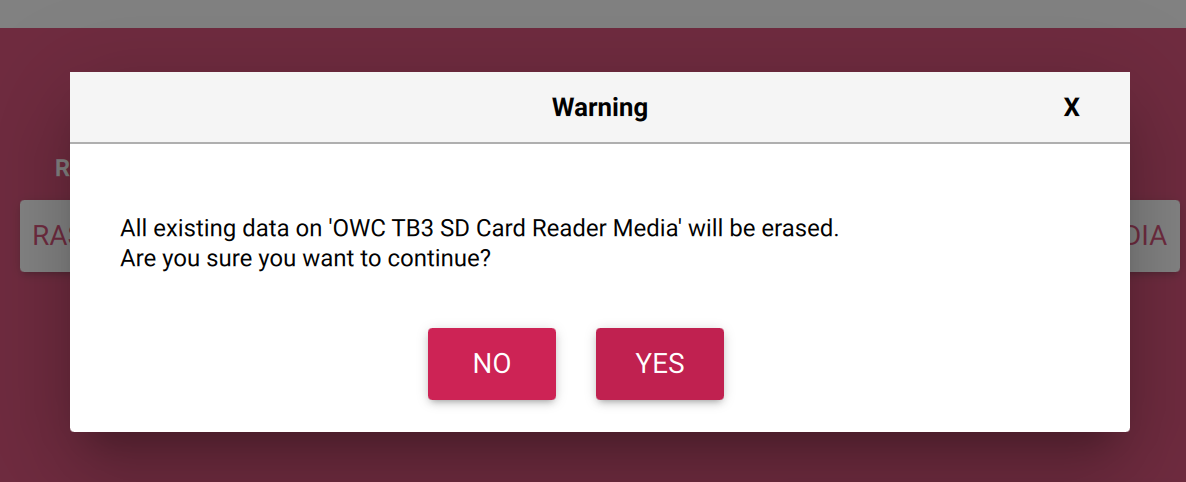
SD Card to be erased warning that can be ignored
After that the disk will both be written and verified:
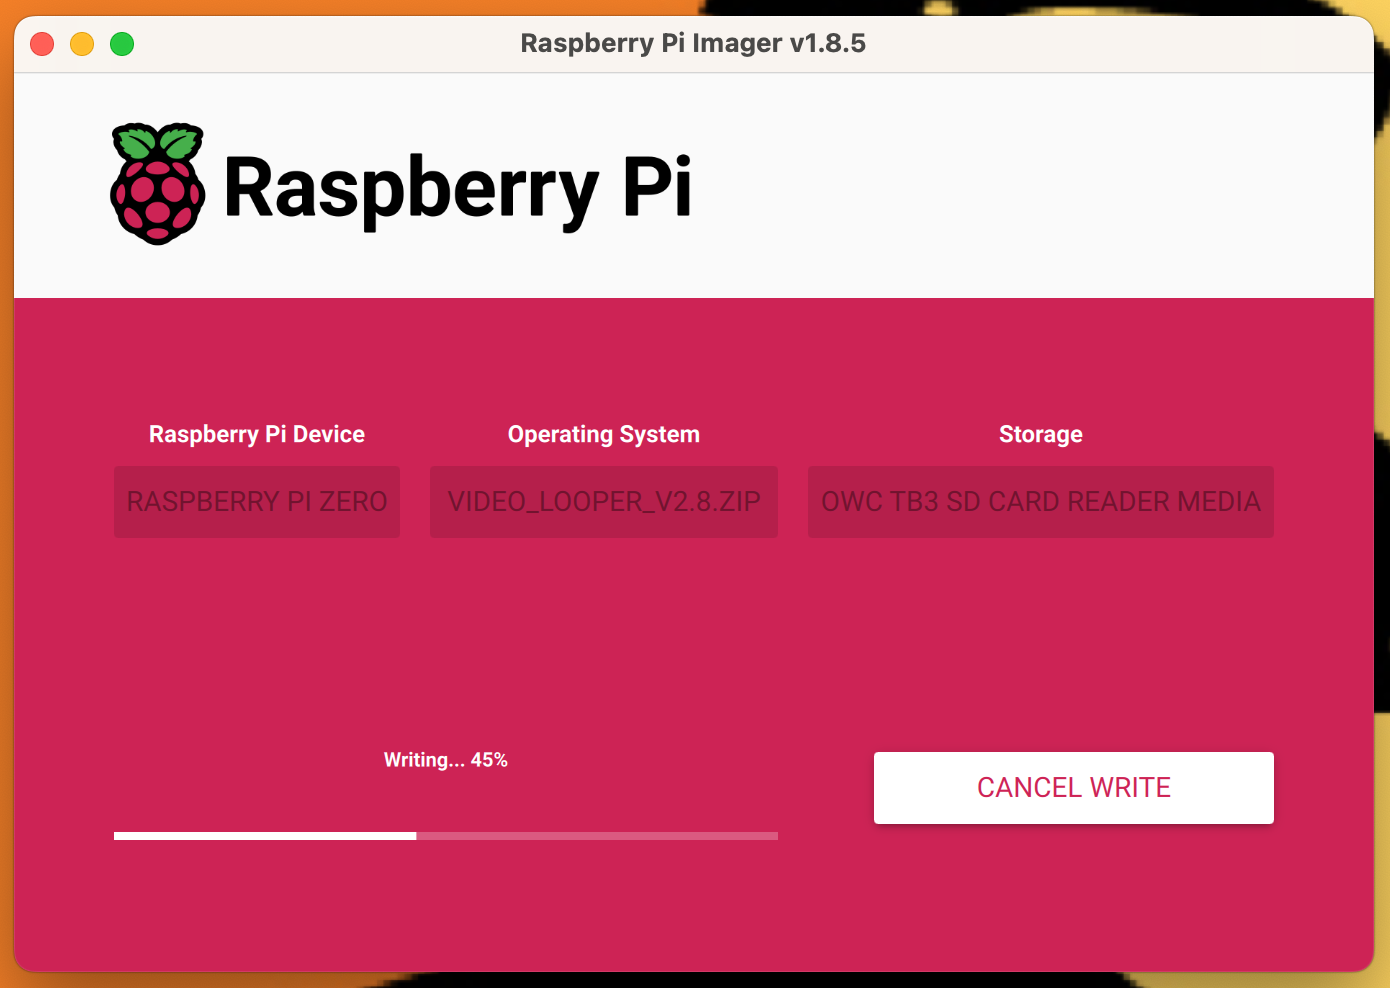
Raspberry Pi Imager writing disk
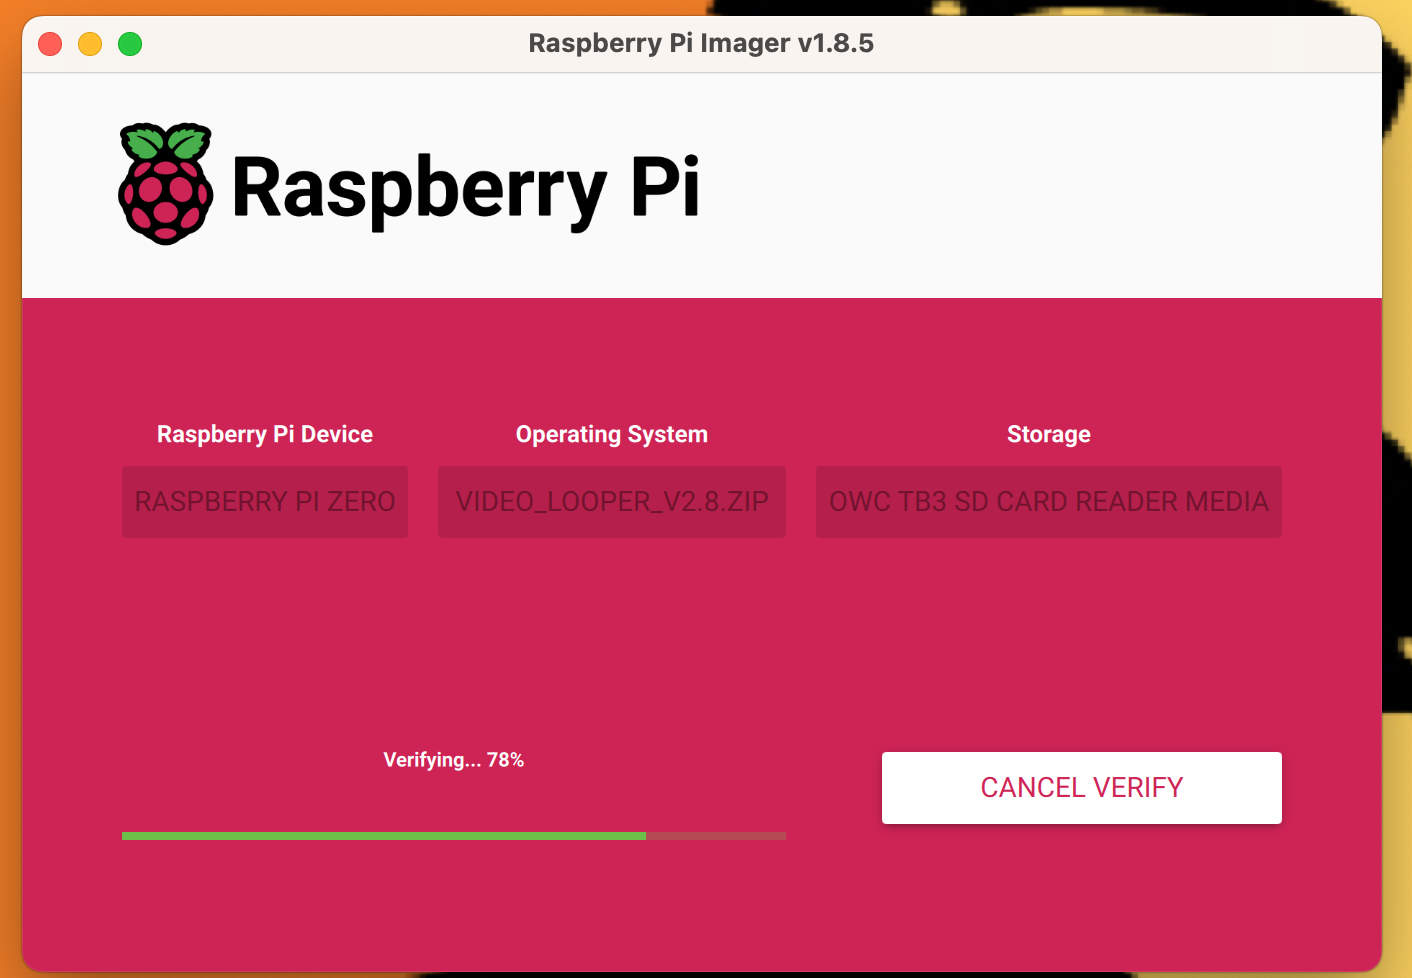
Raspberry Pi Imager verifying disk
Once finished, you will be prompted to remove the SD card from your computer and insert it in the Raspberry Pi.
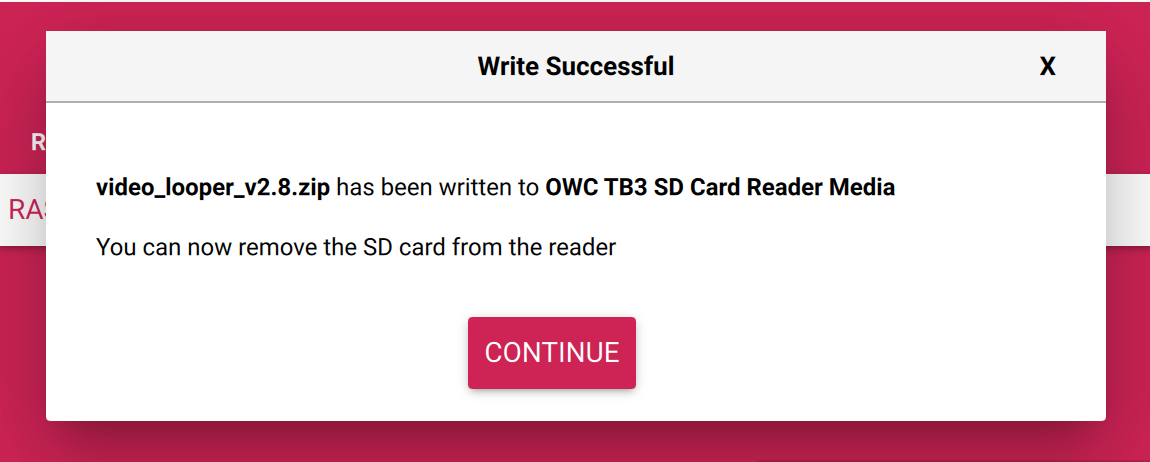
You can now remove SD Card from your computer and insert it in the Pi
After booting§ the Raspberry Pi you should see a screen like this after boot, which suggests the setup went swimmingly:
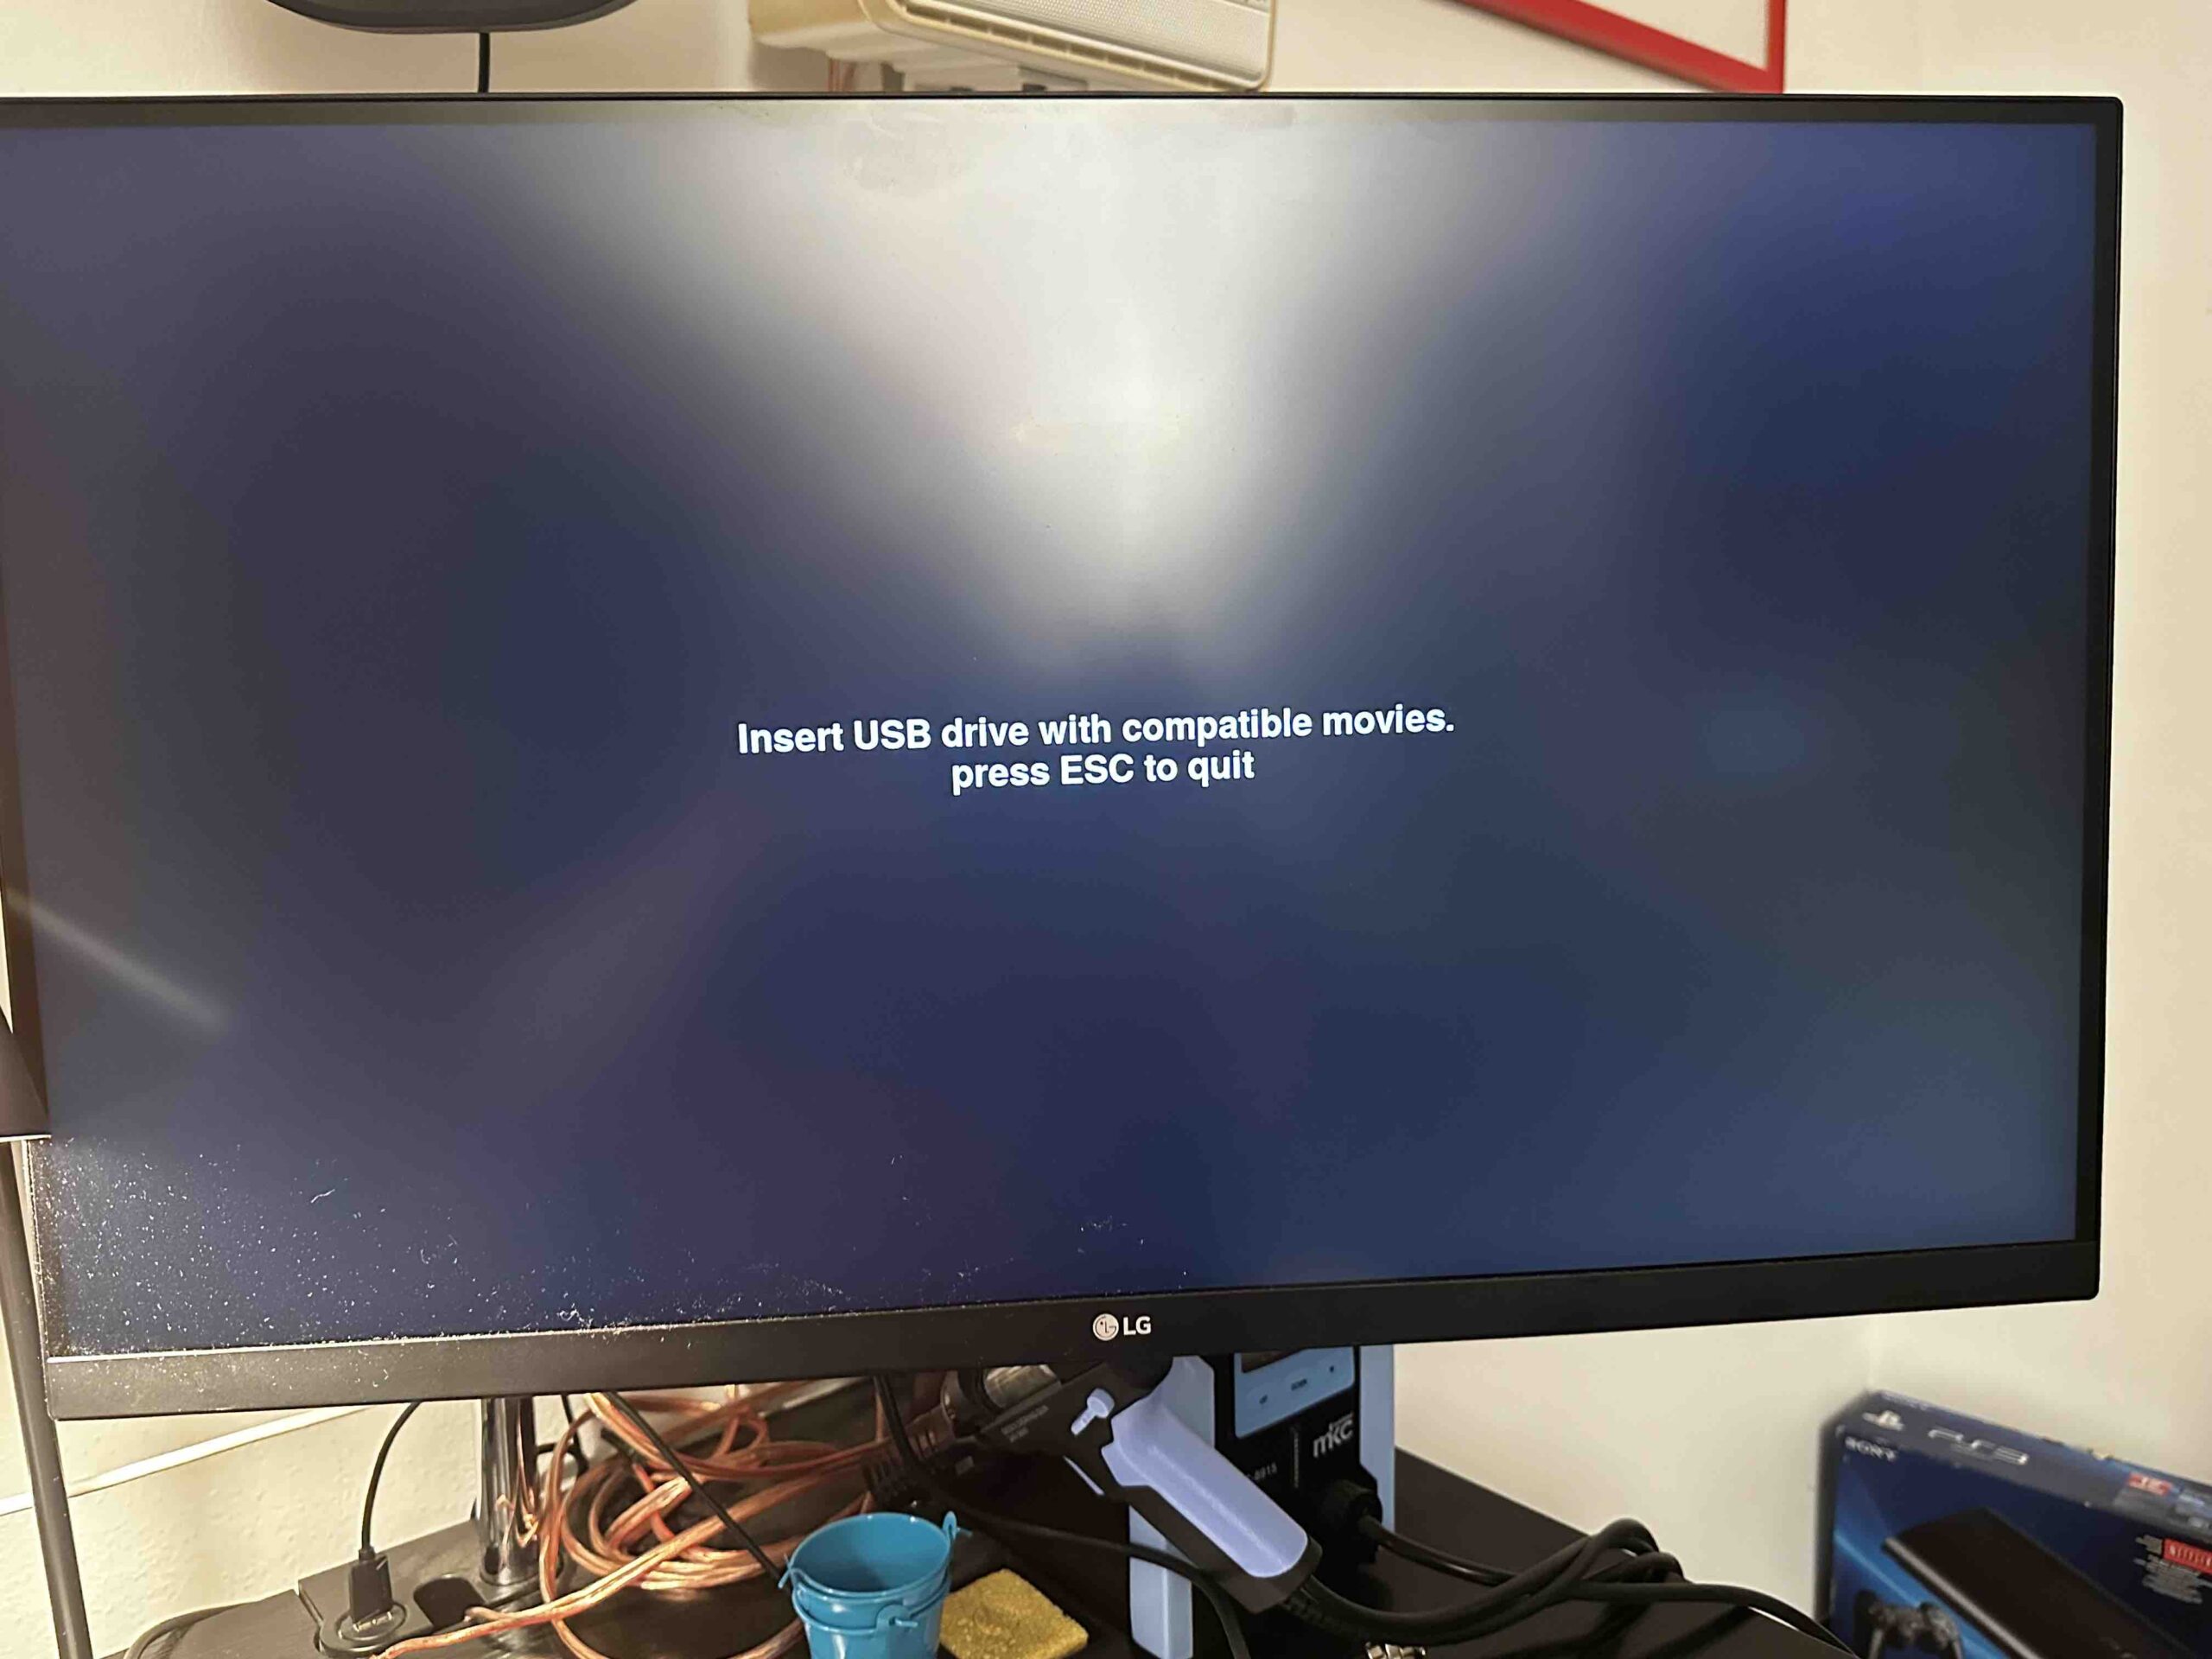
“Insert USB with compatible movies” means the Pi Video Looper was setup correctly, and you are now ready to edit the video_looper.ini file
At this point you are ready to either SSH or SFTP in using the details setup when customizing the OS. For example, the above specified localhost, username and password will allow me to access my Pi Zero via SSH as follows:
After which a password prompt appears, and once you enter it the screen should look something like the following:
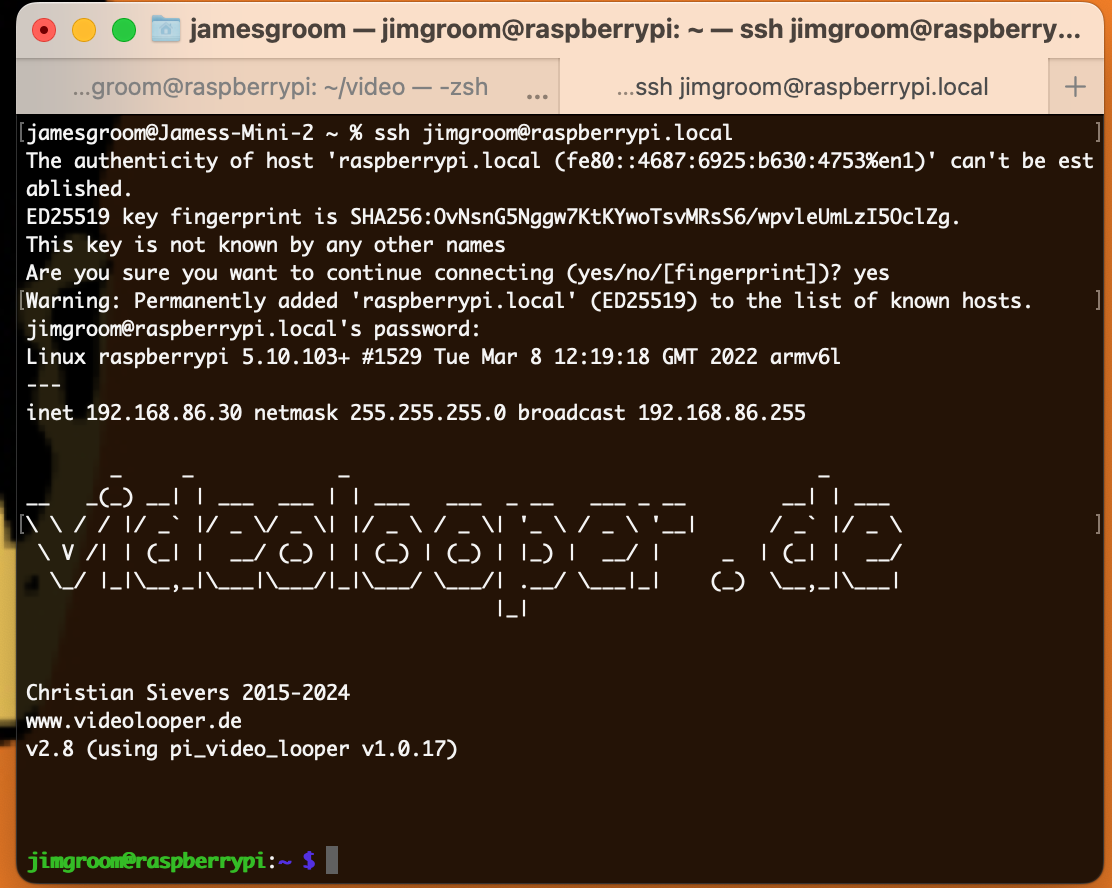
SSH access to raspberry pi using raspberrypi.local hostname
If you changed none of the settings save enabling SSH, the default username is pi and the hostname would be an IP address—with the caveat that the IP address will probably not be what’s shown below (the IP appears at boot up of the program, so be sure to note it):
The default password is raspberry —that should get you command line access. After that you would need to update the permissions of the /home/pi/video folder if you did not change the username, and /home/jimgroom/video if you changed it to a unique name like jimgroom. The jimgroom directory would be reflective of whatever you named your raspberry pi user in the customization settings—so this will vary. You can navigate into the user directory and then run the following command to update ownership of the video directory, replacing jimgroom with whatever your new username is:
sudo chown -R jimgroom:jimgroom video

Changing ownership of video directory if you changed the pi’s username, and remember to use sudo
Once the video directory ownership is changed you should be able to upload files to the video directory. Now that that’s done, edit the video_looper.ini file in the boot directory:
sudo nano /boot/video_looper.ini
Here you need to change two things:
- Assuming you are loading video and image files directly from the pi, rather than a USB drive, comment out the
file_reader = usb_driveand then remove the hashtag in front offile_reader = directory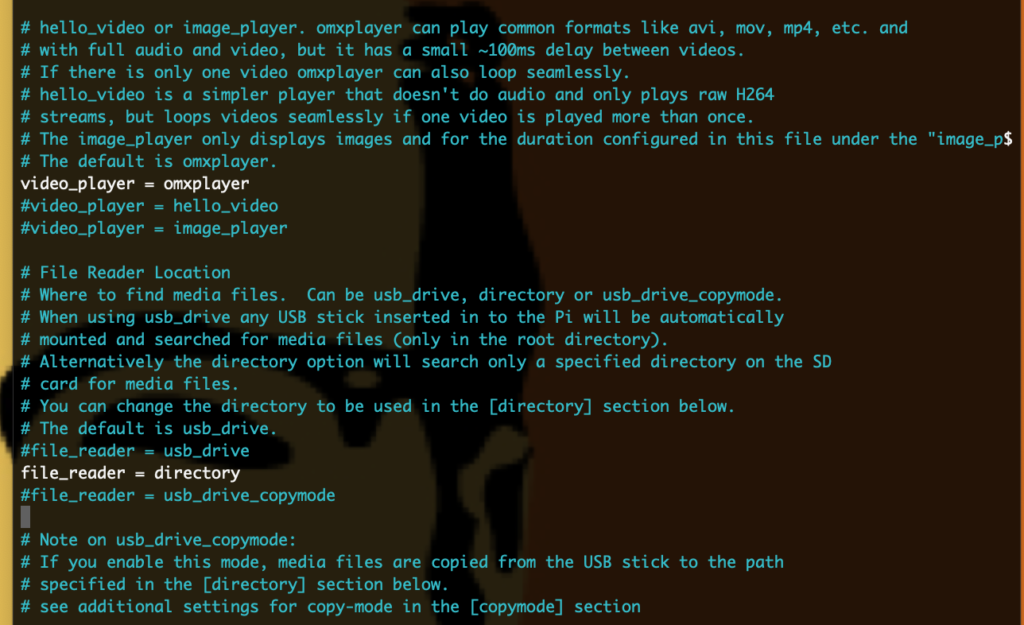
Editing
video_looper.inito default tovideo directory rather than USB drive - If you changed your username, change the directory videos are stored from
/home/pi/videoto/home/[username]/videousing the username you created: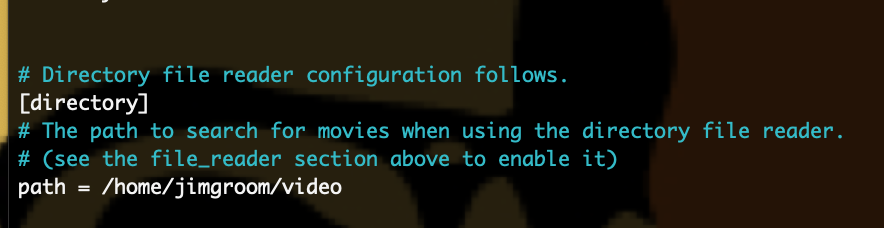
Update directory path of where videos are stored locally on pi

After that, you can copy files to the directory from your computer by accessing the terminal on your non-Pi computer and running a scp command like the following:
scp /path/to/video/file.mp4 [email protected]:/home/jimgroom/video
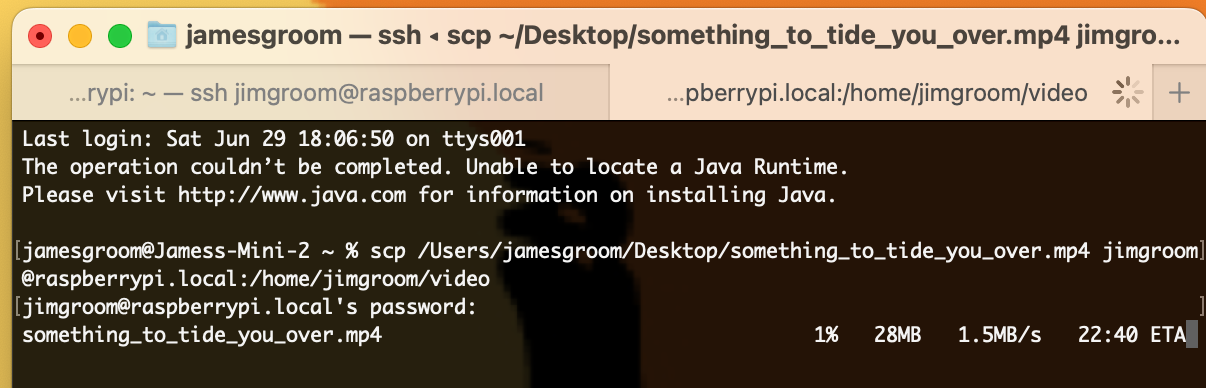
Command to copy local files to your video directory on the Raspberry Pi
Now if command line is not your game, then you can do most of the above via your FTP client using the following details:
- hostname: IP address or hostname you specified in customization options
- username: pi (default) or whatever you specified, in my case jimgroom
- password: raspberry (default) or whatever you specified in customization options
- port: 22
SFTP gives you a more familiar file structure to work with, and will log you into the /home/[username] directory. If you changed your username in the customizations options you will still need to change ownership of the video directory via command line before you can start uploading files. Also, accessing the /boot directory to edit the video_looper.ini file should be pretty straightforward via FTP—the boot directory is at the same level as the home directory, for reference.
That should at least get you started with accessing the file system of the Raspberry Pi via a Mac, just keep in mind that Raspberry Pi’s OS is a Linux operating system, so directory and file structures of a more robust Linux machine—along with the commands—will directly apply. This also means that some of my slow, but fairly steady, understanding of Linux servers is finally paying off on these side projects, which makes me very happy.
_______________________________
*As it so happens, we learned about this cool use of a Raspberry Pi back in 2015 from Michael Branson Smith (MBS). He used this software and setup it to create his awesome day of 1980s programming for the UMW Console Living Room project. All hail MBS!
†That said, I’ve been playing with the possibility of having a motion detector switch the video on the TV, but that might be a “stretch goal,” as MBS has told me 🙂
‡The recommended Micro SD card is 8GB-32GB for the Zero Pi, but a 64GB card I had hanging around worked fine, so larger is not an issue, but it might be a waste.
§One of the quirks of the Zero Pi is that there is no power indication led until the SD card is inserted—this confused me given after plugging just the micro USB into a power source there was no indicator so I thought it was dead, but turns out it just needed a bootable micro SD card, who knew?

Hello, the author of videolooper.de here. Thanks for the nice write-up. There’s one error: the password of the images is “video”, not the default “raspberry”.
Hi Christian,
Thanks for the comment, so to clarify, the Pi image you provide has the password video not raspberry? I must have missed that, and I wasn’t sure if you meant I had the wrong password in one of my screenshots above. Let me know what I am missing.