
I spent much of this weekend digging in on some Electrohome G07 monitor chassis repair. I have a bunch of games in the bavacade that use this monitor chassis to power the glorious CRT tubes for these 1980s miracles.
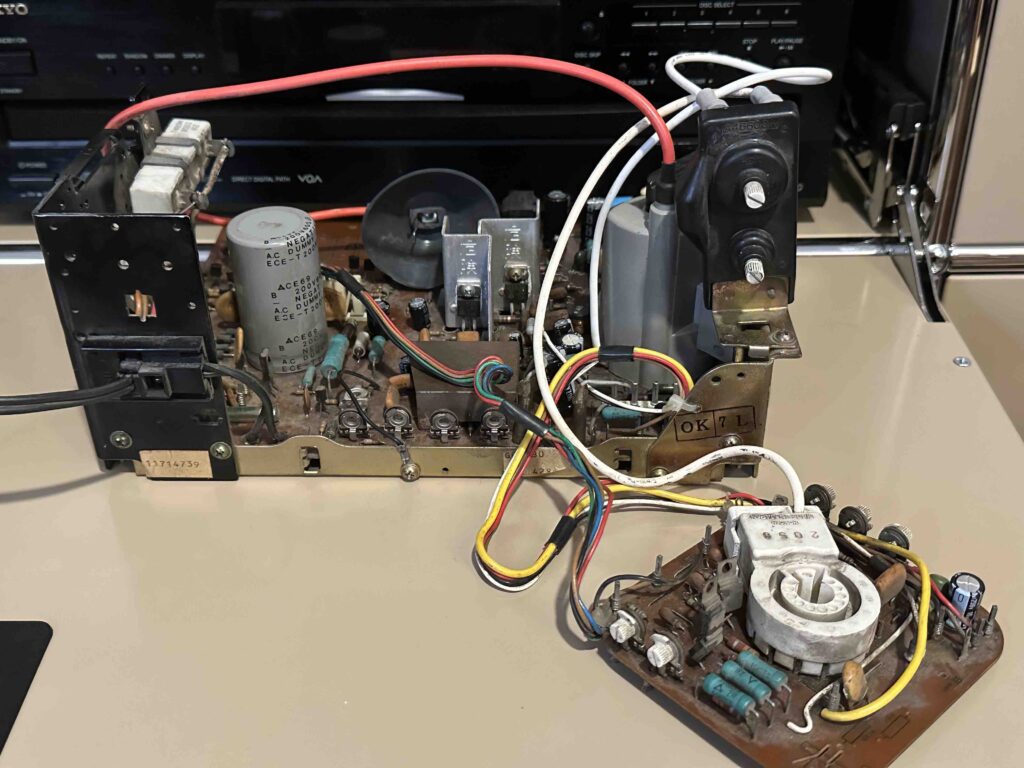
Image of G07 chassis with yoke connector
All told I have at least 7 cabinets that have a G07 chassis. There may be more, but I’m not sure what chassis all my cocktails are using given I never checked, and there are four total: Rally-X, Pleaides, Galaxian, and Moon Cresta.* Along with the Wells Gardner K4600 (at least 6 cabinets have this chassis) the G07 is the most common in the bavacade. That means part of making this hobby sustainable is figuring out how to work on these models given chassis repairs are a big part of keeping games online. I’ve slowly been getting better, but I remain very much an amateur. But even hacks like me have their moments, and this week was one of them. I got two of the three non-working G07s running again, leaving me with just one non-working chassis that I can use as a donor chassis for parts given all the games with G07s are now fully operational. YES!

More detailed image of a G07 chassis
Trusting the process means a lot of troubleshooting, and this weekend I was pretty happy to have committed a bit more and pushing myself to do more extensive diagnostic testing of the various components for things like resistance readings, diode readings, checking if transistors are good, voltage test points, etc. All of this was Greek to me just a couple of years ago, so starting to get my head around this basic troubleshooting before replacing anything is long overdue and pretty rewarding.
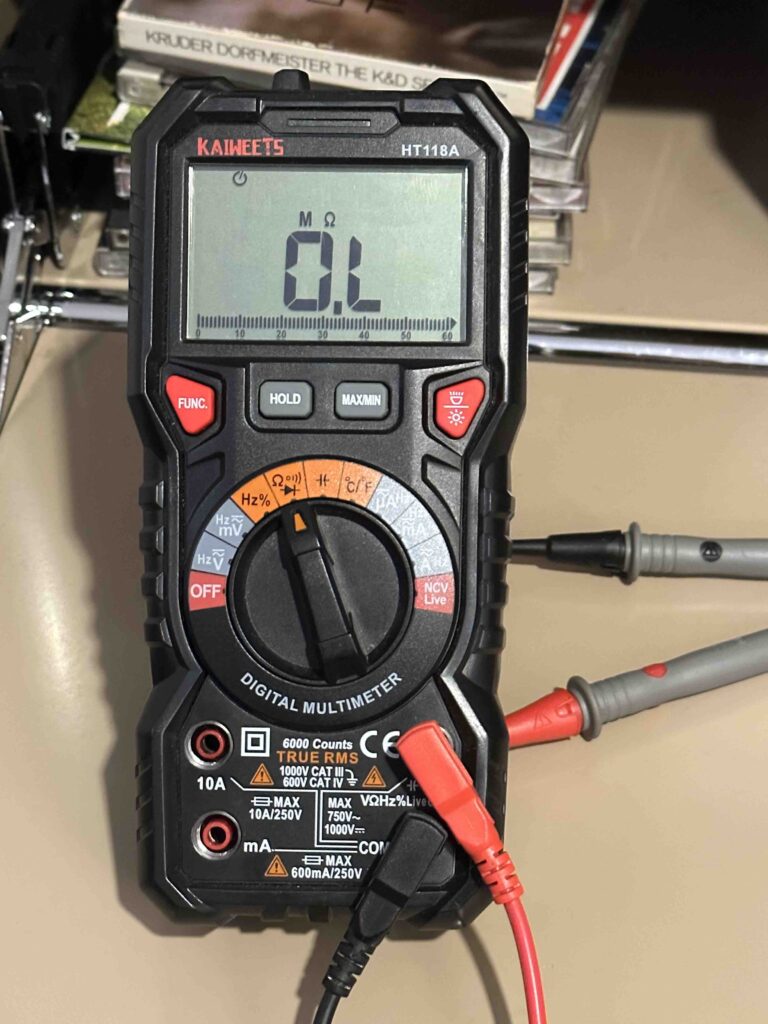
The multimeter has proven to be the most indispensable tool of them all
I already talked about the first successful G07 repair this week in my “bavacade Repair log from 6-29-2023,” noting “I was able to repair the Condor G07 chassis that was dead by doing a cap kit, swapping out a new B+ filter cap as well as a horizontal width coil.” The cap kit was done almost a year ago, but I never got it working. Turns out the recent replacement of the B+ filter cap is what brought it back to life. The horizontal width coil was broken, so I soldered a newer one off one of the other two non-working G07 chassis, figuring better to replace the broken one while the board was out. When I re-installed the chassis in Condor it worked, but there was a slight undulation that was annoying me. So, as a test, I tried it in Robotron and the waviness was gone and it worked perfectly, so that’s where it lives right now.
This means I needed to repair one of the other two chassis for Condor, and then I was golden. The two G07 chassis I had both blew the F901 fuses (2.25 AMP @ 250V ) next to the B+ capacitor, which is the biggest capacitor on the board. After discharging the B+ filter,† I replaced the fuses, which needed to be soldered in, and then tested the G07 that came from Pole Position (I defaulted to this one because I had desoldered the horizontal width coil from the other chassis for the first fix). Initially I thought the Pole Position chassis had an issue with the flyback and/or the horizontal output transistor (HOT) given the symptoms when it originally occurred a few weeks back. But after re-soldering the fuse and re-installing in Robotron to confirm as much, there was a total vertical collapse of the heart 🙂
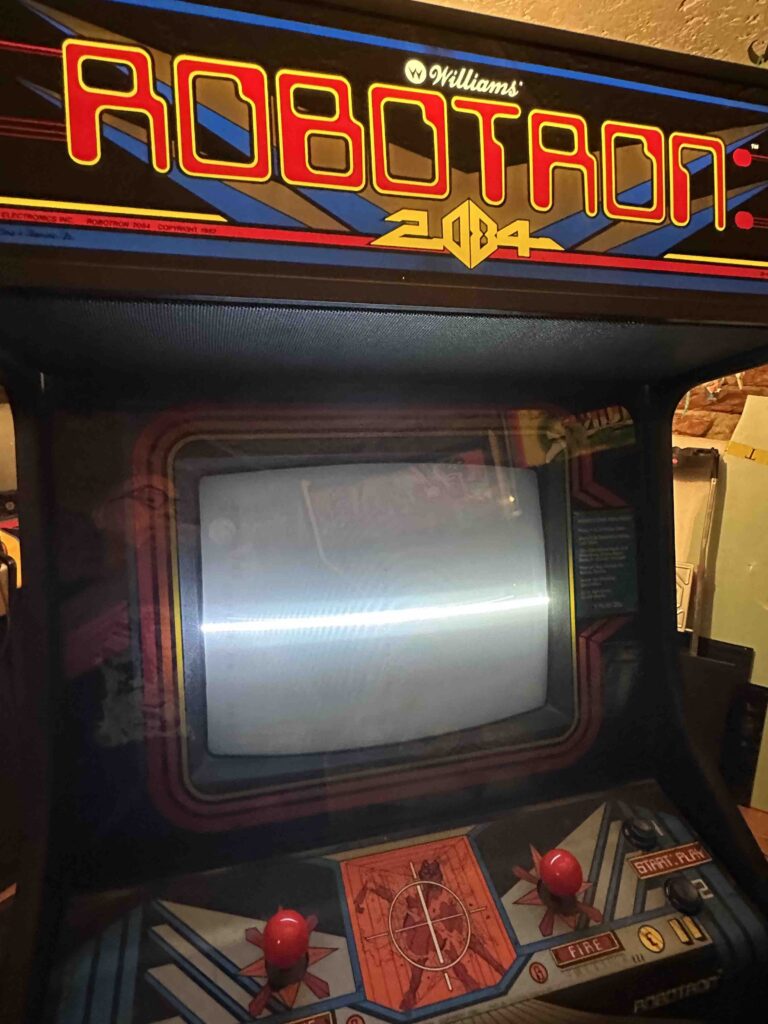
G07 chassis with vertical collapse
That’s a new one, but I’ve read about it on forum posts innumerable times. I figured I’d have to deal with it sooner or later, so I embraced the challenge to broaden my experience—learning is painful! OK, so the first thing I did was look at some of the basic troubleshooting for this, and from what I read it is possibly linked to a few different things, such as an open circuit somewhere, which requires testing each resistor in the 400 series circuit to ensure there are no infinite (OL) ohm readings. It’s also been linked to the x401 and/or X402 trasnsitors, so you wanna check the values there. I’ve read a few cases where the IC501 chip was bad and needs to be replaced, but that seems less likely. That said, the following G07 repair video did have that issue, and it does a great job walking you through common troubleshooting as well as demonstrating how to test the transistors, which was very helpful:
I tested the transistors, and they were both reading at .570, which seems normal. I then tested all the 400 series resistors and some were lower than the specs, but none were open, so not sure they are the issue. I also compared the results on a working G07 and they were fairly similar, here are the results I got for this chassis:
FR401: 69 Ohm
R401: 99 Ohm
R402: 18K Ohm
R403: 3.3K Ohm
R404: 4K Ohm
R405: 12K Ohm
R406: Vertical linearity trim pot
R407: 4.2K Ohm
R408: vertical Height trim pot
R409: 51 Ohm
R410: 6.4 Ohm
R411: 13K Ohm
R412: 13.5K Ohm
R413: 580 Ohm
R414: 3.1K Ohm
R415: 2.6K Ohm
R416: 8K Ohm
R417: 67 Ohm
R418: 1.3K Ohm
R419: 1.9K Ohm
R420: 6.6 Ohm
R421: 5.5K Ohm
R423: 2.4 K Ohm
Some of the readings are low, particularly for R404, R411, R412, R416, R417,R421, and R423, but I got similar low values for another chassis that works just fine, so I “resisted” replacing any resistors just yet given I didn’t find any open circuits, just issues with value range (assuming a low resistor value would not cause the total collapse, but I’m not positive on this). The next test would be the IC501 chip, but I was not entirely sure how to test this chip, still a blindspot for me, and I don’t have a spare regardless, so I let that sit.
There could also be an issue with soldering joints at the yoke connectors on the board but the solder was fine, but still might reflow those. Beyond that, I tested the resistors for R406 and R408 which adjust the vertical height and linearity, and they adjusting values accordingly, so I was hitting a brick wall. I even checked the diodes in the 400 circuit, but all seemed good.
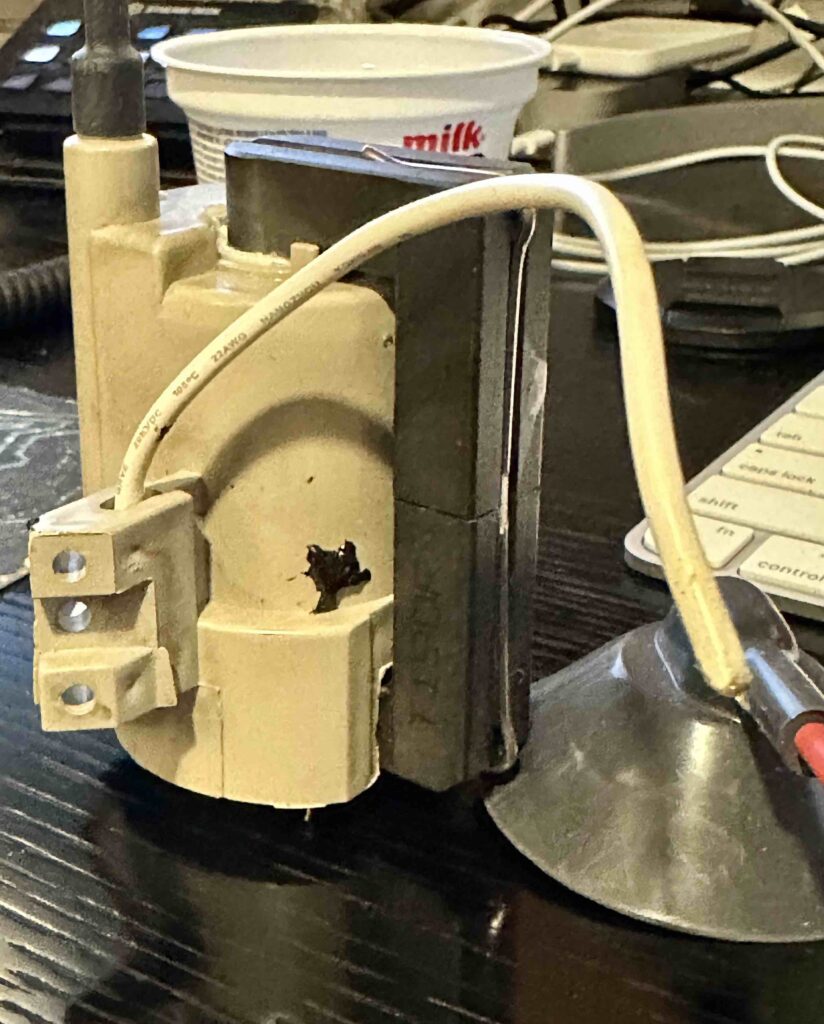
The dark splotch on the flyback is where it burst and started leaking
At this point I decided to step away from the Pole Position chassis, and turn to the other one that wasn’t working. First thing was desolder the horizontal width coil from the chassis I just abandoned and solder it to this one. I already added the new F901 fuse, so with the width coil added and the fuse in I tested it out. The last time it had not powered on at all, whereas this time it powered on and immediately there was smoke coming out of the flyback. It had blown. This, oddly, was very reassuring because at least I knew exactly where the issue was, and I also had an extra flyback that worked. So, I replaced the flyback and tested the game again and voilà this time it worked perfectly, whew! All the work on the other one with no results but a lot of learning, and this one was a simple replacement part swap, I’ll take it every time.
I need another width coil and a working flyback, but once I have them I might even take another shot at the last non-working G07, but given no games are effected I can finally move on to the last chassis repair I need to do, the K4600 for the Centuri Challenger, so until then!
_____________________________________
*I’ve yet to dismantle a cocktail cabinet, but that task will probably be coming soon given some work needed on my Pleiades cocktail cabinet, I don’t trust the adjustable metal legs on that game and want to get them properly lubricated and adjust with the write screws.
† Capacitors are designed to hold a charge, and when you blow the F901 fuse that charge has nowhere to go, which makes these big capacitor dangerous to the touch. Whenever removing this board do not grab it from underneath before discharging the G07 cap. You can do this by using an insulated screw driver that is connected to a ground via an alligator clip to ensure the charge has somewhere to go. To ground it, make sure the screw driver touches the + and – posts, read more on this on the KLOV forums here.

I remember getting very familiar with the G07 on Pac-man, it was my first attempt at a cap kit, first time working on a monitor chassis of any kind back when we had the repair bench where the living room is now. That big ass capacitor is no joke and bit me good when I went to grab the chassis. Until then I only knew about discharging the monitor itself, had no idea the chassis had a charge as well.
Yeah, I remember you were doing the Pac-man chassis very early on (2018?), and I was like “whoah, Tim is no joke.” I also remember you warning me about the cap on the G07, and luckily my shock was mild compared to what the shock seems like right after a fuse blows. That think pops like a gun and sparks like an M80, it is crazy. I am committed to not get shocked by that!