
The repairs continue at the bavacade, and this week they came in fits and starts given it was a busy one at Reclaim Hosting. That said, I definitely made a bit of progress and continue to fine-tune the collection, even if there is a bit of one-step forward two-steps back with Venture and Cheyenne.
Cheyenne/Crossbow
As alluded to, Cheyenne continues to elude me. I have the game working cleanly with a Crossbow board while the audio board on the original board with a 440 Multi-kit gets looked at.
Crossbow working in Cheyenne
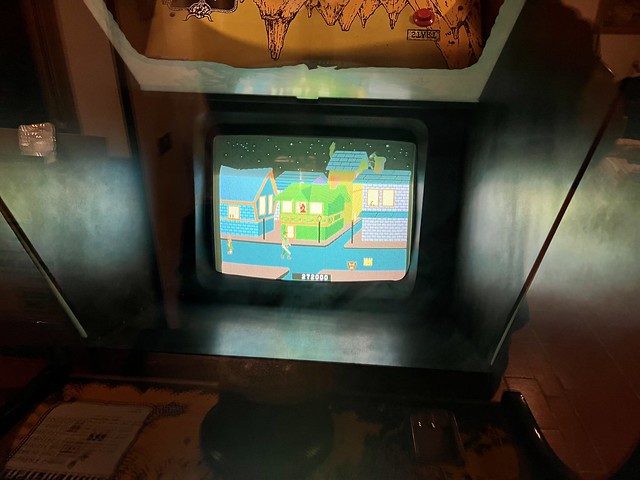
The Hanterex Polo 20″ monitor chassis that was in there originally was curling at the top after the game was on for 20 or 30 minutes. I know this means a capkit and I have an extra chassis for this game, so I tried swapping it out this week.

I must say I love the way this monitor slides right out so you can work on it out of the cabinet while still fully connected. So the swap was easy, and while the new chassis looks great it would not horizontally sync —which is an issue with many a monitor—so I spent a ton of time troubleshooting, including adjusting the B+ voltage to 138V DC (tested at P112) and every combination of tweaking the vertical and horizontal pots all to no effect. I had to take a break cause it could be something on the chassis board and I was getting nowhere. I’ve had no luck finding a capkit for this monitor chassis, but thinking it might be quicker/faster to just try a capkit on the curling chassis originally in the game. We’ll see.
Venture
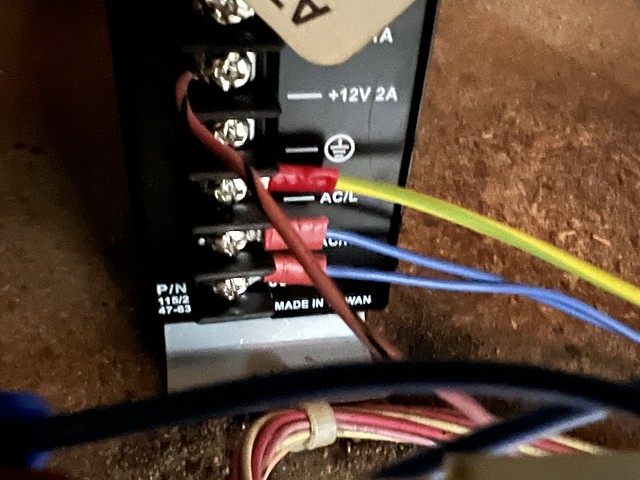
Sigh. For a minute or two I thought I was close, but alas nothin’. I swapped out the resistor 302 so I was able to re-install the boards. I also ran +5V from the switching power supply given +5V was not running from main logic board to the coin door, control panel, and the audio/video board. I’m not sure if this is an issue with the logic board, or what, but I decided that with no +5V to the audio/video board the game was not gonna work. After piggybacking on the +5V to the switching power supply I was sure I would get some love, but nada!
Piggybacking for +5V on Venture Board
I also tried everything like making sure everything was grounded with switching power supply, even to field ground, but still nothing.
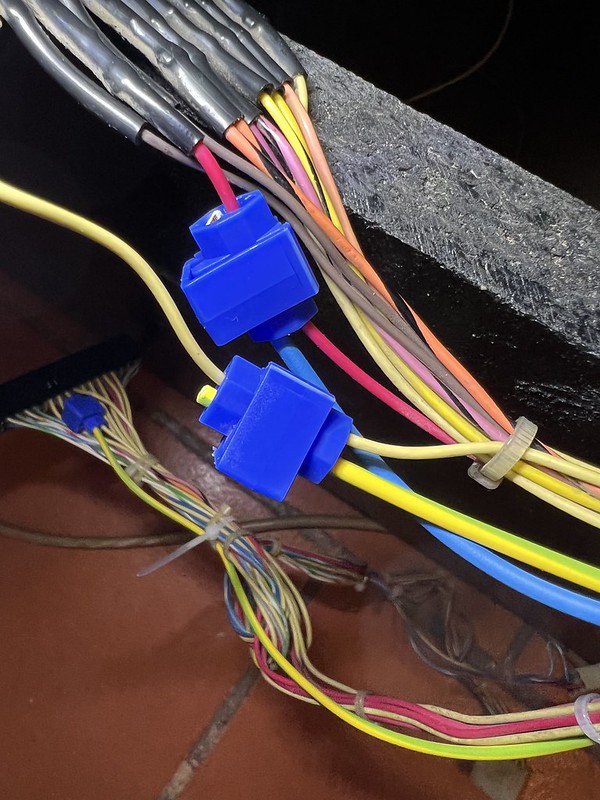
Field ground is the green and yellow wire and goes into the ground coming in from the wall:

Tapping into Field Ground from Wall
Then at a certain point the -12Vs (Hi and Lo) coming out of the original power supply were no longer registering, and -5V from the switching power supply also stopped working so I was at a total loss. The only voltages registering were +5V from the switching power supply and +12V. Frustrating to no end.

I either need to find a custom switching power supply for Venture or have the original power supply rebuilt yet again, which is annoying. I also have the uncertainty about whether the board blew while I was stumbling around with this game, so right now this one is the bane of my existence and I need some time to rethink my approach because so far nothing has worked. I’ll be back!

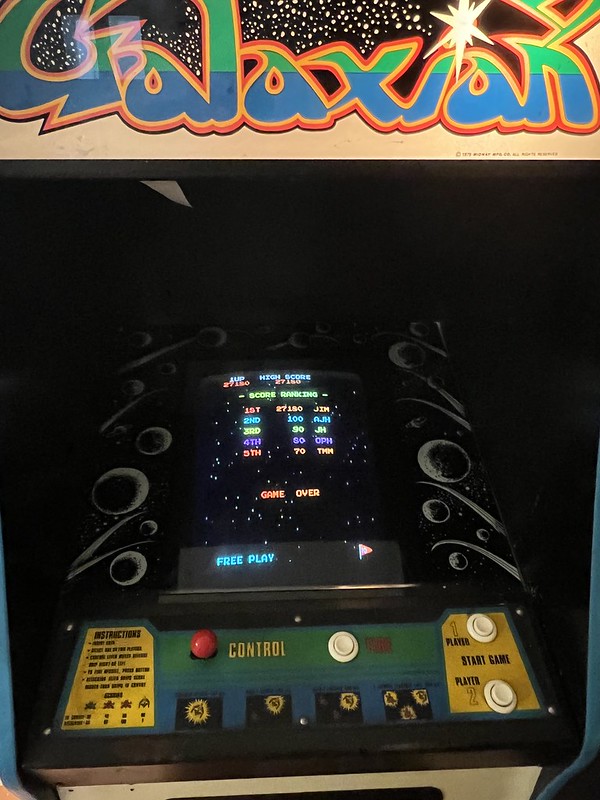
Galaxian
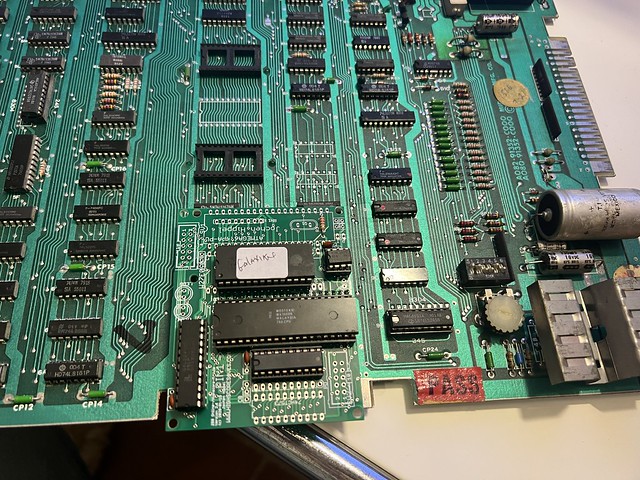
As a result of my epic Venture failures, I took out the K4600 chassis I had taken from Galaxian and reinstalled it on that classic 1979 space shooter. While I was doing that work I also installed a high score save kit on Galaxian, so that is working beautifully.
It’s always nice when the Z80 chip you need to replace for a high score save kit is socketed so you can easily remove and replace it without any soldering.

Socketed Z80 Chip I removed and replaced on High Score Save Kit Daughter Board
I removed the original daughter board that was installed and added the new daughter board with the Z80 chip installed and that was that.
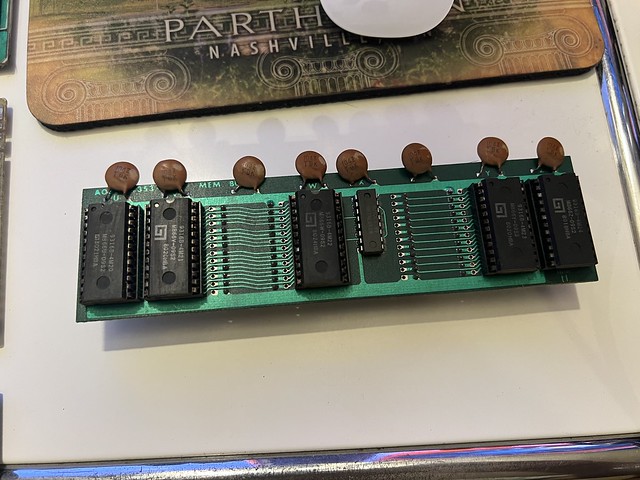
Image of the Original Galaxian Daughter Board replaced by High Score Save Kit
High Score Save Kit Daughter board installed on Galaxian
I also have new locks on this game and vacuumed out the cabinet, so this game is pretty cleaned up. It might need a fresh coat of paint at some point, but for the time being it’s golden.
Defender
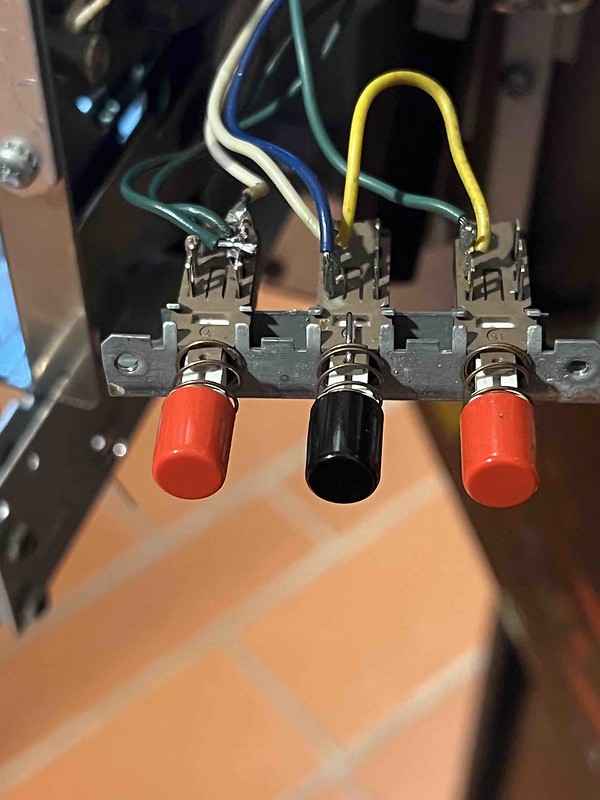
Defender‘s coin door switches
This was an interesting one. After I installed the FPGA board on Defender I went to adjust the settings to ensure I could go from 3 ships to 5 or 7 given this game is hard enough without only having 3 ships. To do this you need to open the coin door and use the 3 switches inside it to advance through the menu and change things like free play, number of ships, etc. When I tried this I could advance, but the high score reset switch (the red one on the left) was not working. I figured the switch was bad so I took it apart and used another switch I have as a model to see if it was wired wrong. It appears that it was, and someone had wired a resistor across two of the switch legs, so I desoldered those and re-soldered the wire and grounds to what I believe were the correct legs.
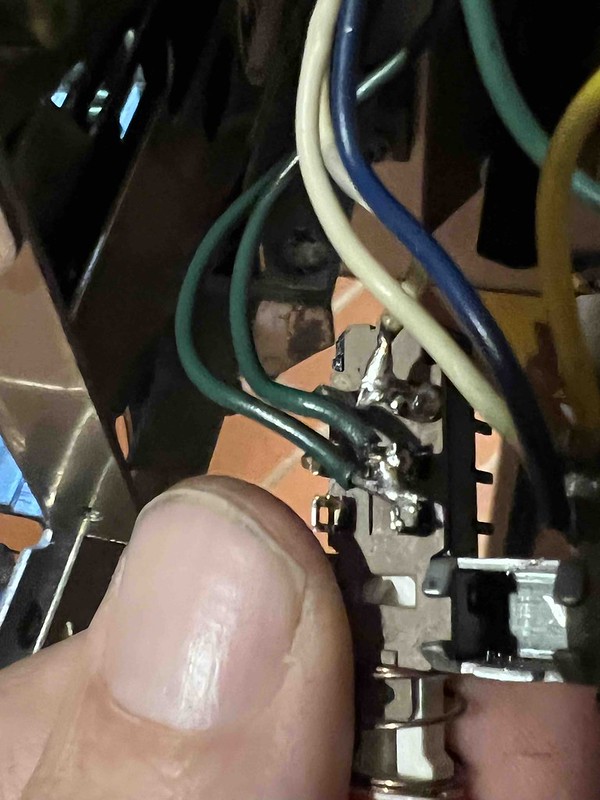
Resoldered wires, the green are the ground and the white/gray is the high score reset switch
After re-soldering the wires and testing the switch I saw it was working using the Switch Test built into the menu for the FPGA board. The video below takes you through what that looks like, but turns out the switch works but not for the switch I wanted. What was switching was button 6 for player 1, not the high score reset switch. WTF!
If you watched the above video you might sense a bit of frustration given what I thought was a layup, proved to not work. But the fact is the high score reset switch was working after I re-soldered it. It was just registering as a different button, one that does not exist on Defender. 1P button 6 only exists on Stargate, or so I believe. It is the additional button for invisibility. I then realized that on the FPGA board there is a 4-pin molex that has settings for 1B6, 2B6, Coin3 (also menu), and HSRT (or high score reset). Hmmm, that is weird, given the game is mistaking high score reset for player 1 button 6 (or 1B6), this was starting to seem like a bit of pin inversion.

FPGA Game Board for Multi-Williams
As you can see from the diagram of the FPGA board above, those 4 pins are linked through a 4-pin molex connector to a Jamma connector that actually takes all the various molex connectors for the coin door, control panel, video, and audio from the original game boards and connects them to the FPGA:
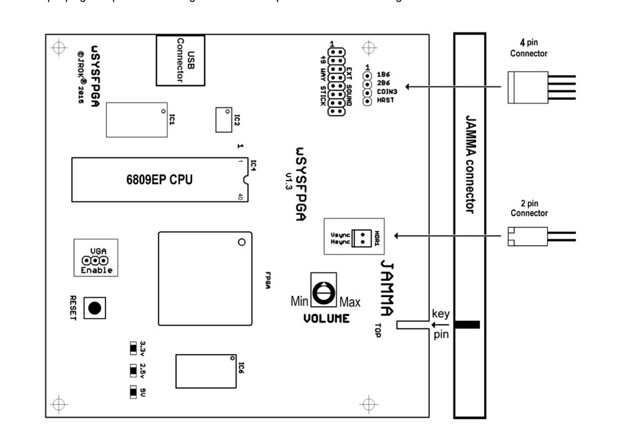
FPGA Game Board for Multi-Williams connecting to Jamma Board Drawing
This particular 4-pin molex is a way to add additional switches to the FPGA/Jamma board combo. And I figured out there’s an issue with the Coin3 pin on either the FPGA board or the Jamma Connector—which one I’m not certain. The Coin3 pin controls the menu of the FPGA which allows you to select which game you want and to change board settings.
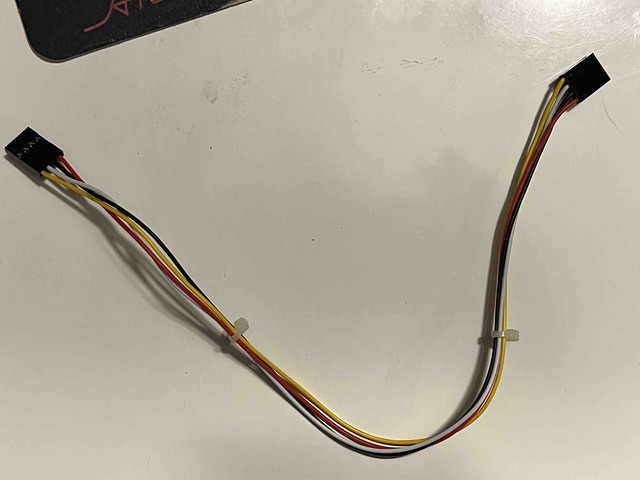
4-pin Molex Connector from FPGA to Jamma
When the 4-pin molex was connected to the Jamma board in what I believed was the correct way based (given wire colors matched) it was impossible to leave the FPGA menu and return to the game after saving your settings. So, as a result, I thought I had the 4-pin molex connector installed wrong, so inverted it and was then allowed to leave the menu and play the game. So I thought it must be right, but I was wrong. The wiring was not inverted, rather inverting the wire hid the issue with the Coin3 menu switch being stuck open which allowed me to leave the menu and play the game. It hit me when I realized after the above painful video that the high score reset switch was now mapped to the player 1 button 6 (1B6) switch as a result of my inverting the 4-pin molex. Ah ha!

So, as a test, I found a wire connector from a Sparkfun set Tim and I bought at a hobby shop years ago and connected only the high score reset pins and it worked! Not connecting Coin3 (or menu) left that switch closed so you did not get stuck in the menu and the switches for 1B6 and 2B6 are not used for Defender, so no loss keeping them disconnected. Whew, that was some work, but kind of fun. Now I think I can fix the same issue I’m having in Robotron in half the time, but I probably jinxed myself by writing that.
Moon Patrol
And finally Moon Patrol, the cabinet for which is still sitting up in my dining room in shell form waiting to be refinished. That said, I did get all the paint I needed so I’ll be ready to go once the cabinet work is done. In anticipation I was preparing to clean the power supply and transformer after testing it and once again realizing all original power supplies for Williams games are insane and report the craziest voltage readings and need to be replaced with switching power supplies that have the Williams adapter STAT! [/rant]
So using a switching power supply in Moon Patrol is what I will do, but first a good clean-up is important because we’ll still need the transformer to run power to the monitor and marquee lights, even if the DC voltage going into the Williams power supply board from the transformer will all be replaced with a switching power supply—most likely the one in Venture. Anyway, here are some before and after images of the clean up of both the transformer and the power supply board:
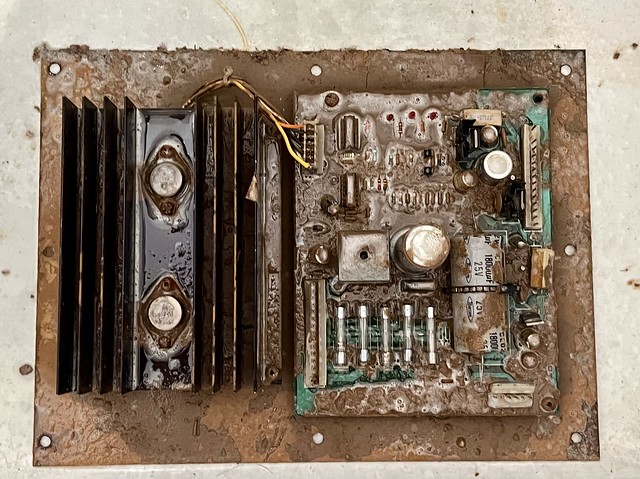
Moon Patrol power supply and heatsync with degreaser applied
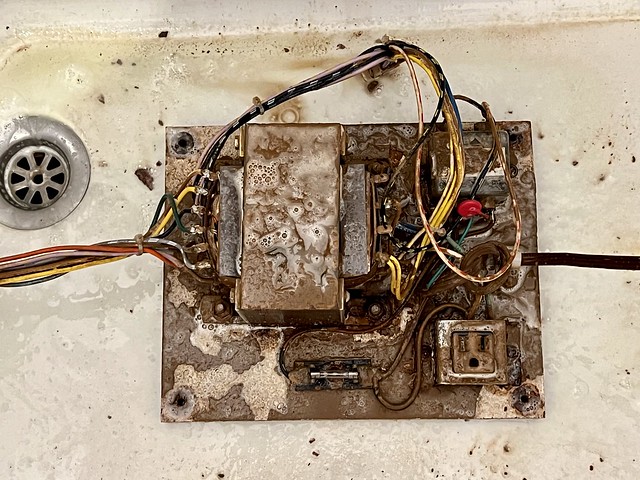
Moon Patrol transformer with degreaser applied
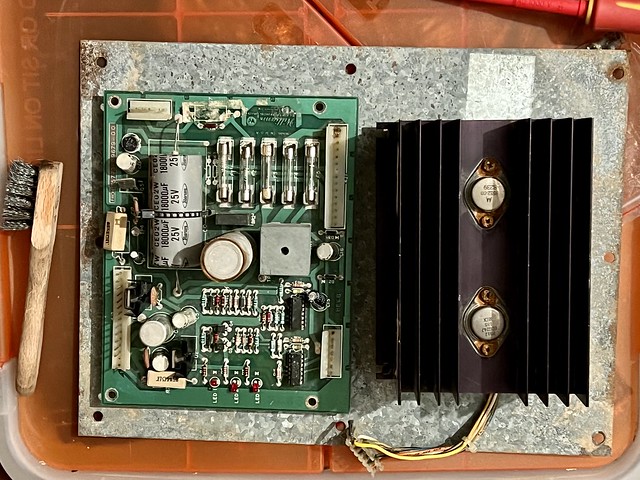
Moon Patrol power supply board and heatsync after washing

Moon Patrol transformer after washing
Quite a difference, no? I still need to scrub out some of the rust on the transformer with a wire brush and maybe swap out some screws, but gonna let everything dry real good for a while, and then re-install these inside Moon Patrol once the work and painting on that cabinet are all done.

Keep it up Rev. Jim. You are getting an education in electronics by way of collecting arcade cabinets. An unintended but undeniably cool side effect. You’re getting smarter and more courageous and more hands-on each and every time you make the attempt.
Eric,
I have to say the wrapping my head around some of this stuff is an unexpected, but absolutely awesome side effect of preserving these old machines. I really have a better grasp of everything from AC vs DC voltage, the simple logic of chips, and the magic of CRT tubes. I’m really falling in love with the repair process, and just 3 or 4 short years ago it all seemed impossible. It is still quite daunting, but by no means impossible anymore, which is amazing in and of itself. So thanks for the comment and “atta boy,” it never sucks 🙂
Pingback: bavacade To-Do List, Part 2 | bavatuesdays
Pingback: bavacade Repair Log 10-24-2022 | bavatuesdays