
 Early yesterday morning I got two requests to setup Omeka S for folks on Reclaim Hosting. The first question I asked myself is, “What the hell is Omeka S?” Thanks to Sharon Leon’s post on the software, I now know:
Omeka S shares an ethos with Omeka Classic(2.x), but none of its code. There are a nice range of features for Omeka S that should make it appealing both to cultural heritage institutions and academic and research libraries, including:
*the ability to administer many sites from a single installation;
*a fully functioning Read/Write REST API, which the system uses to execute most of its own core operations;
*the use of JSON-LD as the native data format, which enmeshes the materials in the LOD universe;
*native RDF vocabularies (DCMI Terms, DCMI Types, FOAF, BIBO);
*and a set of modules to aid integration with Fedora, DSpace, Zotero.
Omeka S seems to be the next generation of Omeka, and the fact that it has a multisite feature built-in, as well as REST API functionality and JSON data format is more than promising. The interest amongst Reclaimers yesterday was most likely spurred by this post on Digital Humanities Now featuring Sheila Brennan’s presentation on Omeka-S at IMLS’s Focus conference in New Orleans.
The good folks at the Roy Rosenzweig Center for History and New Media have been a constant source of support for us at Reclaim Hosting since the very beginning, and Reclaim never forgets its friends! What’s more, Omeka continues to be one of our most heavily used applications, so it makes good sense that we would try and support folks exploring Omeka S. That said, it’s still Alpha software, so there is no Installatron installer for it yet.
In order to install Omeka S I had to do a little commando lining thanks to some tips from Tim “R2D2” Owens. I tried to download and upload the zip file through CPanel’s file manager, and then install the application from there, but that continually failed me. So, that may not work for folks on Reclaim Hosting. That said, I can vouch for the following method using terminal/command line.
Note: Before you start the installation, you need to create a database and user for this application. Use the MySQL Database Wizard in CPanel to create a database and be sure to record the username, database name, and password. Also, you should probably create a subdirectory or subdomain that you will install the application in. For the purposes of this tutorial, that subdomain will be called “test.”
First, login to your terminal. You do this using the FTP username and password you received in the Welcome email from Reclaim Hosting. Once you have them, the login looks like this:
ssh [email protected]
After that, you will be prompted for the password, be sure to use the FTP password we sent you in Welcome email.
Now you use the following commands to get your application up and running.
Run the following command from inside the folder you created, for this example that will be the directory test.
wget https://github.com/omeka/omeka-s/releases/download/v0.4.0-alpha/omeka-s.zip
Then unzip the application:
unzip omeka-s.zip
Now we need to move everything in the omeka-s folder up one level in the test directory.
mv omeka-s/*
This following command moves all the hidden files in the omeka-s folder up one level as well.
mv omeka-s/.* .
The next commands removes the omeka-s directory, which should now be empty.
rm -rf omeka-s*
Finally, we will need to edit the database.ini file and add the database info we creating using the MySQL Database Wizard.
Use the following command to edit the file:
nano config/database.ini
Now you will add the database details to the file, it should look something like this:
user     = "testacct_admin"
password = "yrp@ssw0rd"
dbname   = "testacct_omekas"
host     = "localhost"
;port     =
;unix_socket =
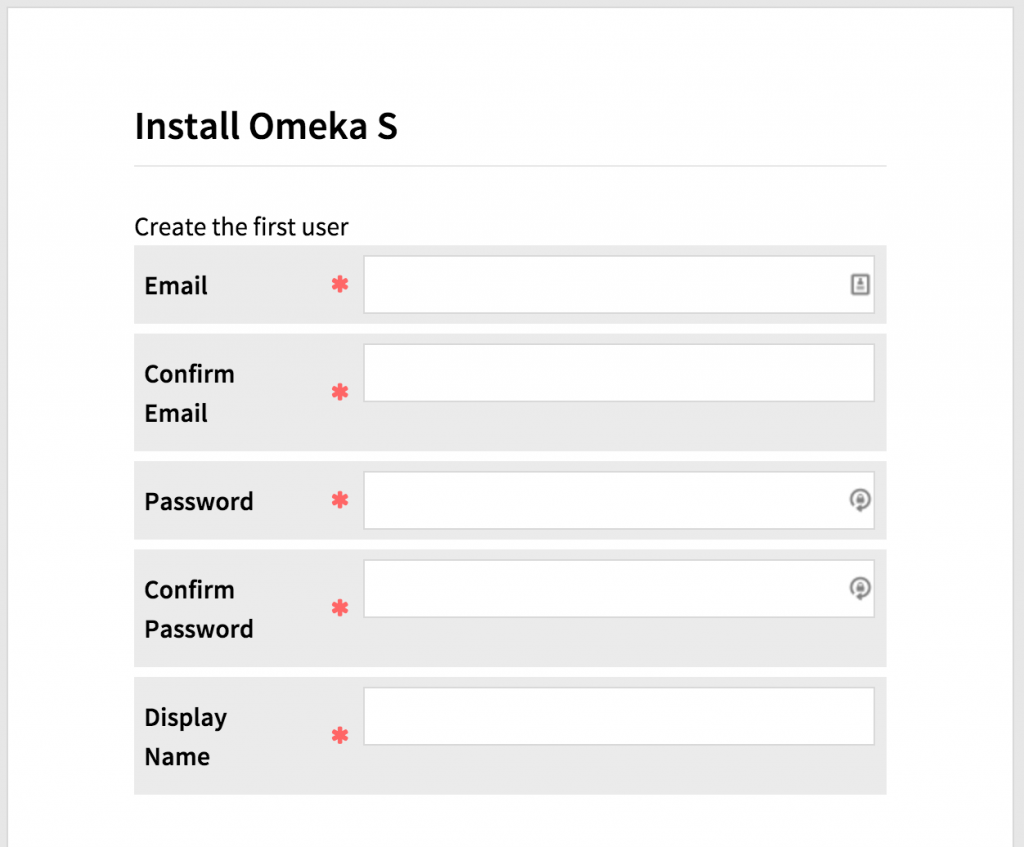
Click ctrl + x to save the database.ini file, and you should be all set. Now you jsut need to navigate to the URL you were installing Omeka-S, such as http://test.mydomain.com, and you should see the following screen asking for you to create the first user and password:
__________________________
For server admins only:
If you are managing the server and installing Omeka-S for a client, use the su command to assume the role of that user so there is no need to change permissions afterwards. For example, if I was logged in as root user, and wanted to assume the role of jimgroom, I would type the following command as soon as I login:
su jimgroom

I just wet myself. Command Line, API, JSON-LD. 😉
Who am I, Kin? What have you done to me? I want my old life back now 🙂
Hello
I install Omeka s but I have this error.
403 Forbidden
Omeka\Permissions\Exception\PermissionDeniedException: Permission denied for the current user to access the index action of the Omeka\Controller\Install controller. in /var/www/html/application/Module.php:395
Stack trace:
#0 /var/www/html/vendor/zendframework/zend-eventmanager/src/EventManager.php(271): Omeka\Module->authorizeUserAgainstController(Object(Zend\Mvc\MvcEvent))
#1 /var/www/html/vendor/zendframework/zend-eventmanager/src/EventManager.php(151): Zend\EventManager\EventManager->triggerListeners(Object(Zend\Mvc\MvcEvent), Object(Closure))
#2 /var/www/html/vendor/zendframework/zend-mvc/src/Controller/AbstractController.php(105): Zend\EventManager\EventManager->triggerEventUntil(Object(Closure), Object(Zend\Mvc\MvcEvent))
#3 /var/www/html/vendor/zendframework/zend-mvc/src/DispatchListener.php(119): Zend\Mvc\Controller\AbstractController->dispatch(Object(Zend\Http\PhpEnvironment\Request), Object(Zend\Http\PhpEnvironment\Response))
#4 /var/www/html/vendor/zendframework/zend-eventmanager/src/EventManager.php(271): Zend\Mvc\DispatchListener->onDispatch(Object(Zend\Mvc\MvcEvent))
#5 /var/www/html/vendor/zendframework/zend-eventmanager/src/EventManager.php(151): Zend\EventManager\EventManager->triggerListeners(Object(Zend\Mvc\MvcEvent), Object(Closure))
#6 /var/www/html/vendor/zendframework/zend-mvc/src/Application.php(332): Zend\EventManager\EventManager->triggerEventUntil(Object(Closure), Object(Zend\Mvc\MvcEvent))
#7 /var/www/html/index.php(17): Zend\Mvc\Application->run()
#8 {main}
Could you help me?
Gus,
Are you running PHP 5.6 or above? Folks have had similar issues lately, and it seems that the recent release is not compatible with PHP 5.5. Check that and let me know if that helps.
Thanks very much for your answer…
I have PHP 7