
Yesterday was a good day for the bavacade, I got the Elevator Action Multi-Kit from High Score Saves up and running. This kit not only saves up to 10 high scores, and enables free play that allows attract sounds, but also throws in 6 more games to boot, namely Jungle Hunt, Jungle King, Pirate Pete*, Time Tunnel, Space Seeker, and Seafighter Poseidon—the last four of which are new to me. I was excited to get this installed on one of two Elevator Action boards I have.
These Taito boards can be a bit confusing. To make matters worse, my boards were not identical to those in the installation guide. So, below are some images of the board set I was working with in the event it helps anyone else, and oddly my other board is identical, so I don’t think it is a one-off fluke. Anyway, to the boards….
The ROM daughter board is mounted on the game board.
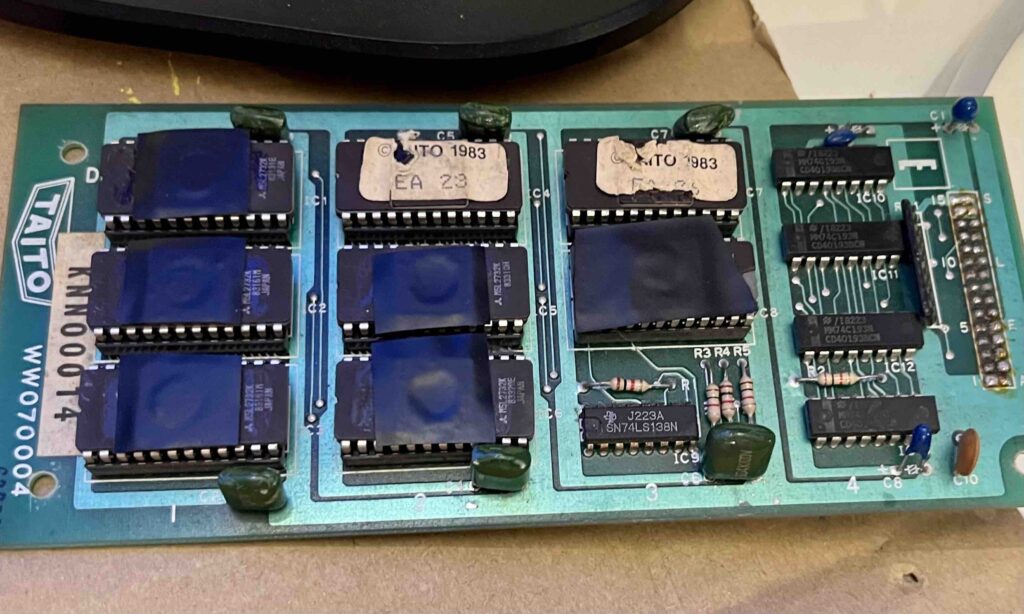
Taito daughter ROM board for Elevator Action
Then there’s the game board which is where the above ROM board is mounted:
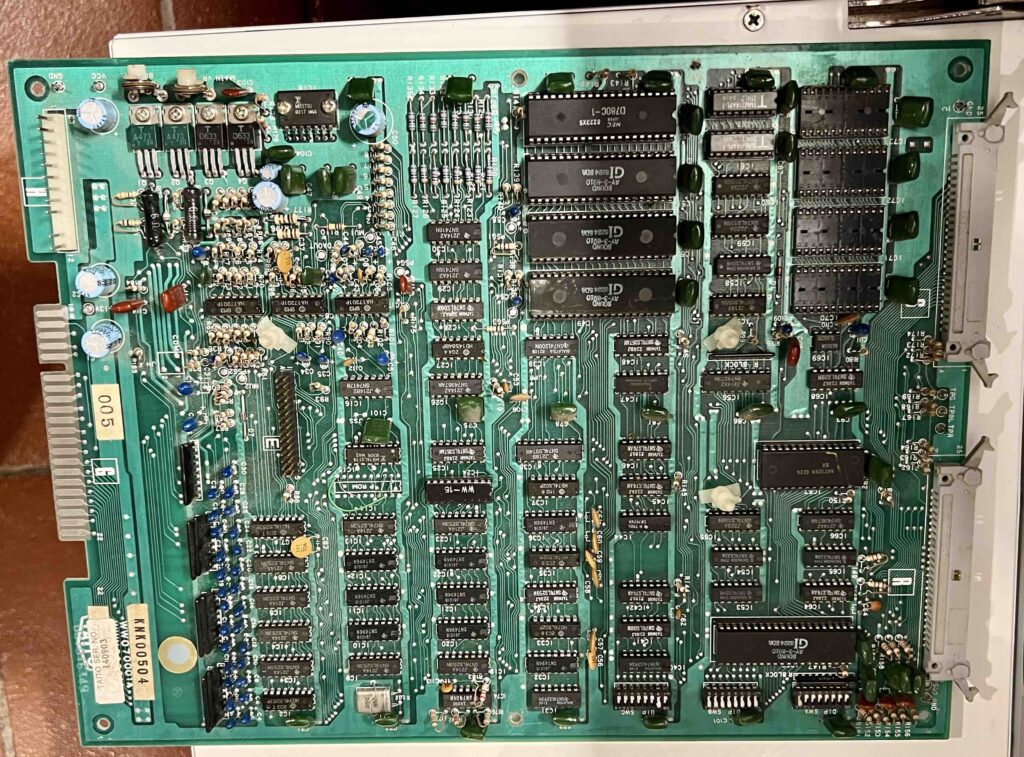
Taito game board for Elevator Action that has the Sound z80 chip where the sound mod goes
The video board is mounted beneath the game board in the opposite direction, and you should not have to touch this board:

Taito video board for Elevator Action, you need to make no changes to this one
Then the CPU board, which is face-to-face with the video board, but separate by 1″ spacers:
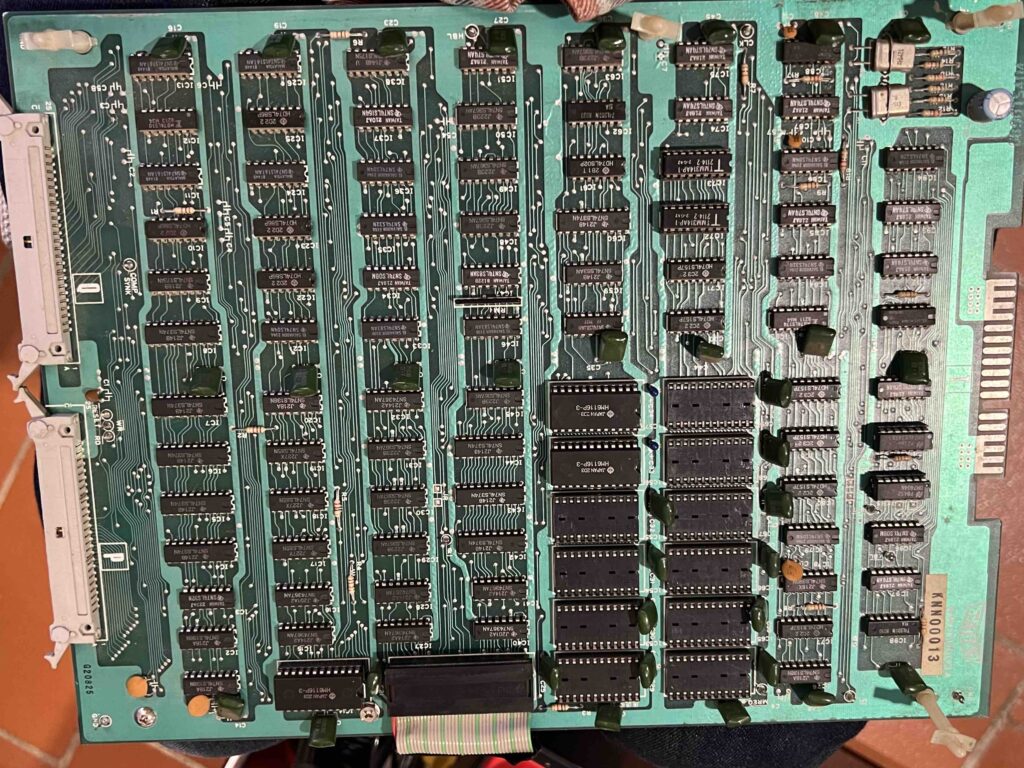
Image of Taito main CPU board for Elevator Action
Finally a ribbon-cable attached CPU board that connects to the main CPU board. The ribbon cable attaches where the z80 chip would normally be, and this would be where the main multikit daughter board would go if you had a normal board set, unlike me.
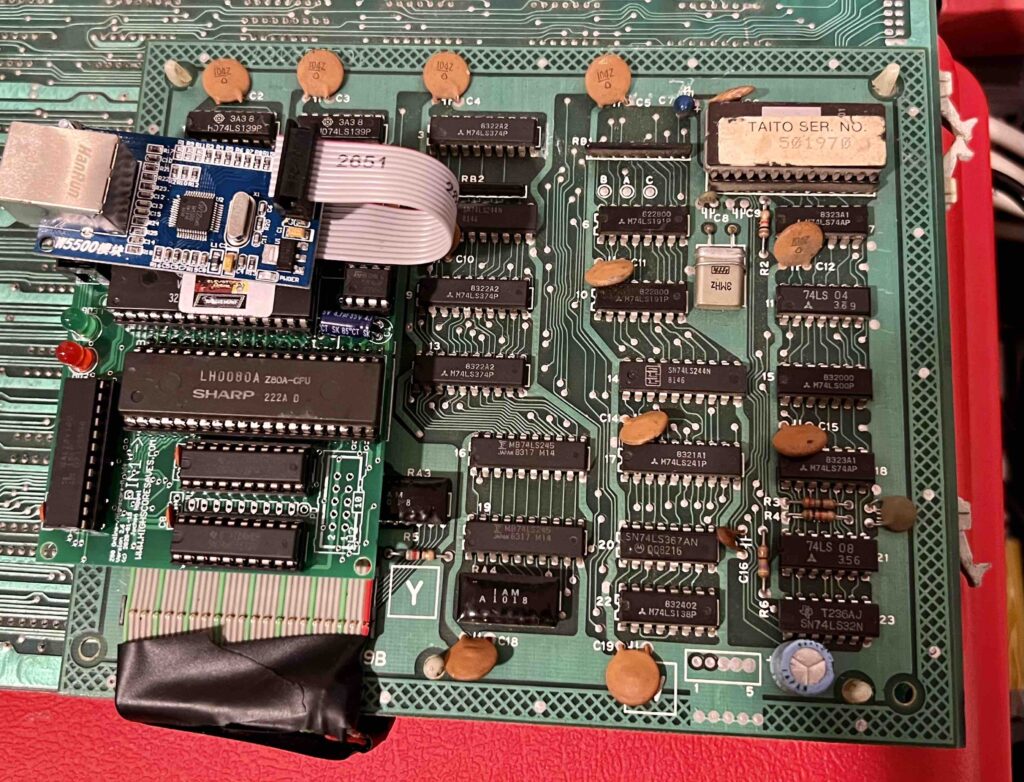
Image of Taito attachment CPU board for Elevator Action, notice the main multi-game daughter board is attached
The CPU attachment board has a socketed z80 chip where the main multi-game daughter board goes. Also, the chip in the upper-left hand corner with the “TAITO SER. NO.” label is the MCU chip, and you do not need to remove that.
I took my boards apart, and followed the installation instructions available through the website. But once I realized my chip numbers and the chip locations were not always identical, I reached out to the proprietor at High Score Saves and he gave me all the advice I needed, so big shout out to their wonderful service!
Once the daughter ROM board is removed, no need to re-install
In short, the first board, the ROM daughter board, does not need to be replaced after the multikit is installed. Once you take it off, it can stay off. On the game board, you need to remove the z80 chip the instructions point to, as well as (in my case) two additional ROM chips, namely EA 9 and EA 10.† The guide notes there are three to remove, but my boards only had two.
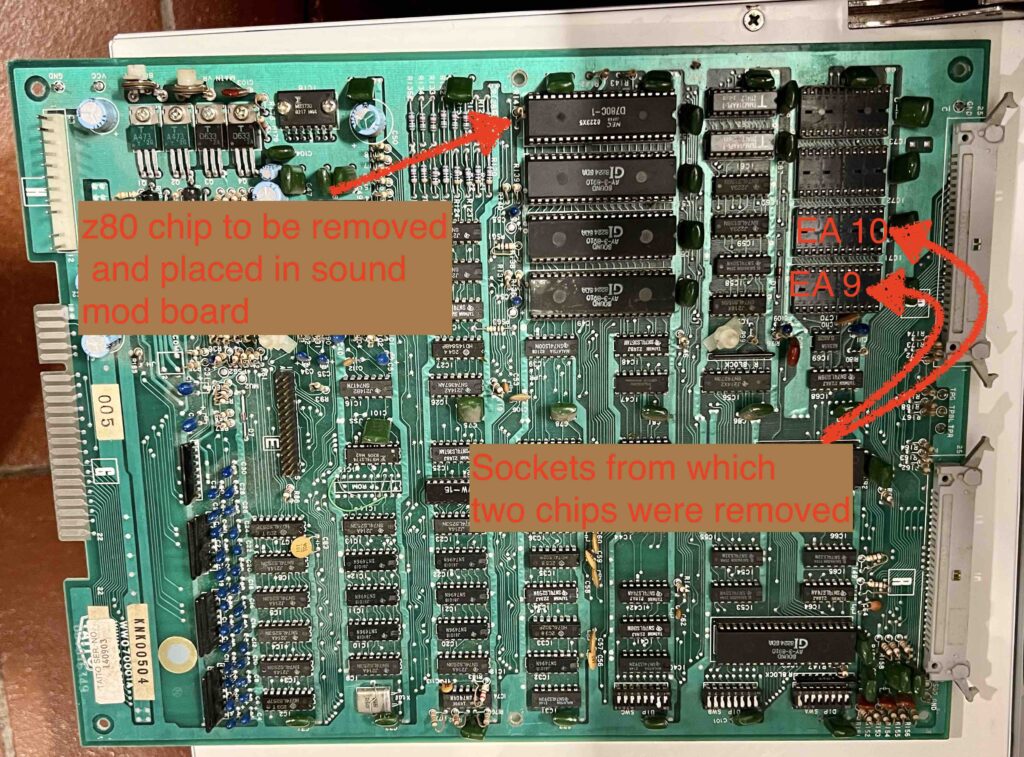
Modifications needed for game board
Once you remove the z80 chip from the game board you can place the sound multikit daughter board in this z80 chip being sure to match pin 1 when inserting. Here is a picture of the sound multikit chip installed, notice the z80 chip, once removed, is then placed in the available socket in the daughter board:
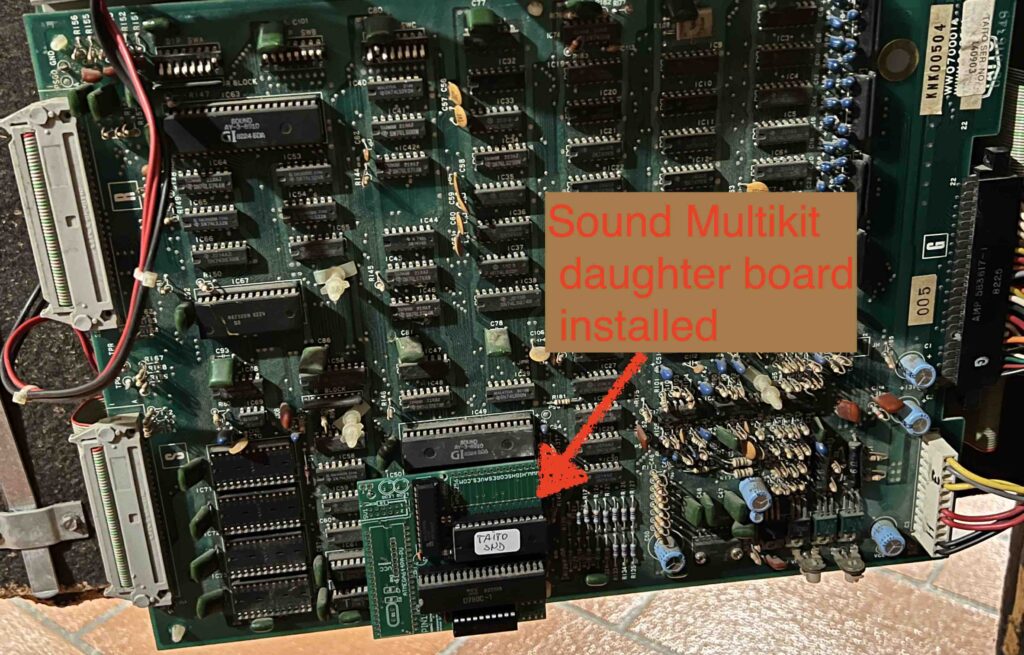
Game board with sound card for multikit installed
On the main CPU board you need to remove all ROM chips save the two pictured below in the upper left-hand corner of the two rows of ROMs.‡
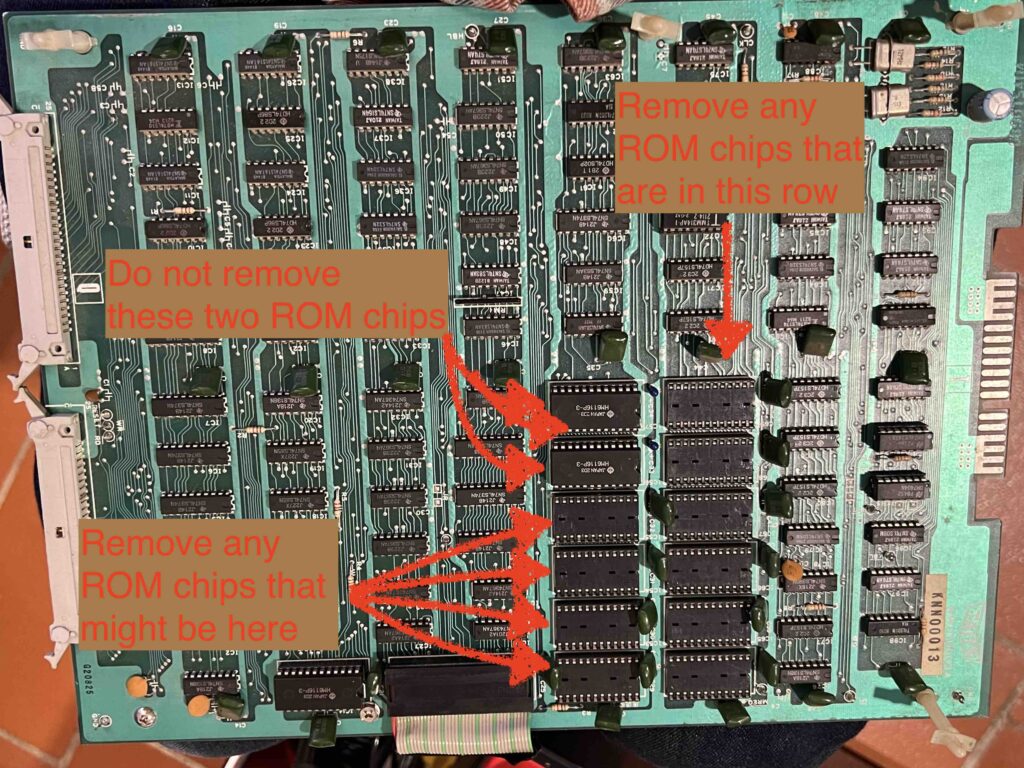
Removed 8 ROM chips from the main ROM board (instructions say to remove 9, but I only had 8)
Once you have the ROMs removed you need to remove the z80 chip on the CPU attachment board and install the main mulitkit daughter board. The MCU chip—located in the upper right-hand corner in image below—will not need to be removed as noted earlier:
CPU attachment board with z80 chip that needs to be removed from socket and placed in daughter board (matching pin 1)
After that re-assemble the board and everything should work. I got extra lucky because the board was not working after I first tried and failed to install the kit it the first time. I realized too late I only had one of two multikit boards needed—the main multikit board—having left the sound board back in Virginia. So I stopped the work and ordered a new sound board, but when I returned to install the kit for this board a second time it was not working. I decided to go ahead with the multikit anyway as a hail mary to see if it would save the extra board, and to my surprise and immense relief it worked. I now have two functioning boards, one with the original Elevator Action chips and the other modded to have 6 additional games and all the other bells and whistles. It was a big win for the bavacade. What’s more, I hope one or two people out there that have a weird set of Taito boards, like I did, find this post useful.
___________________________________
*Another re-release of Jungle Hunt with pirate theme swinging between ship masts and fighting sharks instead of alligators in the water.
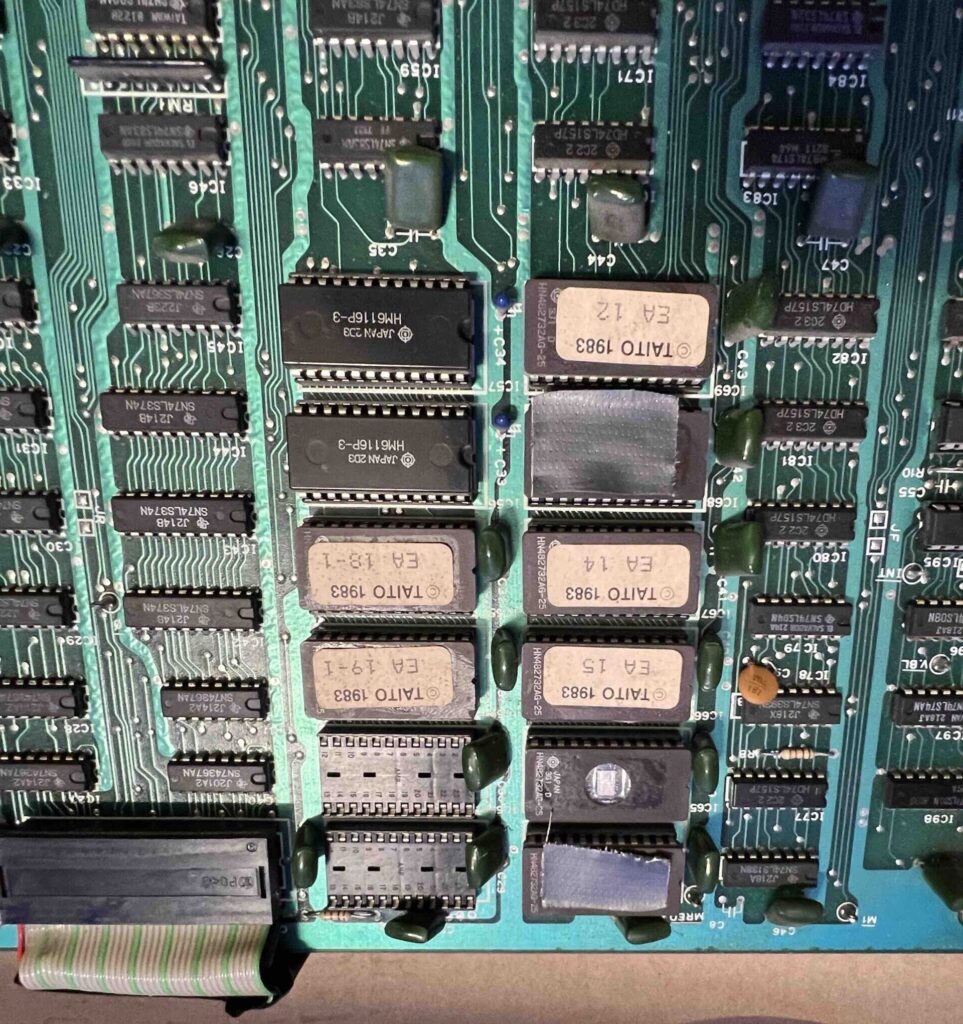
†Below is an image of the game board that still has ROM chips EA 9 and EA 10 installed for reference:

Image of game board with two ROM chips installed that were then removed
‡ Below is a picture of the chips removed (save the two in the upper-right row) from the main CPU board for future reference:
Reference for the chips I removed

Will you be able to add Jetpack to this?
https://www.youtube.com/watch?v=YsK95GBU-SA