
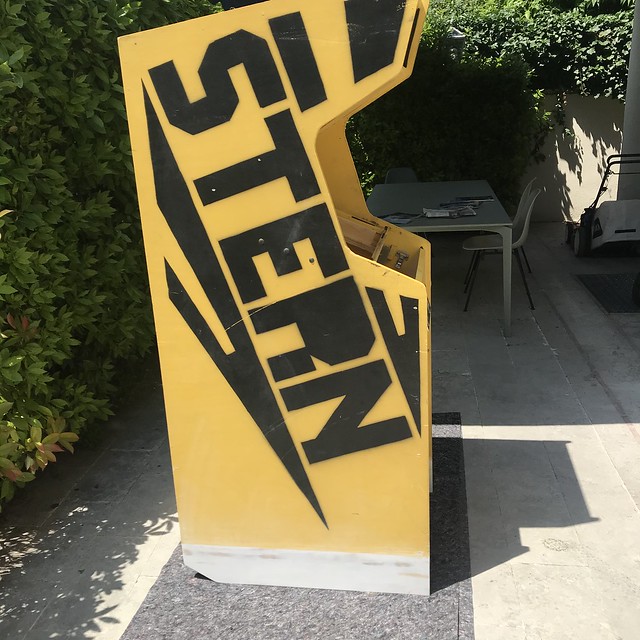
I finally have a bit of time to provide an update on the Scramble project, which was officially finished this past weekend! In order to compartmentalize, I’ll just cover the stenciling of the side art in this post, which was by far the most labor intensive part of the entire project. As I mentioned in my last update, I brought back the stencil kit I bought from This Old Game in order to replace the generic STERN side art with the original abstract astronaut art.


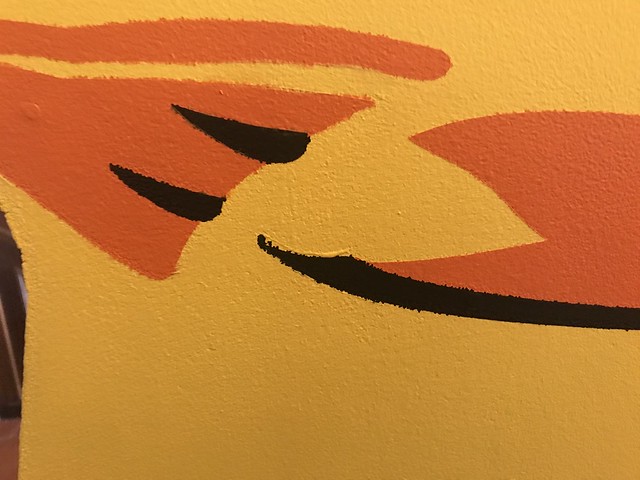
Once I got a few coats of primer and the base yellow laid down, it was time for the stencils. This was my first time using stencils, and I made a few mistakes for sure. The biggest was opting to roll the paint rather than spraying. The water-based paint I was using ran a bit so the edges where the colors overlap were not as sharp as they should have, it is particularly noticeable when you get up close.

I bought the spray paint with every intention of going that route, but I was concerned with the paint going all over the place given I don’t have a dedicated, enclosed space like a garage. So, in the end, I opted for water-based roll-on paint, and I am now wondering if latex would have been a bit better, but you know what they say about hindsight. Anyway, that was probably my biggest mistake as a first-timer, so if you’re reading this and contemplating rolling the stencils with paint, think twice about it. I spent hours after the fact trying to clean up the lines, and they’re still far from perfect.
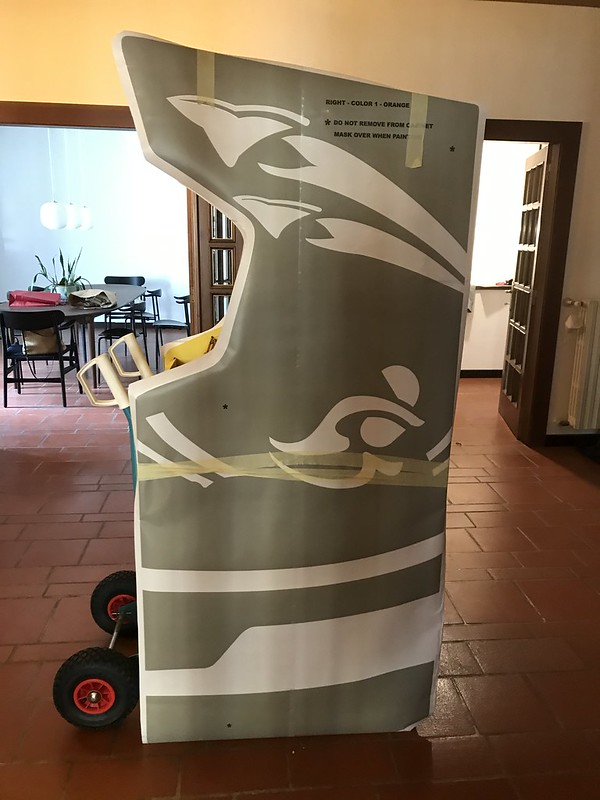
Anyway, above is an image of the first stencil mask, and the thing about these bastards is you have to line them up, then tape them across the middle with masking tape to hold them in place. After that you fold the top half down and peel the mask on the back off and cutting the plastic away. After that you stick the stencil to the cabinet. You then do the same thing to the bottom half of the cabinet so that the stencil is secured to the side of the cabinet with only the front mask left to remove.

Now you have to peel off the front plastic, which is the part of this process that takes the most time in my experience. I would estimate at least 2 hours for each side for each stencil. With 2 stencils for each side that makes a minimum of 8 hours in mounting and peeling the stencils, and that does not include painting each color on each side with 2-3 coats. It was definitely labor intensive.


But the first of the two colors, safety orange, came out pretty damn good.

After several coats of orange you rinse and repeat for the second stencil, which is black. This is where you start to see the impressionistic astronaut design start to take shape.

And it was not only more detailed peeling, but also you had to align the second stencil with the first bylining up the asterisk on the first stencil with the pre-cut triangle on the second:


That was kind stressful, and the peeling of the stencil did not get any easier, in fact this one took me longer than I care to admit.

And while exhausting, it did get finished. It was now time to paint the black of the design:


Aafter a couple of coats of the black I was ready to peel and unveil the design:

At the right angle and distance it looks perfect 🙂 There were some imperfections that I mentioned earlier with lines not being as sharp and tight as they might have been, but I do admit I’m kind of knit-picking given the time and energy I put in and the fact that I will be the only person using this machine for the foreseeable future.

After I let the project sit for a bit I came back with a brush and cleaned up as much as I could, and I do think it is presentable at the very least:


There is a full album on Flickr with all the shots of the stenciling for anyone interested. On a personal note, this project was absolutely heaven for me. While I made some rookie mistakes, the idea of spending several hours each morning bringing this relatively beat up Scramble cabinet back to its former glory was a deep source of happiness. So after two weeks of painting and stenciling it was time to put the cabinet back together, and I’ll save that story for the next and final update.

Holy crap, the design, the colours…that thing is gorgeous!
It is gorgeous, Antonella is not necessarily a fan of these hulking machines in our foyer, but this one might be able to stay 🙂
This really should have been done in a Bob Ross wig. Then there would be no mistakes, only happy accidents. But seriously, I’m glad you wrote this up. I was curious about the process.
The next one I restore will be a Bob Ross-like TV series 🙂
Pingback: Scramble Project Update: Reassembly | bavatuesdays
Pingback: Refurbishing Moon Patrol: the Photo Documentary! | bavatuesdays
Pingback: bavacade work log 2-9-2023 | bavatuesdays
What shade of Yellow did you use for the cabinet
I got it matched at a paint shop here to make sure it is exact, but I think it is pretty much identical yellow to Pac-man, so shouldn.t be hard to source.
Actually, not sure this will be of help, but I got the exact custom mix the did for me, which was spot on. I am not a paint expert, but here are the various values, maybe someone mixing it custom will understand them 😉
UWW: 261
UYX 60
UZL 3
UYY 150
Also used glossy (but semi-gloss might even be better) and water-based paint if that helps at all. The color that will work in terms of spray paint is Rustoleum’s Sunburst Yellow, it looks pretty damn spot on: https://spraypaint.rustoleum.com/products/protective-enamel-spray?ls=7747830&lc=Gloss%20Sunburst%20Yellow
Pingback: Elevator Action Project Update | bavatuesdays