The semester is coming, so here’s a little something to keep you going…
Including a Custom Header Image in K2:
To include a custom header in K2 you have two options. You can use the custom header tool in the tabs Presentation –> Custom Header or you can modify the Cascading Style Sheets (CSS). Modifying the custom header via the Presentation tab is relatively self explanatory, but it does not give you as many options for presenting your header. In particular, it is difficult to move the text in the header up or down to complement the header image. For this reason we will look at adding an image in the header using the CSS. First things first, select an image for your header that is 780px wide by 200px high. Make sure this image is optimized for the web and is no bigger than 25k. Upload this file to the wp-content/uploads folder (or some other folder designated for uploads). After this, go into the Presentation –> Theme Editor tab and make sure you are editing the “style.css” file. The following code should be replace the current styles for the header. Keep in mind two things: 1) I extended the height of the header to 225px so that the page tabs would not overlap the image -there will be a 25px space for the page tabs (in this case black because that is the color I set for the header background); 2) the URL is specific to one particular site -if you want to use the code on another site you are going to have update the address accordingly.
#header {

      padding: 0;

      margin: 0;

      position: relative;

      height: 225px;

       background: black url(../wp-content/uploads/fairbanks.jpg) top center no-repeat;

}
Moving the Text in the Header:
Depending on the image in your header you may want the freedom to move your header text around. This is easily accomplished by modifying the CSS code for K2. For this code I added a text-align: right; and changed the padding to 50px (from the top) and 20px (from the right). The padding code works as follows: padding: top right bottom left; (substituting a pixel value for the appropriate positions as you see in the code below). If the font is too big you can change the size using the font size value, etc.
h1 { /* H1 is the title in the header */

	font-size: 3em;

	font-weight: bold;

	letter-spacing: -1px;

        padding: 50px 20px 0px 0px;

        text-align: right;

	}
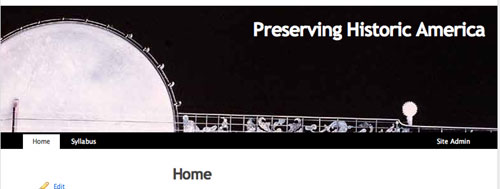
After you changed and updated both these areas of the CSS file you should get something like the image below.
Changing the Size of the Content Area:
Finally, if you want to remove the sidebar and have a larger content area there are two steps:
- Go into Presentation –> theme editor and edit the “Page Template” file. Remove the get sidebar call that looks like this
. - Next, edit the primary class of the CSS and change the width value from 500px to 780px as illustrated below. Additionally, you may want to edit the right and left margins to center your work a bit more. I changed the right and left margins below from 10px and 30px –> 50px and 30px in order to center the body of the text a bit more.
#primary {

	width: 780px;

	float: left;

	padding: 20px 0 20px;

	margin: 0 50px 0 30px;

	display: inline;

	}
That’s it, hope this helps.
For a far more thorough and thoughtful tutorial on doing things with the K2 theme for WordPress, check out Paul Stamatiou’s tutorial here. His instructions for placing a rotating images in your K2 header are quite good, and it proves to be a very easy hack!