Why I Love Reclaim Roundup

Screenshot of September's Reclaim Roundup

September’s Reclaim Roundup-It’s So Beautiful!

After every new Reclaim Roundup monthly newsletter I usually do three things: 1) read it, 2) remark on how awesome it is, and 3) tell myself I need to blog about it! I regularly do the first two of those three things, and this go-round I’m gonna even do the third thing as well. BLOG IT, YEAH!

Taylor Jadin’s “I’m blogging right now, take a message” GIF

When we dreamt up the idea for a monthly newsletter last November during our annual company trip in Nashville, I had no idea it would become such an integral part of both tracking our work internally as well as sharing it more broadly with the world. Not only has it been an amazing document capturing what we’ve been working on every month of 2022, but also really cool to see more and more folks not only subscribe, but reference the newsletter when they reach out to us. Pilot Irwin has been leading on the newsletter since its inception and they’ve done an absolutely bang-up job from day 1 with everything from an engaging and inviting tone to the brilliant, gem-like GIFs.

Image of the 7 dwarves working

What’s more, every time we share something in Slack, it gets a little paper airplane emoji to let us know it’s being included in the Roundup—it never gets old! The Roundup is not just a newsletter—although it is definitely that—it’s a testament to the shift in culture afoot at Reclaim Hosting. We’ve doubled in size from 5 to to 10 employees over the last two years and as a result we can finally look-up a bit from support tickets and server monitoring to do targeted and intentional outreach to our community around broader issues like hybrid working, open source media tools, WordPress Multisite management, and even a series dedicated to how we built-out the Roundup using Ghost.

The next step for the Roundup is to start looking outwards a bit more to highlight and promote the work Reclaim community members are doing. In fact, I think that’s why the Roundup is so near and dear to my heart, because celebrating the work of others is crucial to the success of any project I’ve been a part of—I’m thinking here of the likes UMW Blogs and ds106 to name just a couple. So we’re committed to featuring more community work as part of future Roundups—which could come as soon as November. Just another brick in the Reclaim Wall!

So like and subscribe, dammit, and make some edtech art!

Posted in reclaim, Reclaim Roundup | Tagged , , | 2 Comments

Vinylcast #54: The Pogues’ Red Roses for Me

Backcover of the Pogues’ first studio album Red Roses for Me (1984)

For 54 it is another appearance from the Pogues‘s, this time their first studio album Red Roses for Me from 1984. I picked this vinyl up 10 days or so ago in Venice, and I have to say it sounded quite good. A bit noisy, but that’s how I like it. Physical media #4life. It’s an original German pressing, and the cover might be the only time I have seen a band member added via insert. It’s a raucous album and I have to say that the Pogues may be the most unlikely and beautifully imperfect band to emerge from the 1980s, I never tire of listening to them. Anyway, enjoy the recording!

Posted in ds106radio, on air, vinylcast | Tagged , , , | Leave a comment

bavacade repair log 10-3-2022

I have been hard at work on the bavacade this weekend going through part 1 of the to-do list. I would like to make each game’s repairs a post of its own, but if I don’t capture this stuff in the moment I forget it pretty quickly, so going to try and quickly record some of the repairs over the last few days and then use these logs as notes for longer posts, or at least that is the plan.

Venture

I knew a good part of this weekend would be dedicated to Venture, and I wasn’t wrong. I spent much of yesterday afternoon testing the K4600 from Galaxian (which worked!) and then methodically testing all voltages and continuity on the edge connector from the power supplies.

Venture with Test Pattern Color Bar

Color bar test on Venture for WG Test Pattern Generator is a success

I’ll start with the win: the Wells Gardner K4600 monitor chassis from Galaxian worked in Venture. At first the screen was black, but after connecting a Wells Gardner Test Pattern generator I picked up last year I was able to confirm the chassis is fine, and that the original K4600 I had in there needs a capkit, or more given it was completely dead. Here is a quick video of the test pattern generator tool, which is pretty cool:

After that, I started methodically testing all the voltages from the universal power supply to both the audio board and main logic board edge connectors. The universal power supply delivers +12V (hi), +12V (lo), -12V (hi), -12V (lo), and -5V.* I was testing for continuity to begin with, and then switched to testing for voltages but got confused and linked a 12V charge with a non-charged connector and a resistor on the main logic board started smoking. It was a rookie mistake, and I’m not happy. That said, I’m hopeful I didn’t fry the entire logic board given there were no additional signs of damage after a close visual inspection, but that might just be wishful thinking.

Resistor 302

Resistor 302 is fried, let’s hope that’s all that fried

I’m waiting to get a packet of resistors to change the one I fried out and then test the board again. While doing the close inspection of the board I realized the edge connectors might have been inverted, which would make some sense given the audio board seemed to be getting no power at all. That would be a very bonehead mistake on my part, but I was sure I checked that when the game was still in America and I was troubleshooting there, if that is the issue then we may have a working Venture soon (assuming it is not fried).

Venture's audio and main board edge connectors

Venture‘s Main logic board and audio/video board edge connectors

I printed out a copy of the wiring diagram for Venture, and used it to record the values, and this was helpful. It’s pretty cool that I am starting to wrap my head around these things that were traditionally unintelligible to me.

Venture Wiring Diagram

Venture wiring diagram with annotations

The other thing to note on Venture is that I am pulling in only the -5V from a switching power supply given it is not working on the original universal power supply. The +5V is working on the original power supply, in fact it is high at +5.4V, but that is generated separately from the +/-12Vs and -5V on this particular power supply. When I tested the -5V from the switching power supply to the edge connector while grounding to the universal power supply I got no reading. But when I grounded it to the switching power supply I could see the -5V successfully delivered. I’m wondering if this might be causing a problem for delivering -5V to the audio and main logic board. I’m not entirely sure—but I’m thinking about piggybacking the ground from the switching power supply to the universal power supply ground for -5V just to be sure. I’ll consult with an expert or two before I do given I’m at the edge of my already limited understanding of electrical systems and I don’t want to cause any more unnecessary damage.

-5V for Venture PSU

Left to do on Venture is repair the burnt resistor, ground -5V to universal power supply (maybe), and invert edge connectors after testing the rest of the values given I think a couple/few +5V readings are outputs from the main logic board to the control panel, audio/video color board, and coin door that depend on being mediated through the main logic board, so I don’t think the absence of +5V reading on those connectors is accurate, but we’ll see.

Dig Dug and Bagman

Dig Dug with G07 Chassis looking good

Dig Dug is looking good after swapping in the G07 I did a capkit on, proud bava!

So while Venture was a mixed bag at best, swapping G07 chassis between Bagman and Dig Dug was a win. and particularly sweet win because it is a G07 chassis I did a capkit on that I thought was having issues in Bagman, but was not in Dig Dug and it solved the jerkiness problem. In fact, both Bagman and Dig Dug no longer have monitor issues, and I can relish my first truly successful capkit, the success of which buoying me to try one on the K4600 from Venture that’s dead, maybe later this week.

Dig Dug looking good

Dig Dug looking good!

Anyway, this means the only things left on Dig Dug are to get the marquee and coin door lights working and eventually a bit of cabinet repair on the lower back portion of the base. Will hopefully have Alberto work on that later this fall.

Bagman has Bad Sprites

Sprite issue on moving elements of Bagman

Bagman has bad sprites

Sprite issue on moving elements of Bagman

As for Bagman, that is already entirely minted out, the only remaining issue is after the board heats up the moving sprites start to pixelate and loose all definition into a striated color blob, so this is another board to ship along side the Cheyenne, and Moon Patrol.

Asterock

I had big plans for removing the switching power supply from Asterock in order to consolidate that cabinet down to one wall plug and have everything running off the original power supply that has been repaired, including the heat sync Roberto fixed.

Asterock Heat Sync

Heat sync installed

But after looking at all the various wires I would have to move from the switching power supply to the edge connector I got scared.

Asterock Power Supply

Switching power supply inputs from edge connector on Asterock

Instead, I opted to simply hook power for the switching power supply (which was using its own wall plug) into the AC power lines using a few piggyback connectors that look like the following:

Asterock Power Supply Piggback Connector

Piggyback connector for tapping into 120V for switching power supply

Here is what the piggyback connectors look like in action, the brown and blue wires from the switching power supply are tapping into the main AC power lines (also blue and brown) going into the original power supply, and the green/yellow wire is the ground that is screwed onto the power supply along with several other grounds wires.

Asterock Power Supply

Brown and blue wires are 120V AC and green/yellow is ground, the close-up above shows the connections coming into the switching power supply

Asterock Power Supply

Overview of tapping 120V AC for switching power supply from AC wires coming into original power supply from the wall

Asterock Power Supply

Close-up of piggyback connectors tapping into AC going into original power supply

If I was an absolute purist I would have removed the switching power supply, but given this game already had power issues I think using the switching power supply will preserve the original that much more 🙂 Anyway, my plans to consolidate to one wall plug worked and Asterock is still running in all its vector glory. Asteroids was truly one of the most gorgeous video games ever made.

Asterock Power Supply

Super Cobra and Defender

On a smaller note, I added back door locks to Defender and Super Cobra, and I will add another to Bagman, replace both on Yie-Ar Kung-fu, and another to the back of Galaxian. I think after that I might need a few more, but we’ll see.

Super Cobra

____________________________________________________

*I’m not exactly sure of the distinction between high and lo here, but I think it suggests +12V tends towards more than the expected 12V, and 12V low means a bit less, like 11.90 or so, but I am not sure. That was wrong, I researched this and Ken Layton (RIP!) lays it out as clearly as he always does on the Arcade Forums:

The hi/lo means this:

+12v HI = +12 volts @ 3 amps

+12v LO = +12 volts @ 1 amp

-12v HI = -12 volts @ 3 amps

-12v LO = -12 volts @ 1 amp

In essecence you have two seperate +12 volt power supplies: one that can output a peak of 3 amperes and another that can output a peak of 1 ampere. Same goes for the -12 supply.

So what it boils down to is that are “electrically” four seperate 12 volt power supplies in there. I don’t think you’re going to find any power supplies made today that can put out a minimum of 4 amperes on the -12 volt line.

Posted in bava.tv, bavacade, bavarcade, video games | Tagged , , , , , , | 1 Comment

bavacade To-Do List, Part 1

It’s been about 3 weeks since the container arrived and my basement is starting to get back into livable shape. I’m gonna need to get some perimeter shelving for the walls to manage all the VHS tapes, laserdiscs, excess vinyl and toys (especially the Smurfs), but after that it will really just be getting all the video game cabinets in mint shape. In fact, that process is already underway. I will mention quickly before jumping into the to-do list that the basement office/arcade space is becoming everything I ever dreamed it would be and more. I’m realizing that one of my middle-aged passions is filling up space with shit I have collected over the years, and I’m totally at one with that.

A list of tasks for bavacade

Cheyenne

Image of Exidy's Cheyenne cabinet

Cheyenne

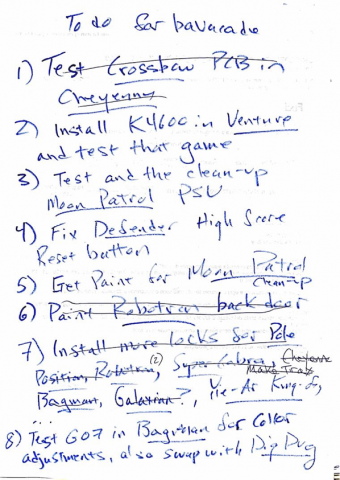
One game that has been down for a while now is Cheyenne. The sound board was having issues, and the monitor was curling at the top  of the screen which often means a capkit. I have a spare Crossbow board that arrived from the US in the container (the original board was also a Crossbow with the 440 multi-kit mod), so I figured I could try that board and see if the sound issues were fixed. Sure enough, the new board works well and the original speakers (which we replaced with new ones for testing) also had no issues, so I re-installed the OG speakers.

Bavacade

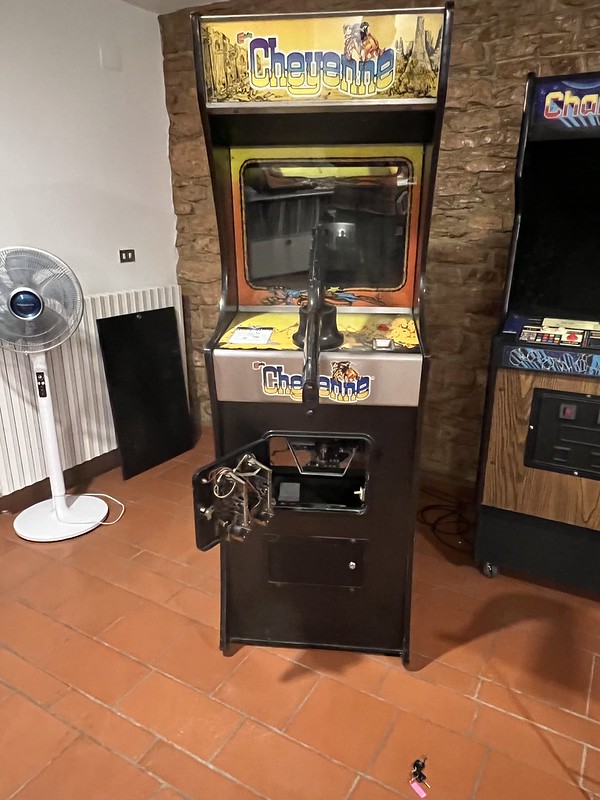
New speakers removed from Cheyenne

The only outstanding issue is that the screen is still curling at the top, so I need to swap out the Hanterex Polo 20″ chassis with a spare I have, then try a capkit on the original. If that works, then this game is back up and running and looking good. Roberto still has the audio board, so if he can fix that I can re-install the multi-kit mod and have a spare board that I know works.

Crossbow working in Cheyenne Cabinet

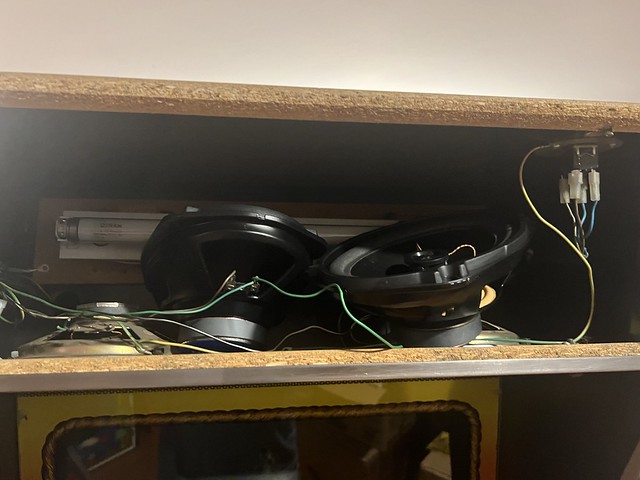
Excellent image and color on Cheyenne/Crossbow, but a bit of curling at the top

So things are looking good with Cheyenne at the moment—not done yet entirely, but working and moving in the right direction.

Venture

Venture

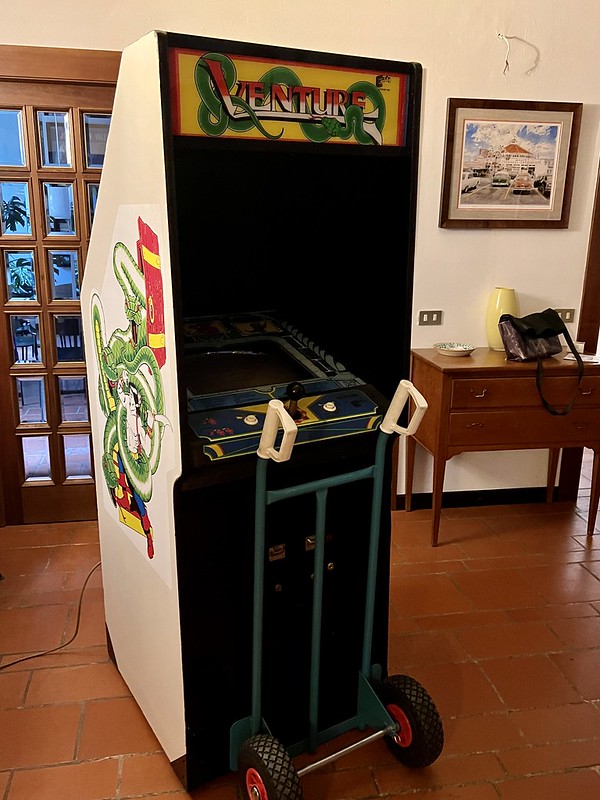
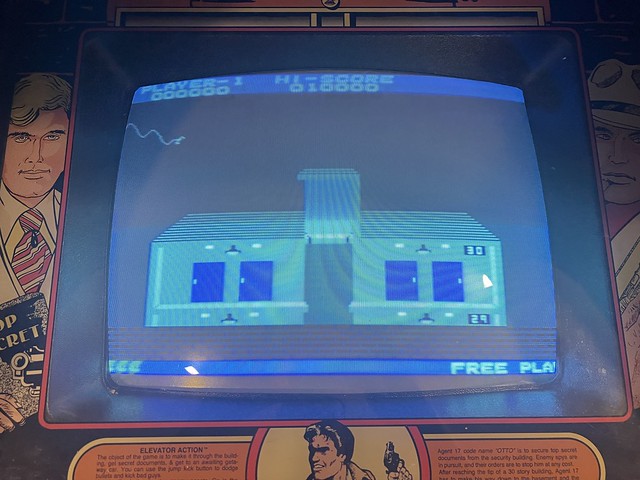
Exidy’s Venture, a childhood favorite!

While not crossed out on the list above, I did re-install the K4600 chassis I had repaired for Venture a while back, and it has been the bane of my existence for a couple of days now. Venture is the only game in my collection that I have never seen working, and I was sure I was close the other night, but alas I could not get any power to the monitor chassis no matter what I tried.

K4600 for Venture that is not getting power

K4600 Monitor Chassis for Venture not working 🙁

I re-installed the K4600 chassis and then traced all the power and re-hooked up the connectors.

Venture Original Power Supply

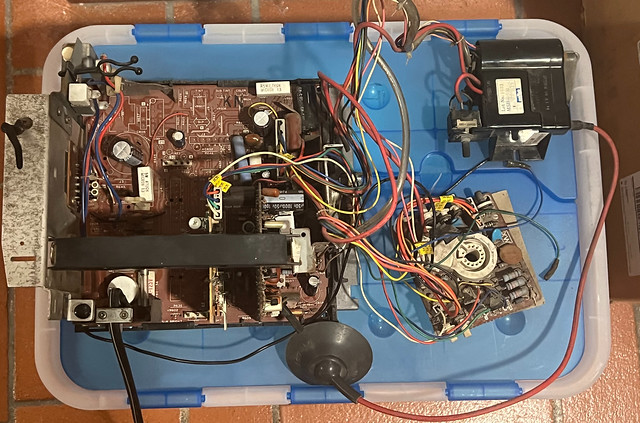
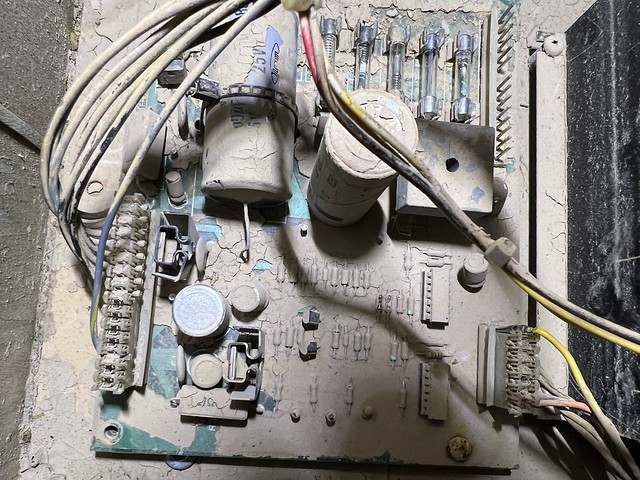
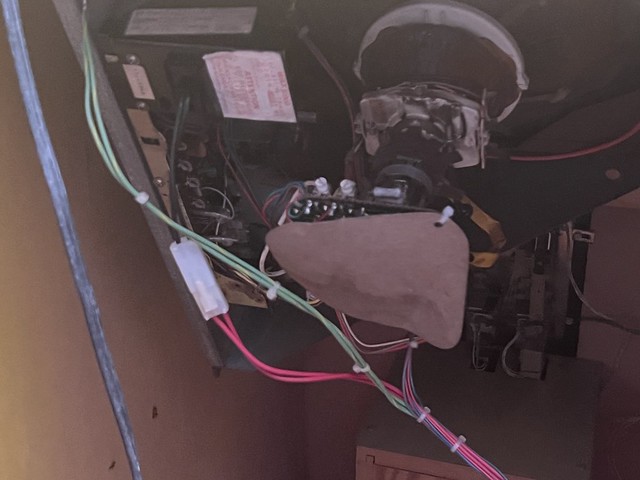
Venture original power supply

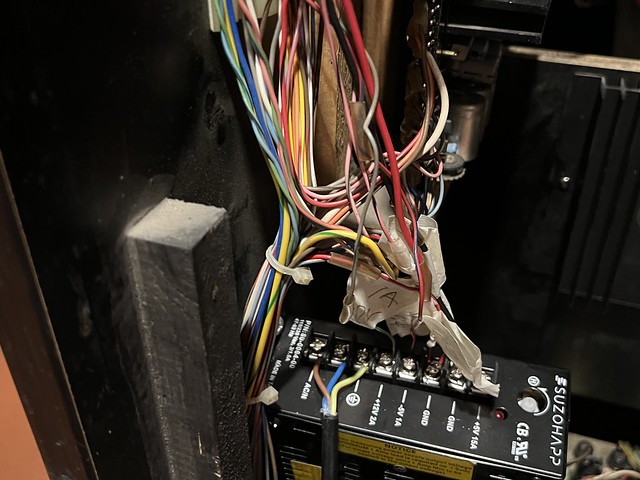
I noticed that -5V was not being generated by the original power supply, but +5V, +12V, and -12V were, so I swapped in a switching power supply to feed the board the -5V while the original power supply was delivering the rest.

-5V for Venture PSU

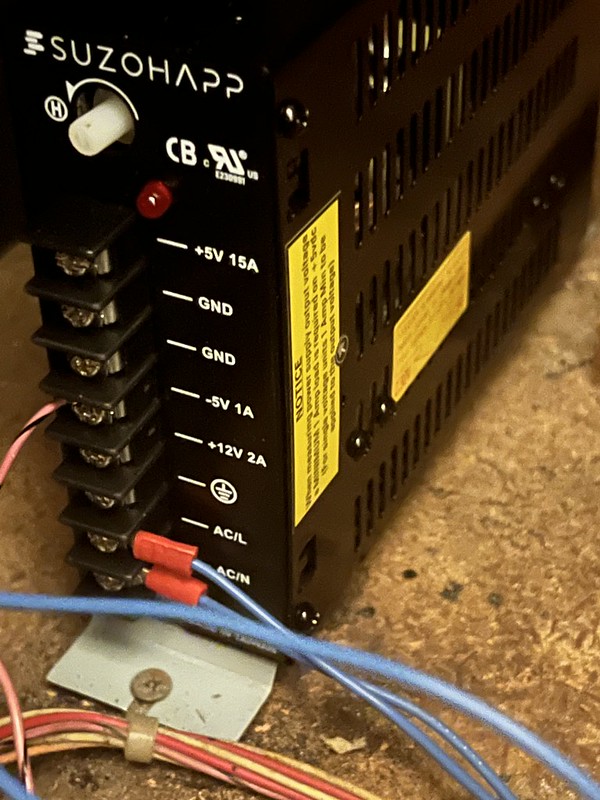
-5V from switching power supply installed in Venture

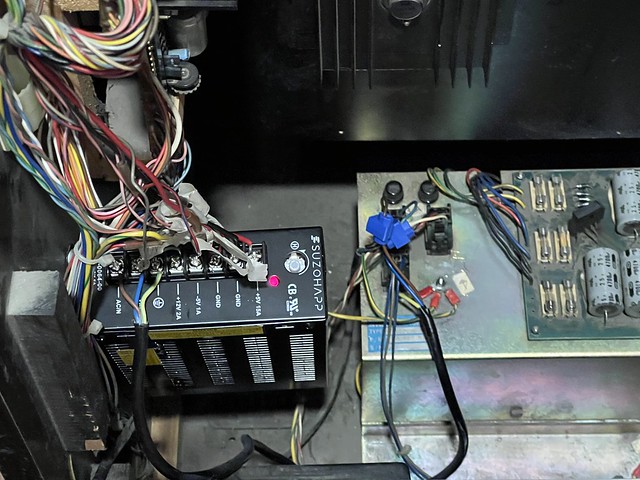
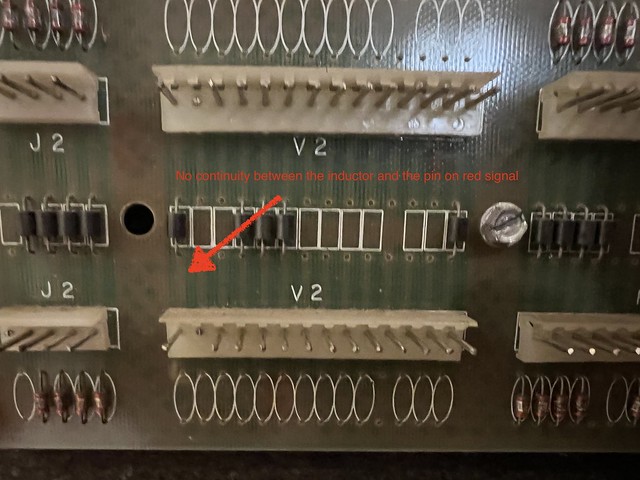
So I know for a fact all the voltages from the power supply are now correct after testing, but I believe something is not working along the board’s edge connectors, or perhaps in the wiring, given the board is not showing any sign of life.

Venture's audio and main board edge connectors

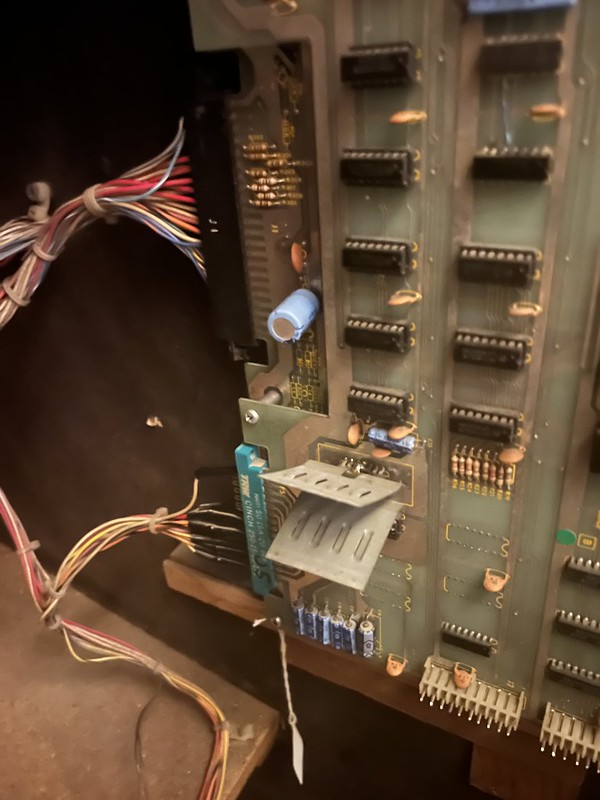
Edge Connectors for main and audio game boards in Venture

While I can’t see the screen given the power issue with the monitor chassis, the game should be playing blind, or I should be able to hear sounds when coining-up, pressing player 1, etc. But in this case there is nothing. My next steps here are to swap out a K4600 I have in Galaxian that I know works to confirm the issue with the chassis, after that I am probably going to have to test every connection between the power supply and the edge connector for continuity and the correct voltage. At that point I should be able to track down the issue, but not having a working monitor is annoying me to no end, so we’ll see on this one, it is still very much a work in process.

Cracking Venture

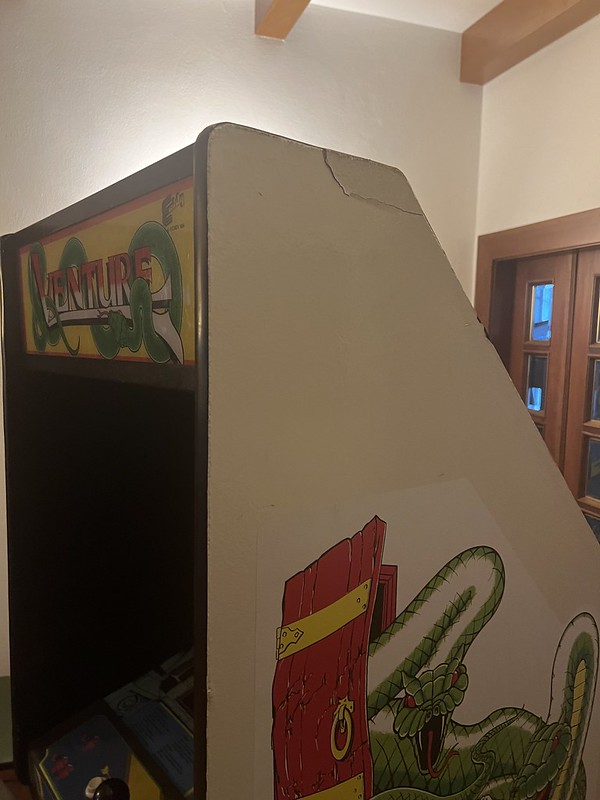
Cracked Edge on Venture Cabinet

Moreover, once I get everything working (so much confidence!) I’ll be stripping it down given the cabinet could use a good clean-up, as well as reinforcing certain parts and repairing a cracked edge near the top of the cabinet.
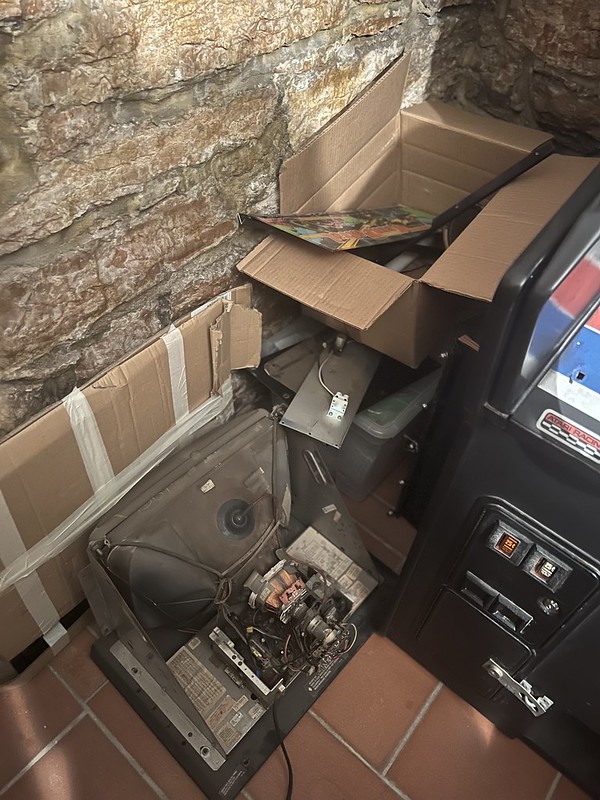
Moon Patrol

Moon Patrol Cabinet Disassembled

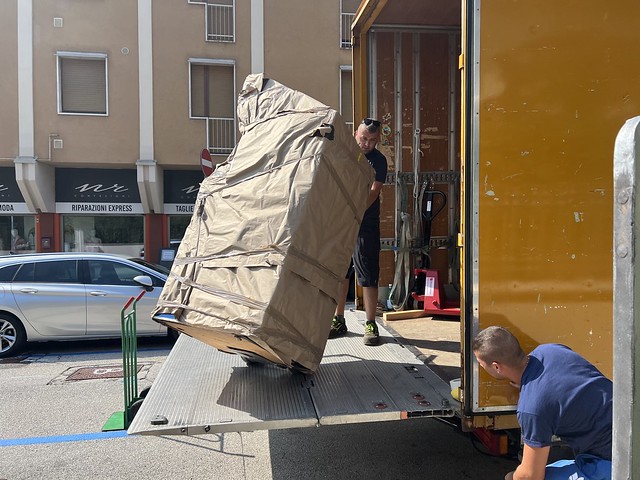
An empty Moon patrol cabinet

The Moon Patrol cabinet is probably the other biggest project right now alongside Venture. the bottom of the cabinet seems to have been submerged in water, but luckily, if not strangely, the water damage is limited, but the dirt and grime on the power supply tell a story.

Moon Patrol Power Supply Board

Moon Patrol dirt caked power supply

In fact, the bottom of the cabinet is salvageable, no need for cutting and replacing the bottom portion, but the coin housing is pretty rotted out and will need to be rebuilt. Luckily this refurbishing job will be a lot less overhead than Donkey Kong Jr or Scramble, so I’ll take it, and Moon Patrol will be restored to “like new” condition once I start cleaning the parts and Alberto takes the cabinet in to work his magic.

Moon Patrol Parts

Moon Patrol pieces

When I tested the game after it arrived I was getting garbage from the board, and I swapped out the G07 chassis and tested all voltages from the power supply so I can confirm it’s a board issue. I have since gotten a replacement board that Tim kindly shipped from Reclaim Arcade, so I can test that once I reassemble the game given right now the cabinet is totally empty in preparation for the cabinet work. I am beginning to think I could use a work bench for testing boards and monitors separately, but I am not at that stage of expertise just yet…one day!

Replacement Moon Patrol Board from Reclaim Arcade

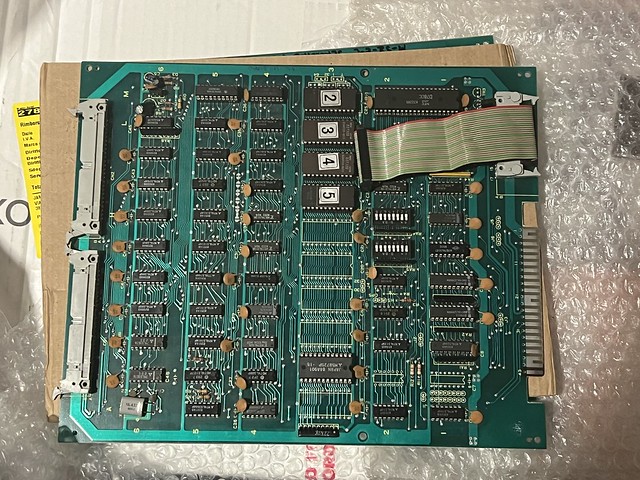
Extra Moon patrol board from Reclaim Arcade, thanks Tim!

The cool thing about Moon Patrol is I can use the parts from the power supply I will be cleaning up to help me figure out how to rebuild the Joust power supply (which is on part 2 of this list). I still need to test the voltages and see if it would work in Stargate (I took that power supply and put it in Joust temporarily), although not certain it will.

Defender

Bavacade

Twinsies

I am using a FPGA board in Defender and everything is working a treat, but I realized the High Score Reset button inside the coin door does not seem to be working.

Reset High Score Button on Defender

Defender’s Coin Door Switches

This is an issue because it’s the button you use to change game settings like number of ships, free play, etc. I think it needs to be re-wired, but still have not had the time to look at it. While preparing to look at it yesterday, I was moving the game with the back door off and immediately realized the monitor housing was not bolted down at all and was freely sliding all over the place. WTF! How did this monitor survive a trans-Atlantic journey?

Bolted down Defender

Mounted Defender monitor housing to prevent a lost monitor

Anyway, it was an easy fix, just four bolts and as many washers and nuts.

Yie-Ar Kung-fu in a Defender Cabinet next to a Defender cabinet

Defender and Yie-Ar Kung-fi side-by-side

While I was figuring out the perfect size bolts I realized Yie-Ar Kung-fu is in a converted Defender cabinet, so I could look at the bolts locking that down to figure out the right size, as well as compare the two for reference. I am thinking once I have everything working and some free time I’m going to try my hand at some custom side art for the Yie-Ar Kung-fu, given I love the bosses in that game and would even like to try the first GIF side-art project for a video game cabinet 🙂

Get Paint for Moon Patrol

Moon Patrol Side Art

Moon Patrol Side-art

As the Moon Patrol cabinet gets ready for refurbishing I am also planning on touching-up the side-art, which is actually in pretty good shape. I’ll just need to get samples of the yellow, black, light blue, and dark blue paint off the cabinet to take it to the local paint store Friscano Colori which does an awesome job of matching colors. I’m pretty happy the cabinet is in better shape than I thought because it was a pretty good deal. The last piece will be considering replacing the top section of the back door, like I did with Robotron 2084

Paint Robotron 2084 Back Door

Robotron Back Door Painted Black

Robotron back door being painted

I finally got around to painting the back door of the Robotron 2084 cabinet Alberto made for me several months ago. The original was already broken, and given this cabinet is quite close to mint, I figured replacing the thrashed back door would get me closer. I think the only thing left on this cabinet is to see why the coin door advance switches are not working. I think there is a wiring issue, but given all setting s are acceptable I’ve been a bit lazy on looking into that one, maybe I’ll tackle that when I fix the Defender coin door switch as well.

Robotron back door installed

Looking good, Robotron!

Installing Locks

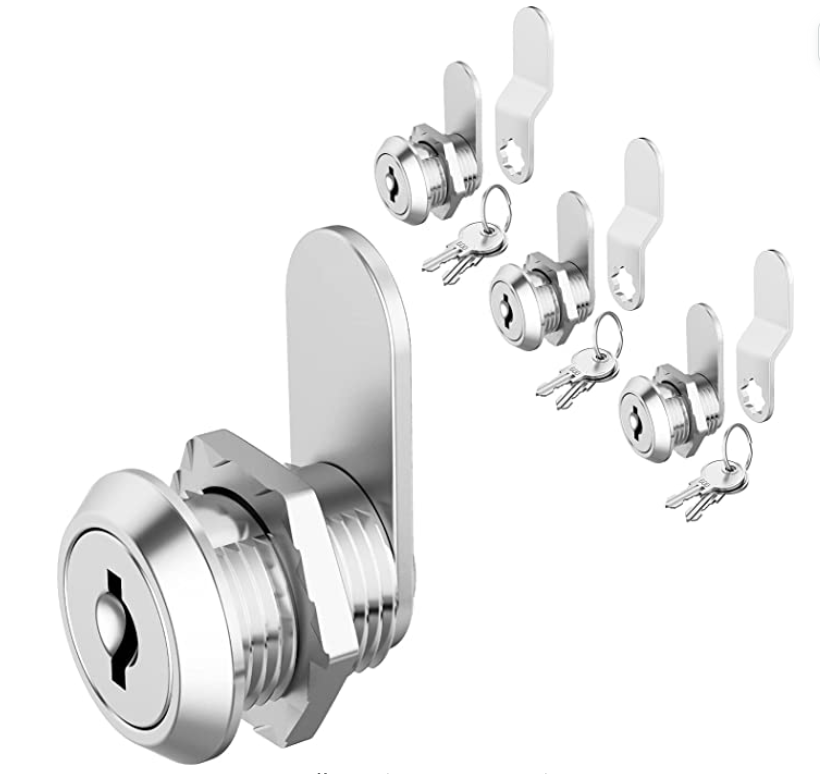
I was having issues with the Pleiades Cocktail powering up (which turned out to just be a loose power cord) and the only way to access the cabinet was to drill the lock which I had no keys for. This was my first time drilling a lock, and it’s a bit of a pain. After getting the game open and realizing it was a quick fix, I then turned to the lock mechanism and started counting how many I would need across all my games to get that done. I have installed 16 locks so far, and I have another 6 coming tomorrow—which should almost cover it. I experimented with 2 different kinds of locks (regular and cylinder), and while both work well, I found the regular smaller keys to be a bit easier to install and use. Your mileage will vary given how many options there are out there, but I used a 5/8″ (or 16mm) lock body that had an articulated lock plate as well as a straight plate on so that I could make the fit more snug as needed.

Normal key with articulated lock plate for snug fit

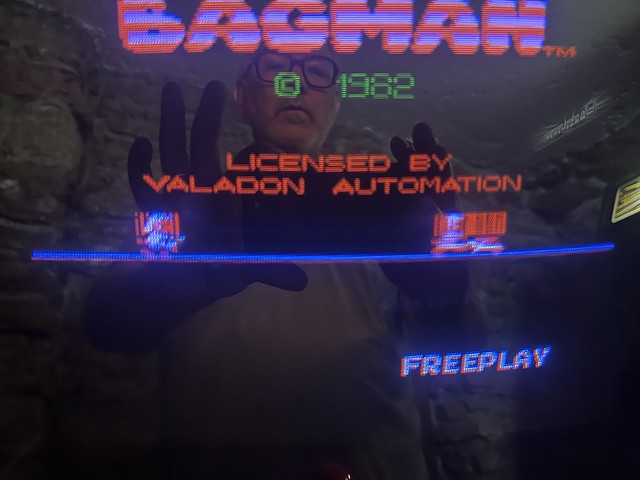
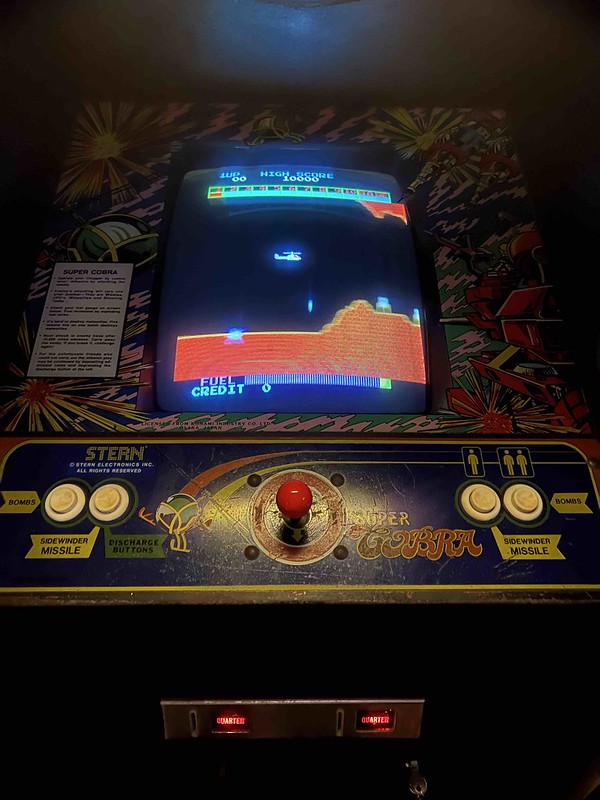
Anyway, I installed 2 cylinder locks each on Pleiades, Dig Dug, and Joust, the other 4 cylinder locks are installed on the front doors of Pac-man, Galaxian, Make Trax and the backdoor of Cheyenne. The six normal keys are installed on the front-door of Bagman, Super Cobra, Defender, Pole Position, and Robotron (2x). I know this is a bit of TMI for a post, but this is pretty much the only reference I have for the future given my memory is shot.

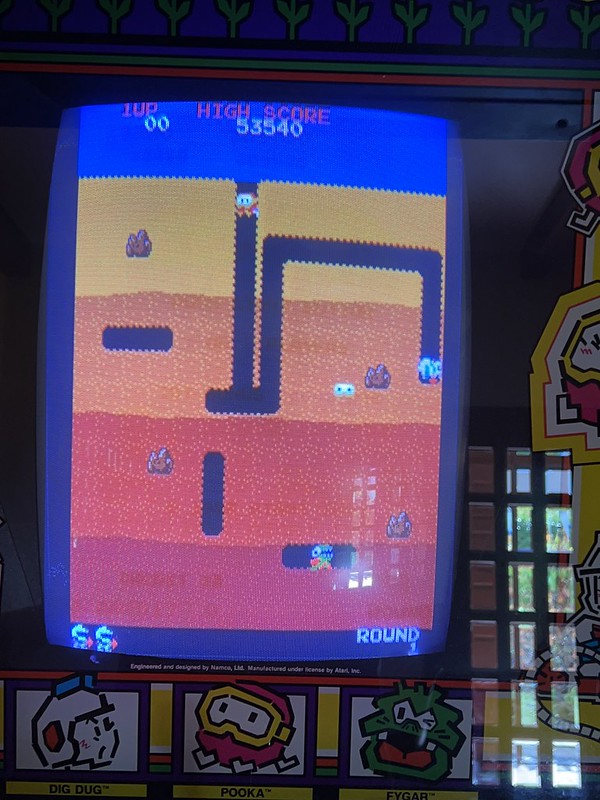
Test G07 Chassis for Bagman on Dig Dug

Bavacade

G07 Chassis in Bagman that I did my first successful capkit on

This is on the yet-to-be-completed part of this list, but there is some backstory here worth jotting down. I did a capkit for a G07 chassis that ended up having some issues with syncing as well as a not very crisp green. I resolved the syncing issues by doing a second capkit, but the color issue remained.* So, I wanted to test this chassis (currently in Bagman) in Dig Dug to see if it a) resolves the intermittent shakiness of Dig Dug and b) still has washed out green color issues. The swap will also allow me to get the G07 out of Dig Dug so I can replace the rest of the alignment pots for that chassis, which I think will fix the intermittent jitters that monitor sometimes has. Although, truth be told, that issue is occurring far less often after I re-soldered all the pots and replaced one of the vertical/horizontal adjustment pots. So replacing the other 3 would probably fix that once and for all.

Anyway, that is just part one of my bavacade to-do list I am working through. I have much more to share, but this post is already too long and I still have much work to do as is all too apparent from this post. So, back to work and keep an eye out for part 2 if you are one of maybe 2 people interested in this level of detail around maintaining 1980s arcade cabinets.

_________________________________________

*I did the original capkit on an extra G07 chassis (originally from Robotron) that I planned on swapping out with the Condor chassis while I gave that a capkit to fix the shakiness at the bottom of the image. My first capkit was a bust (bad sync) so I re-did it and the second time worked much better. In the interim I moved the G07 chassis from Robotron into Condor, the G07 from Bagman into Robotron, and finally my re-capped extra board into Bagman. The now third capkit I tried on the original Condor G07 was not working at all, so I have to re-do that one too. It’s a learning process for sure.

Posted in bavacade, bavarcade, video games | Tagged , , , , , , , , | 2 Comments

Chatting DoOO, Open Source, and More with Ed Beck

Early last week Ed Beck asked if I would be willing to talk with him (and by extension his class) about some advantages (and limits) of open source applications in education. I think Ed has been following my recent championing of PeerTube, as a result I figured format and function is the best argument so I both streamed and recorded this session using PeerTube vis-à-vis a self-hosted instance of Jitsi Meet—talk about the power of open source. Reclaim Media!

One of the reasons I enjoyed this conversation was it is an articulation of some of the thinking we have been doing at Reclaim Hosting about how certain open source applications like PeerTube (video management and streaming), Azuracast (web radio), and Jitsi Meet (video conferencing), to name just a few, might be understood as a package of open source tools that can be hosted quickly and easily on Reclaim Cloud.

In fact, this was part of the conversation in today’s Reclaim EdTech meeting wherein we were thinking through how something like this could help a student media organization that is trying to support students run their college radio station or even a TV/video streaming service. In fact, Grant Potter’s work as an edtech back in 2010/2011 at UNBC helping students run a web radio station resulted in the mighty ds106radio!

And in this rich edtech tradition, it was cool to hear how Taylor Jadin worked with his campus radio station at St. Norbert College to get them up and running on Azuracast at a fraction of their current hosting costs, not to mention better software. What if Reclaim could reach out and support student media outfits on campus by pointing them to these tools and providing both hosting and support? Reclaim Student Media!

Anyway, it was a fun conversation with Ed, and by proxy his class, that led to more exciting conversations at Reclaim. I appreciate the invite to chat because reflecting on these open source explorations at Reclaim inspires me to keep imagining the possible because I think there is some real value in thinking through a suite of next generation open source tools for the field of education, and it continues to be a very valuable way to spend our time.

Posted in open source, PeerTube, reclaim, Reclaim Cloud | Tagged , , , | 2 Comments

Re-visiting How we Work at Reclaim

Lauren Hanks has been working on a really cool space that will highlight the various channels through which we are building community at Reclaim Hosting. It’s still under construction, but I’m sure Lauren will share the magic, as well as the process, on her blog at some point soon given it’s coming along beautifully.  While she was going through some old Reclaim posts/announcements she came across this post I wrote in July of 2015. For some reason 2015 still seems like yesterday, but it is 7 years ago now. Crazy.

Thinking about how we work at Reclaim

For context Reclaim had 3 employees when this was written: Tim, myself, and a freshly hired Lauren. I had just given my notice at UMW and was transitioning out of that role and jumping off the cliff of the self-employed. Antonella and I were also preparing to move the family to Italy for what we thought would be “just a year.” It was a moment of transition for sure.

Screenshot of Gusto's admin panel

Gusto’s admin panel

One of the interesting things about that post from 2015 is the discussion of the tools we were using at the time. For example, we were investigating the payroll tool ZenPayroll, which would soon after be re-branded to Gusto. We did decide to use Gusto rather than the more established ADP and it was one of the best decisions we made as a young, distributed, and growing company. It’s like a payroll department that pays everyone, tracks vacation/sick time, files quarterly paperwork, and now even enables stuff like employee reviews, extensive benefits packaging, and much more. I’m not exaggerating the case when I say that Gusto makes much of what we do in the realm of human resources possible for less than $200 per month, it’s truly revolutionary software for a small business like ours.

Screenshot of Reclaim's Slack

Reclaim’s Slack

We were just starting to use Slack in earnest in 2015, which meant finally getting our daily management of Reclaim out of Twitter DMs 🙂  We had just signed our 10th Domains school and we needed to get organizized.

Slack has been the central pillar of growing and managing Reclaim, but at a certain point it starts gets too big for managing projects and runs into issues of easily finding stuff. We have continued to tweak and prune, but it remains home base for us to check-in and out, provide internal help on tickets, and shoot the breeze by the water cooler. The best thing we did on the Slack front over the last year or so was to stop pulling in all support tickets. Too many ticket notifications increasingly made Slack a space of dread, especially early on when we were much smaller. Changing it so that only escalated tickets show up in Slack shifted the tenor of the space significantly. Not only did it cut down on notification fatigue, but it made sure every one of them wasn’t a potential problem. And while we still use Slack channels to monitor our servers for downtime and malware, it’s far less mental overhead on the regular which helps balance Slack as both a space for monitoring as well as a space to congregate, get help, and share as a team. That rather small tweak has made a gigantic difference. Another thing to mention here is that Slack huddles are absolutely solid gold for collaborating internally—Meredith Fierro uses them like a boss.

Screenshot of My Zendesk Admin interface

My Zendesk Tickets

The only tool listed in that post 7 years ago that we no longer use is Intercom.io, and there’s no looking back on that one. Chat-based tools for hosting support is a recipe for disaster. Nothing worse than Tweet-length responses with next to no detail to make the investigation process that much more laborious, not to mention the expectation that support is always immediate. Our time using Intercom ended in 2016 after signs that Tim was going into a chat-induced coma 🙂 We looked at a few tools and decided on Zendesk for support tickets which are all done via email. That’s been a really good choice. While Zendesk is not cheap, it’s money well spent given support remains our bread and butter and we can add additional tools like Zendesk Sell pretty seamlessly for managing customer relationships, which has become crucial to our growth at Reclaim. When you have 200+ large accounts you need to start tracking all the various details to make sure folks aren’t lost in the crowd. in fact, Zendesk Sell ranks amongst the software we added after 2015 that has become indispensable.*

Image of Asana admin area

Asana work requests and more

Asana, one of the applications discussed back in 2015, plays a much bigger role at Reclaim than I would’ve ever predicted seven years ago. I joked at the time it was the “anti-Slack” because it’s more focused on lists and tasks than a stream of notifications and updates, and Lauren really has made this application work to help us both organize and streamline projects, work requests, and more. In fact, she’s written a brilliant blog post about Asana workflows that is an in-depth look at how we use Asana to great effect. In short, it helps us manage long-term projects, work request for infrastructure, edtech workshops, and much more.

Reclaim in Whereby circa Winter 2021

Thinking about other tools that have become crucial since 2015 and asking other folks at Reclaim means the list quickly became unruly. I’ll start with our OG video conferencing tool Whereby.com (it used to be appear.in) that we’ve stuck with despite the seemingly unavoidable need to use Zoom by the rest of the known world. We have since been split between Whereby and Jitsi Meet (a nice open source alternative Taylor has been championing to great effect) and I can see us going Jitsi Meet entirely at some point, but Whereby is so cheap and has been so solid it has been hard to leave them entirely, even as a backup they would be well worth the $18 per month.

Early testing with Jitsi Meet on Reclaim Cloud two years ago

It’s almost invisible at this point, but there is no way we could even run Reclaim without Google Workspace. Google Docs are always useful, but running Gmail to manage employee email has been essential. Thankfully Tim knew when we started that self-hosted email, even for a hosting company, was a non-starter given the blacklist problem that only recognizes power and money. So it’s Google all the way cause email is still the killer app, and this is something we are trying to communicate to Reclaim Hosting customers given it is increasingly more difficult to manage your own email without risking being blacklisted and effectively cut off from communicating via email.

Speaking of which, two other email apps have become crucial for our workflow when it come to outreach and announcements, namely the transactional, API-driven email service Mailgun and the campaign-driven email service Mailchimp. Mailgun delivers our Reclaim Roundup  newsletter as well as our emails for new client welcome emails, etc. in our client portal WHMCS. It delivers thousands of emails for us a month with few failures at a very affordable price point.

Mailchimp is a campaign-based email tool that allows us to do targeted outreach with admins quite well, but it can get expensive to use for thousands of clients, so there are some limits—but its various integrations, templates, and ease-of-use does make it a valuable tool in the Reclaim shed.

Image of 1Password IconAnother tool that is similar to Google Workspace in that we could not really function without it is 1Password. I am not sure why I didn’t mention it back in 2015, because I’m sure we used it. This tool is absolutely ground zero for managing hundreds of logins that need to have unique and secure passwords shared across a group with various levels of access for different apps. I often joked if I was doing edtech in a university I would be proselytizing this tool as ground zero for web literacy, namely organizing your web credentials securely.

Another tool that has become indispensable for how we work is Cloudflare. In particular  Cloudflare’s Zero Trust Network Access has been crucial to help us secure our server fleet by locking down SSH. Chris Blankenship wrote about his work locking down SSH access to our servers, and I am sure we will be doing much more of this in the coming year or two. I have also been using Cloudflare’s load balancing for testing fail-over in Reclaim Cloud, and more and more using Cloudflare’s DNS service to manage various domains that point to public IPs on Reclaim Cloud. Cloudflare is a whole world that I think will play an increasingly larger role seven years from now.

This post started small enough, but has quickly become an unordered list of tools we use at Reclaim, and I’m not even going to dive into our core infrastructure running through WordPress/WHMCS/WHM for most of our cPanel-driven shared and Domain of One’s Own servers. And then there’s Virtuozzo  (previously Jelastic, but re-branded after the acquisition) which we now use to run Reclaim Cloud.†

Image of Reclaim Roundup icon

Reclaim’s Roundup newsletter running on Ghost

The last set of tools that have become increasingly crucial to our daily work deal predominantly with our evolving community engagement. I have already mentioned Reclaim Roundup when talking about Mailgun, and while only in existence for 9 months, I feel like this newsletter driven by Ghost has become foundational for our broader outreach, all hail Pilot Irwin! In fact, our use of Ghost inspired Taylor Jadin to build a pretty awesome installer for the tool for Reclaim Cloud.

Image of the OERxDomains21 Schedule

MBS’s TV Guide-inspired design for theOERxDomains21 Schedule

On top of that we have worked with Tom Woodward and Michael Branson Smith (MBS) to design a conference platform for OERxDomains21 that integrates Streamyard, Youtube and Discord using a WordPress headless site as well as some custom code from MBS to build the foundations of what is now our interactive space for Reclaim’s Edtech group that has been running workshops, monthly events, and more. This integration works by using Streamyard as the web-based production space and pushing it out to stream live via Youtube, and the live chat conversation can be integrated and managed through Discord. It’s a pretty slick integration, but another tool we have been experimenting with a lot and I hope becomes foundational is the open source Youtube alternative Peertube.

Image of Peertube homepage

Reclaim control of your videos with Peertube’s

We still manage our forums using Discourse, but no longer manage the support docs and all elements of our community through that channel. In fact, we’ve been intentional about becoming more faceted about the various channels we use to provide support, community engagement, and general announcements across at Reclaim, but you’ll have to wait for Lauren’s post about the new Reclaim Community site I alluded to at the beginning of this post.

If nothing else, I learned a couple of things through writing this long, wandering post: 1) integrating various technologies is crucial to make Reclaim Hosting work, and it reinforces why showing students how the web actually works through linking and integrating is an essential literacy in the 21st century; 2) how dependent we are on various softwares and how that reinforces the value of open source as the pricing for many of the proprietary applications continues to go through the roof—making open source alternatives not only interesting but almost essential.


*It’s also worth mentioning we moved all our Support documentation from Discourse to Zendesk’s Guides over a year ago as well, and that has helped our ticket system and support documents integrate cleanly.

†There’s also Digital Ocean and OVH for our data centers, and Bitninja to defend our servers from malware attacks, which has been crucial.

Posted in open source, reclaim | Tagged , , | 2 Comments

And then there were 29…

container

The container came in….

container2

Everything arrived safe and sound, but I have spent much of the last week unpacking, playing with retro game consoles, and doing repairs like I still run an arcade 🙂

elevator_action_blue

Elevator Action‘s working fine but the red color in the monitor is out, which gave everything a strong blue tint. I tried changing the chassis (a K4900 5-pot) with Moon Patrol‘s (K4900 4-pot), but red was still missing. Tried extra PCB game board I have and same issue with missing red so thinking this is an issue with the red video signal somewhere on the line or at an edge connector, turns out I was right. There was no continuity on the red video signal on the filter board. After re-soldering that connection and red cam back!  I also got my Wells Gardner Pattern Generator working with this monitor, and that is cool.

elevator action filter board

elevator_action_red_signal

Moon Patrol was working fine in US, but the board is now throwing garbage. I tested the  monitor chassis from Elevator Action and it works fine. Also tested all voltages from power supply to game board and all good there, although the coin door voltages are off—but that should not effect the game board or game play. Tried changing main CPU on board (Z80) but still same issue. Pretty sure this is a board issue and might have to post to KLOV for a second opinion or send it out.

Joust was randomly resetting with installed FPGA board to white screen, similar to Stargate issues I had in the Spring. Reverted to original board and that worked, no resetting during game play, but there is an issue with settings not being saved every time it is turned off, got a “High Score Table Reset Bookkeeping Totals Cleared”  error.

Joust_hi_score_reset

I found this forum post on KLOV that pointed me in the right direction. Essentially there were no batteries to save hi-score installed, but I thought I had installed a new chip for this, but evidently not. I soldered on a 3.6v lithium battery, which should last a few years.

joust_battery2

And then I hit the reset switch on the board, and it started to work.

joust_board_reset

Next up, put the FPGA board from Joust that was having issues in Defender which fixed the graphic issues at the top of that board. The original boards for Defender do work, but with the FPGA board there are no lines at the top of the screen, plus it doesn’t work with Joust at the moment anyway 🙂 One issue is the High Score Reset button inside the coin door doesn’t work so I can’t change number of ships, free play, etc. will need to look into how to change that Williams switch on Defender.

Slight jitter of image on Dig Dug monitor. It’s G07, which I am familiar with now, so re-soldered the vertical/horizontal adjustment pots (and actually swapped one out) and it is better after testing it for a while. There is still some very rare shifting of the screen, so may swap out all four adjustment pots for this chassis if it continues.

I still have to look at the Pleaides cocktail, which won’t turn on. Probably gonna have to screw through the lock to get it open and investigate given I am pretty sure something came loose during the move. The other cocktail, Rally X, is working but the sound is muffled, so will be opening that up tomorrow. I also have to try the new board for Cheyenne out to see if that fixes my issue with that board, and then I should have everything but Moon Patrol and Venture working. I know the problem with Moon Patrol is board related, and venture is most likely power supply, and I am pretty excited cause I think I can get that one running.

joust_power_brick

Arrow pointing to burnt EMI line filter, I think

The other thing that happened this week while working on Joust is I mistakenly plugged the game into a European 220V socket versus the 110V US plug and it blew the power brick in Joust. This is in part linked to the terrible design of the transformers I bought to step-down the voltage from 220V to 110V, and part my stupidity. Live and learn. I used the transformer in Stargate to make sure nothing was ruined in terms of the boards, monitor, etc. and all was good, so I am using the power brick from Stargate in Joust temporarily. While dismantling Moon Patrol yesterday, which I will be minting out entirely, I realized it seems to have the same power brick and connectors.

Williams Transformers Side-by-Side

As you can see from the side-by-side image of the two power bricks above, they are seemingly identical, but the Moon Patrol power brick on the right seems to have been soaked in mud at some point over the last 40 years. It is literally caked on. I will be cleaning it up and then testing the voltages to see if I can use it in Stargate until I finish Moon Patrol and hopefully figure out how to rebuild the Joust power brick I blew.

Anyway, this is a very drawn out post simply to say the games have arrived and I am loving it!

Posted in bavacade, bavarcade | Tagged , , , , , , , | 1 Comment

Copying Files between Environments in Reclaim Cloud

I’ll be submitting this guide to Reclaim Hosting’s support documentation to illustrate how to move files between environments using the Reclaim Cloud GUI. I discovered this trick while migrating a Ghost instance in Reclaim Cloud from one environment to another as discussed in this post.

I am borrowing liberally from elastx’s documentation of this process given they do an excellent job of breaking it down. Moving files between environments uses the somewhat confusing terminology Export, and you can find this option if you click on the configuration wrench of the node within the environment you want to move. Below is a video tutorial documenting the process followed by step-by-step directions.

Export directory

  1. Find the configuration wrench on the Application Servers source node.
Images of Config of Node from which files will be exported

Config of Node from which files will be exported

  1. Go to the folder you want to Export files from. In this case /var/lib/ghost/content/. Click the cogwheel of the content folder as shown on the image below and choose Export
Image of Export option in Reclaim Cloud

Export Directory Contents

  1. Make sure to choose the correct target container where your target Application Server is at.

Select proper target environment in Reclaim Cloud to export content

  1. Here we use the path /var/lib/ghost/content-source which will create and mount this folder on the source environments Application Server.

Copy files

  1. Click the configuration wrench on the target environment’s Application Server.

Config wrench

  • To the left, click the cogwheel and click Copy Path, which will copy the full path location to your clipboard.

  1. Click on the terminal icon to engage the Web SSH terminal

  1. In the terminal you should write cd then paste previously copied path /var/lib/ghost/content-source and then enter. After that you should see the folder content-source executing ls -l as shown on the image below.

  1. Now you should be able to copy files anywhere within the new environment node. Using the --verbose flags gives you this output.

Use the cp –verbose to copy files between source and destination folders

  1. You can confirm that the files been copied by browsing to that folder in the GUI.

Zip files copied cleanly between folders

Clean up

  1. Unmount the exported directory on the target application server as shown below.

Unmount networked directory from target environment

Posted in Reclaim Cloud | Tagged , , , , | Leave a comment

Learning from Reclaim Cloud’s Ghost Installer

As I already mentioned in my last post, I spent some time this week moving my bavaGhost install over to a new environment in Reclaim Cloud to take advantage of Taylor Jadin’s snazzy new Ghost one-click installer. Taylor and I did a fullblown stream talking about his groovy installer if you are interested in the deep-dive:

Soon after this discussion I decided to port my Ghost install to an environment using Taylor’s installer given it makes updating versions, setting up Mailgun, and mapping a domain with Let’s Encrypt dead simple. It’s the closest thing we have to a complete solution on Reclaim Cloud for running an application without feeling you need to dig into SSH and server administration.


The tale of the tape for my explorations with Ghost over the last 6 months are pretty well documented on this blog, but for quick context I was running Ghost using the Community Docker Image straight from Jelastic (no Docker Engine) with a Nginx load balancer to manage the domain mapping and SSL certificate. I did move a similar Ghost instance for Reclaim Roundup from this setup to run within Docker Engine given a bug with the SQLite database that prevented us from sending over 500 emails.

So this was my first go at playing with Taylor’s Ghost installer. The migration of posts and settings was simple. After using the Ghost installer to create a fresh instance, Ghost’s native export/import tools moved the 19 posts and various settings from one environment to the other beautifully. The only hitch was I needed to copy over about 40 MB of featured images and headers from one instance to the other.  It’s at this point where I started running into issues while at the same time feeling my understanding of Docker containers in Reclaim Cloud painfully expanding. So, I’m going to take a bit to document at least two ways at the ostensibly simple task of moving a directory with 40 MBs worth of images.

[On a separate but related note, Taylor and I have been struggling with the problem of moving data between containers in Reclaim Cloud during a series of streams this week. Turns out rsyncing files between different environments in different data centers or with different environmental settings (permissions, firewall, etc.) can result in some serious frustration. The project we’re working on, porting ds106.tv from an Ubuntu VPS to a Docker instance of Peertube, highlighted some of these issues, many of which Taylor has been working through and documenting in order for us to streamline things. It’s been fun streaming it for sure, but I do feel bad for subjecting Taylor to so much PostgreSQL 🙂 ]

The above is separate but related because it highlights my concern when trying to move 40 MB of files from one container to another within Reclaim Cloud. In fact, it should be easy, right? Just zip up the folder and download it via command line, right? Well, yes and no. Yes if you knew that the custom Ghost container was running Alpine Linux and to install zip on that container you needed to run the following command: apk add zip That would work, and the folder would be zipped up and available in the /var/lib/ghost/ path which you could access and download via the Config area for that container:


After that you would upload the images.zip file to the new Ghost instance, which for Taylor’s installer is located at /root/ghost/ghostdata/. You would also need to make sure zip is installed on the new server, and unzip the images directory after uploading and move the contents into the existing images folder. And while not terribly onerous, it is anything but seamless.*

While futzing with zipping directories to move all of 40 MB of files I found an option in the Config option for Reclaim Cloud node to export a directory from one container to another:

When I clicked on this option it seems to allow a link from this container to any directory of any other other container I own. This effectively solves the issue of moving content between containers in Reclaim Cloud!


Yeah! The images directory was copied to the new container as images-move.


After that, I could easily move the contents of the exported directory images-move into the images directory on the new container. This saved me from rsyncing, zipping, FTP, or any other round about means I would try to get a simple 40 MB file over to the new container. What’s more, it opens up a whole new way to moving data between containers in Reclaim Cloud that could save us a whole lot of headaches.

________________________________________________

*I also tried rsyncing to my local desktop and then rsyncing back up to the new container, but I was getting a bit turned around so I abandoned that.

Posted in Ghost, reclaim, Reclaim Cloud | Tagged , , | 1 Comment

Ghosting WordPress

Image of cow grazing in Val di Rabbi

Picturesque Cow in Val di Rabbi

It’s been quiet on the bava for a bit after an awesome mountain getaway to Val di Rabbi in early August, followed by some digging-in on work and entertaining guests over the last week or so. What’s more, the blog silence will continue starting next week through the end of August given we’re heading to Sicilia for a proper beach vacation!

Bugs Bunny on vacation

Vacation!

Things have been intense this month, we’ve had good friends from the States visiting; Miles prepping for his semester abroad in Berlin (he leaves tomorrow!); as well as Reclaim Hosting starting to ramp up for Fall. In between life I have continued exploring Ghost, in particular Taylor Jadin‘s impressive work to make a seamless Ghost installer for Reclaim Cloud that does everything from updating versions to making Mailgun integration simple to automatically mapping a domain and issuing an SSL certificate. It’s some truly amazing work, and if you’re interested in learning more we did a stream about it last week that provides some insight into his process. And if you want to run Ghost on Reclaim Cloud, Taylor documented that brilliantly as well here.

This coincided with another stream last week wherein we had Anne McCarthy from Automattic joined us for our August Community Chat to talk about Full Site Editing in WordPress:

It was pretty cool to have Anne join us given her own experience with WordPress started at at the University of North Carolina, Chapel Hill supporting WordPress on campus. There is definitely a strong tradition of WordPress in higher ed that this blog was grounded in for years, so seeing folks move into the ranks of Automattic is exciting! Anne demonstrated the features of WordPress’s new Full Site Editing features adeptly, and there was quite a turn-out of interested folks. One of the things that struck me during the session was that I’m old in WordPress years.

I’m still using the classic editor with the TwentyTen theme, and I admit to a certain amount of resistance to Gutenberg and now the Full Site Editor. Granted part of that is stubbornness and intolerance,  but there is another part of me that strongly believes the reason for broad adoption of WordPress in higher ed had everything to do with a simple core that leveraged an active open source plugin and theme community. That simplicity made it possible to get an entire class and faculty up and running with a site on WordPress Multisite in minutes, spending a bit of time highlighting the simple WYSIWYG editor (links, images, embedding content), mentioning tags and categories, and then it was off to the races. I have to believe that’s why WordPress blew up not only in higher ed, but across the web more generally. Over the last 15 years it has become an immense ecosystem, and over the last 5-6 years the introduction of Gutenberg, block editing, and now Full Site Editing has certainly reflected the intention to compete with Squarespace, WIX, and other web builders. That said, in the transition things have gotten far more complex. I mean WordPress was never particularly good at on-ramping new users—hence the birth of the SPLOTs to avoid the dreaded empty page—but with the advent of Full Site Editing the vertiginous experience of entering the bifurcated editing world of WordPress is that much more labyrinthine. I really don’t think I would subject Full Site Editing to a group of non-developers who just wanted to post something online, and I’m not alone in this. Lauren Hanks just wrote a post documenting her first impressions with Full Site Editor as a person who has years of experience both using and designing for WordPress, and the experience is mixed at best, even for an expert user.

So after the Reclaim Community Chat on Full Site Editing and a deeper sense that I just wanted a simple publishing experience for my blog I started to seriously consider what it would mean to migrate all my content in bavatuesdays to Ghost. I think I could move the almost 3700 posts pretty cleanly, it’s the 16,000 comments I was concerned about. What’s more, one of the real issues with Ghost is that there is was no native commenting feature, it all depended on third-party tools like Disqus that I wanted no part of. So, I was mulling all of this for the last week or so when Ghost announced they are now supporting native comments as part of their membership feature, in addition to integrated search, which means two huge barriers to moving bavatuesdays to Ghost have now been removed. I have a feeling migrating to Ghost may be a bit painful, and there is a part of me that is WordPress 4life given I built my career on it for roughly 17 years. That said, after running the Reclaim Roundup in Ghost for the last six months I have to acknowledge the publishing experience is far superior. All the overhead around design and plugins and themes are removed and the blog can just be a blog again. Saying this, I fully acknowledge my endless posts and presentations about WordPress being more than a blog early on—funny how things work.

Yesterday I spent some time migrating and updating the Ghost instance I have been hosting since 2014 using Taylor’s installer, which enabled me to seamlessly update to the latest version. So bavaGhost now has both integrated search and comments. At this point I think I’m going to take the plunge and migrate all my content on bavatuesdays to Ghost to see how that works and if it is viable to make the switch after 17+ years of blogging with WordPress. I imagine it will take quite some time given I plan on combing through all my posts since 2005 and cleaning-up broken links, bad images, broken embeds, etc. before even attempting the move, so at minimum it will be several months before I’m ready, but at the same time it is a project I’m excited about. Even if I ultimately stay with WordPress, exploring what’s out there and learning through tinkering is what makes me happy with the work I do, so why stop now?

Posted in Ghost, Reclaim Cloud, WordPress | Tagged , , , | 9 Comments